

Alexander Grabovetskiy, woodcarver, School of Woodcarving · Published 2021
How do you mark the concave and convex parts of an acanthus leaf?
Quick answer: Marking an acanthus leaf is done in two marker colors on the roughed wood, before the gouge goes back in. Orange, the sunshine color, goes on every high spot, and those spots are always convex. Blue means down. Every blue line between two orange ones becomes a concave cut.
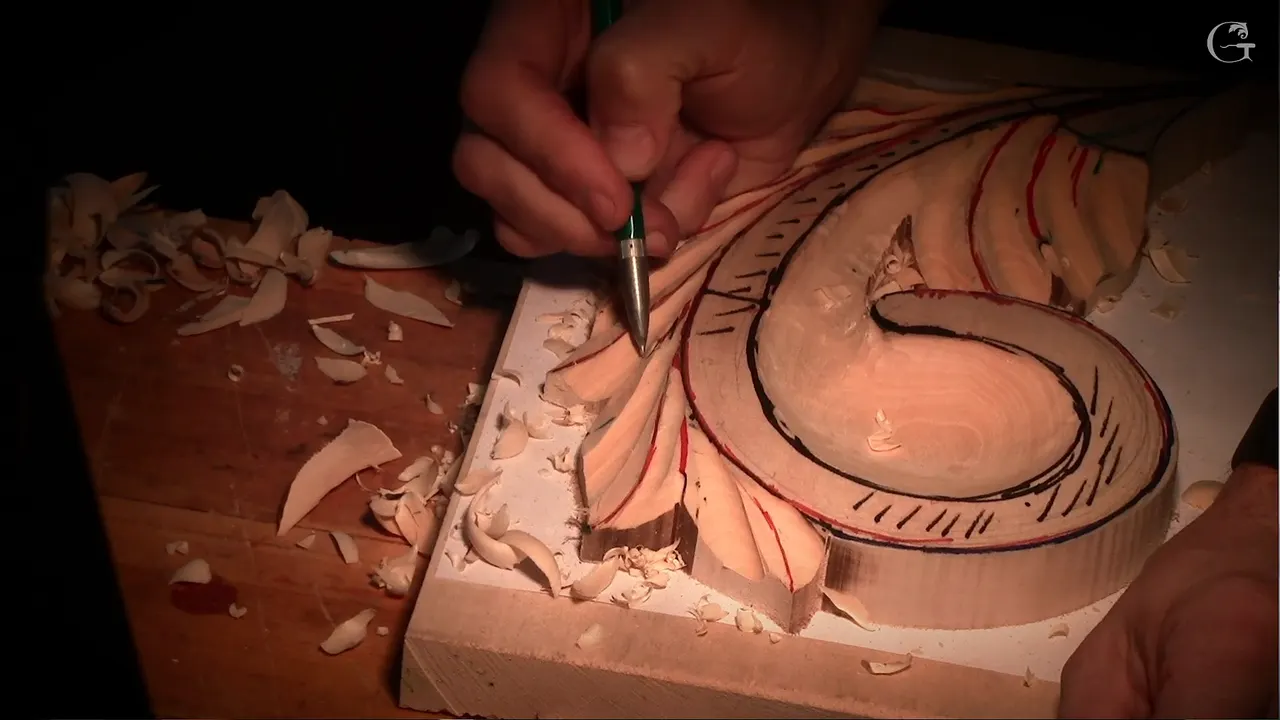
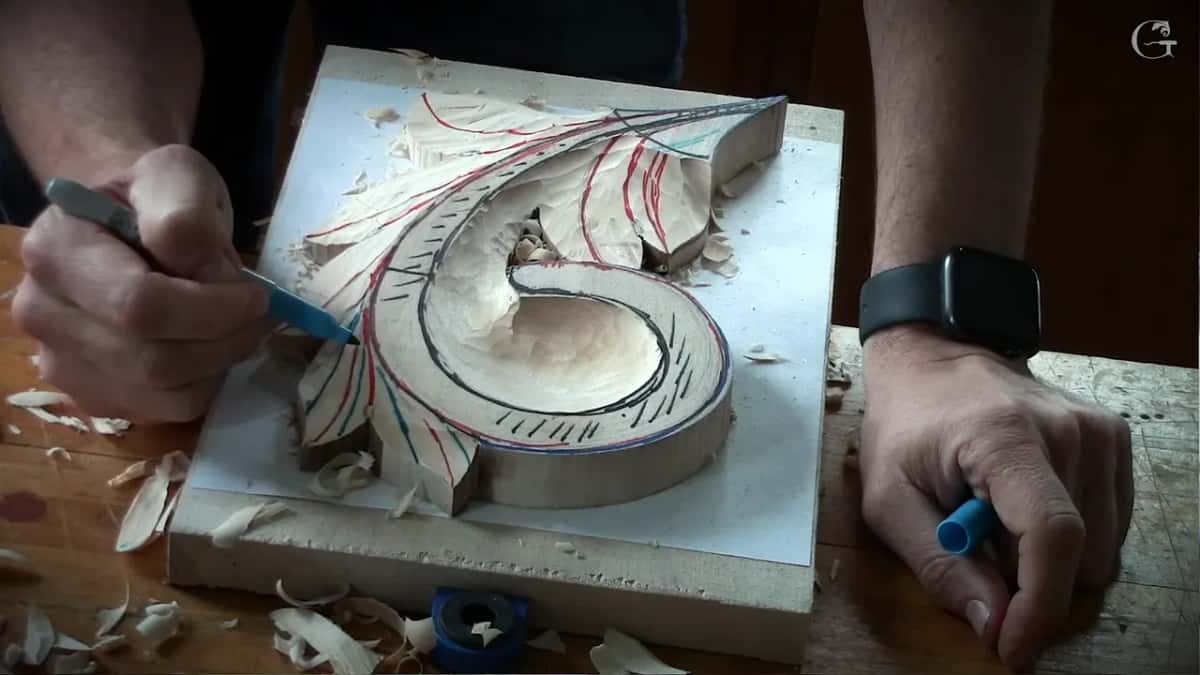
Acanthus leaf carving at this point is marking first and digging second. My Byzantine leaf had come through the first roughing stage. So before the gouge went back in, I put the main concave and convex movements onto the wood in color, orange on every high spot, with blue wherever the wood goes down.
Can you hold a marker? And tell up from down? Then you can map this leaf the way I do, and by the end of this page you will know where each orange line and each blue line goes on it.
Marking rules for this leaf
- Two colors carry the plan, orange for the high spots and blue for the hollows between them.
- Every orange line is a high spot, always convex.
- All the lines of the leaf run to a center line in the middle, with no T-stops.
- An eye goes where a pair of leaves come together, drawn like a water drop.
- Concave cuts go straight and nearly parallel.
- A number 9 gouge carves the blue, light at first and deeper toward the edge.
What comes after the first roughing stage?
Stage two. We got to that step, and I am really happy with the results. We had done stage number one, and now came stage number two, the one where this layer starts to look almost finished. We start on the second layer really soon after it, in the later lessons of this course. At the start I checked that everyone could see the screen. For me it was okay, because I've got lights all over.
In England that first stage is called bosting. I said so in lesson 2. For the marking I use, again, just multi-color Sharpies, the permanent markers.
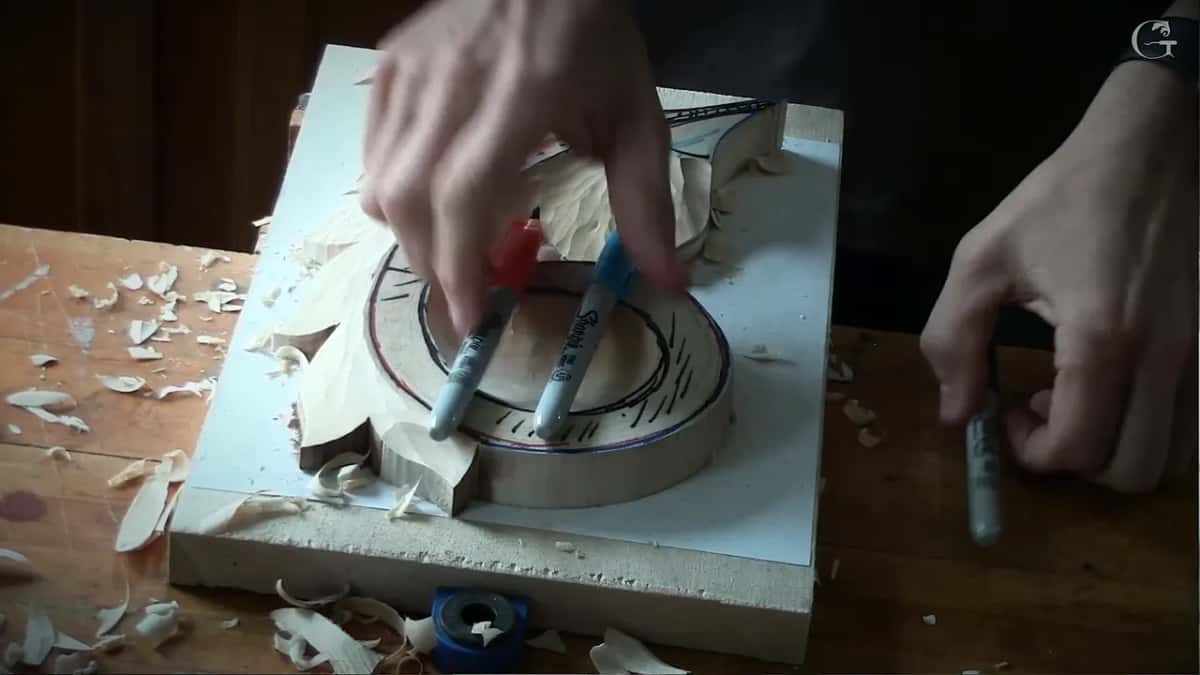
What do orange and blue mean on an acanthus leaf?
Blue means down. Orange is the sunshine color, so orange means up. I use the same idea in other courses too.
In lesson 9 of the floral and molding course I used red and blue instead, just so you could understand the concept, with red as sunshine for the convex and blue like the ocean for the concave.
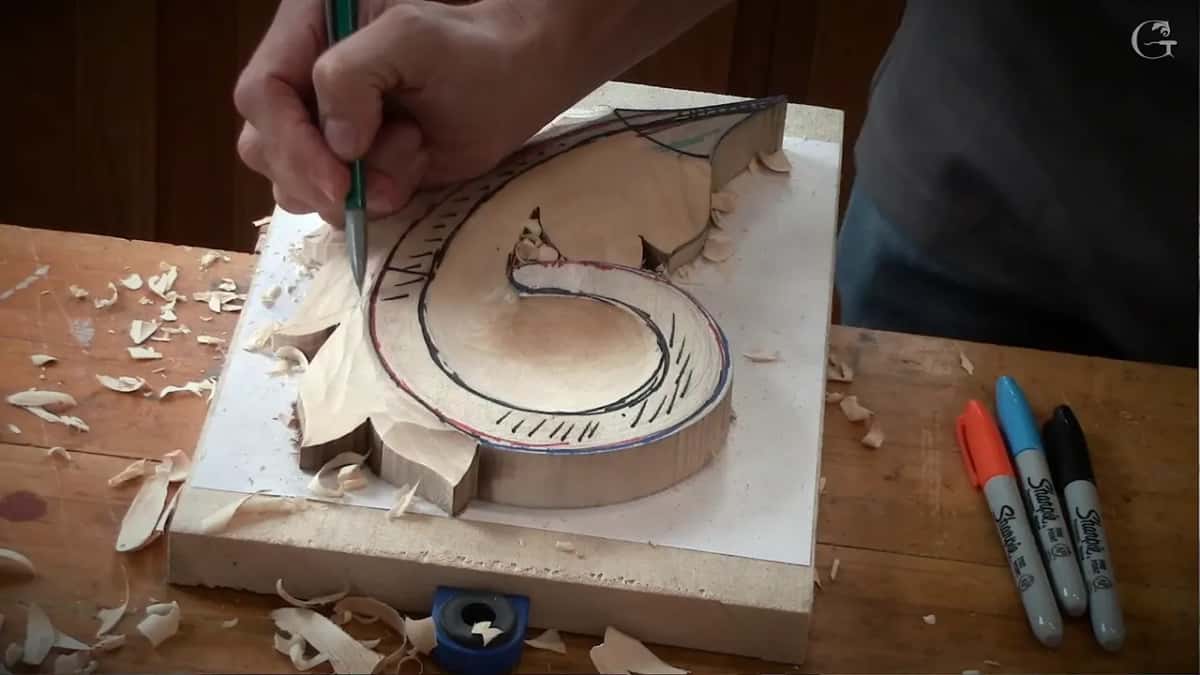
So do not let the names mix you up. On this leaf I say red marks or orange marks for the same high lines. And I said it again in lesson 8, that the red, or orange, is a convex, sunshine, and the blue is ocean.
Where do the orange lines go?
To a single center line. The day before, I said everything is supposed to be connected, and this is what I meant. Somewhere right in the middle there is an invisible center line, and the points of those leaves are supposed to connect to it, just a continuation.
And no T-stops. A T-stop is a line that comes in and makes the letter T against another one, and it is no bueno, because in wood carving you really have to be flowing. I go deeper into T-stops in lesson 6 of my furniture panel design course.
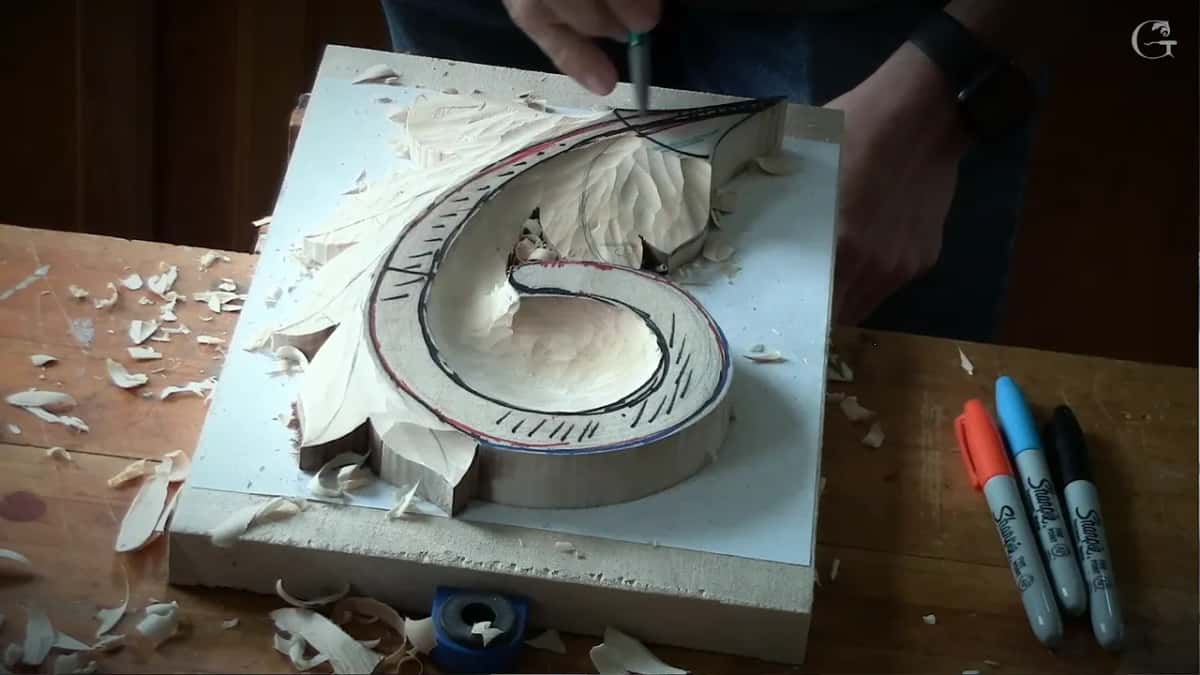
Then the 40-60 rule, 40% on one side and 60% on the other, with everything still going to the center line. For the inner part of those two leaves I flip it, so my 60 becomes this part and the 40 goes to that side, and then I place the middle line. It still flows in the same direction.
On one part the line goes only partway for now. We develop it more later. That line matters because it is going to be the high spot, always convex, the highest spot of the convex, so it gets the orange. And the next one I drew still connects to the same line.


Why does every line go to one center line?
Carving is an exaggeration of nature, and I found that idea in a book. I was reading a book about old masters of the 16th and 17th century, and there is one part of it I really love.
Two men were talking about the artists who were carving stone and wood. One of them asked if they were trying to be as good as nature, to copy it. The master said no. They were trying to be even more than nature.
In nature, not everything connects to the same line. In a carving, everything does. Exaggeration is the process. I hope it makes sense, my wonderful people.

Where does the eye go, and how big is it?
Where two leaves meet. We call that spot an eye, just like a human eye, and most of the time it looks like a water drop. On this leaf I make it maybe about five millimeters at the most, about 3/16 of an inch.
I want one in every place where those leaves meet, whatever its form. Sometimes the eye goes on an upper piece too, and you will see what I mean later. The eye also has a page of its own from my floral panel course.
What is the pipe, and why is it orange too?
Another high spot. Between two transitions there is a pipe, and just like a real pipe it is convex. It goes right to the center line, the same idea as the others.
I put them everywhere. Then I saw that one of mine was a little off. Later in this lesson, once the eye was blended, I showed the class how that whole area will become one long pipe, raised and exaggerated. The pipe comes back again in lesson 8 of this course.
Where do the blue lines go?
Between the orange ones. To create that convex, I need concaves right on the sides, so between those orange marks I put blue marks, and each is going to be a concave cut.
Make sure they go all the way straight. The other way would be a mistake. Where they end, the spacing is still somewhat 40/60, but it is not that critical. Every space between those lines gets a concave cut, and I do all of them at once.

Each color asks something different of the tool in your hand.
| Color | Meaning | What happens with the tool |
|---|---|---|
| Orange or red | a high spot that is always convex | Left standing |
| Blue marker lines | the wood goes down, a concave cut | Carved now |
| The black line | where each concave cut starts, never crossed | Never touched |
Which gouge carves the blue lines?
A number 9 of 10 millimeters, which is 3/8 of an inch, or closer to it. I had asked the class for number 11s in 1 and 3 millimeters, so the number 9s of 10 millimeters were what we went with.
Start with almost no weight at the black line and add pressure as the gouge travels. The closer you get to the edge, the deeper the concave cut you make. But don't go too deep. We had only 10 millimeters (3/8 in) left, and some of the class had only 6 millimeters (about 1/4 in), so make sure you don't destroy that piece.
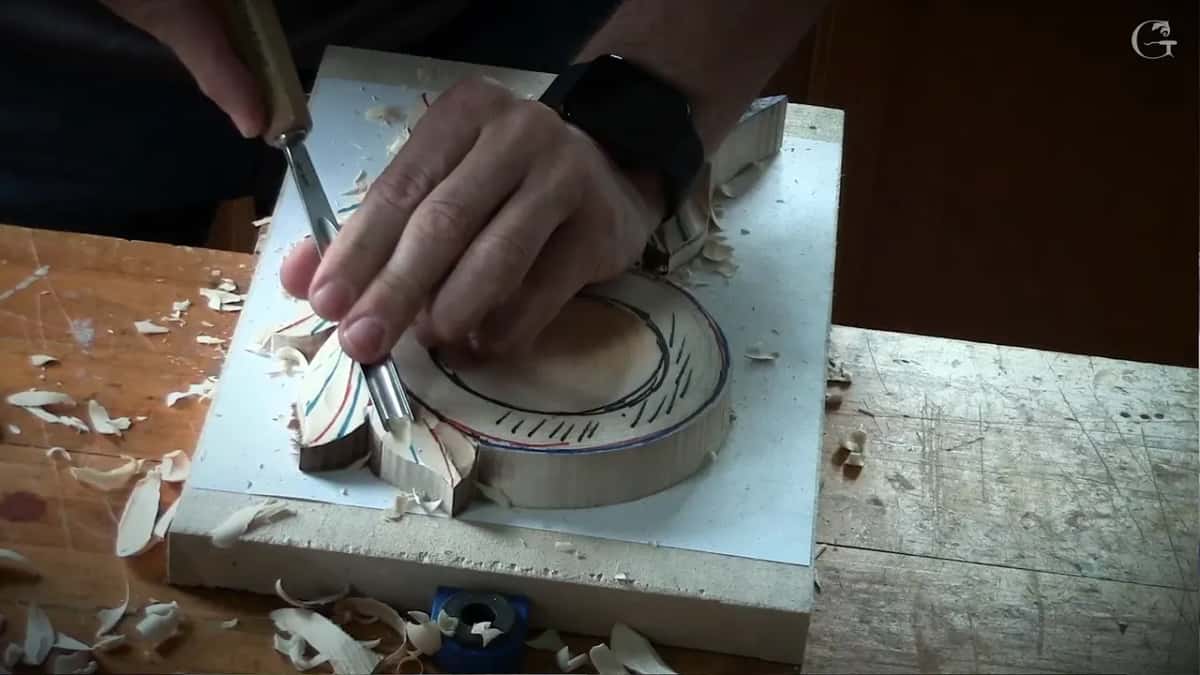
It is the same tool all around, with the rotation, the slicing movement I talked about before. You can start on the left side of the tool or on the right. It doesn't really matter, whatever feels more comfortable to you.
In this case it is better to stay closer to the red line in the middle of the leaf than in the places of the eyes. Two steps went together at that point, so it would be easy to understand, and we did it all around the leaf. Try to make it as smooth as possible. One spot I left alone for now, right there, and I said not to touch it yet.
What if the gouge hits something in the wood?
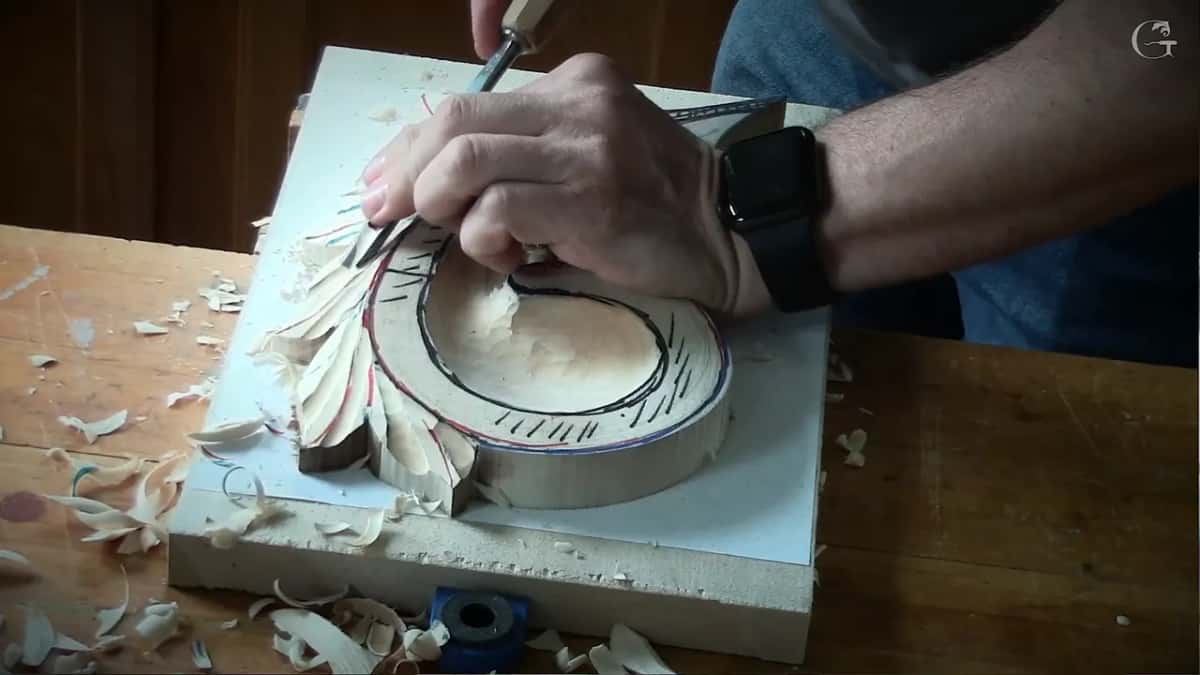
Take a bigger tool and go on. That is what I did when my gouge hit something inside the wood during these concave cuts. Something broke right there. But that's okay, that's fine. I would just use a bigger one, it didn't matter, and I would fix that one. After that we went on doing it on both sides.

Right after that I gave the class the rule again. Leave the red line and the black line alone, and carve on the blue. Going beyond the black line would be a big mistake, as I said again later in the lesson.
Which tool makes the overlap at the eye?
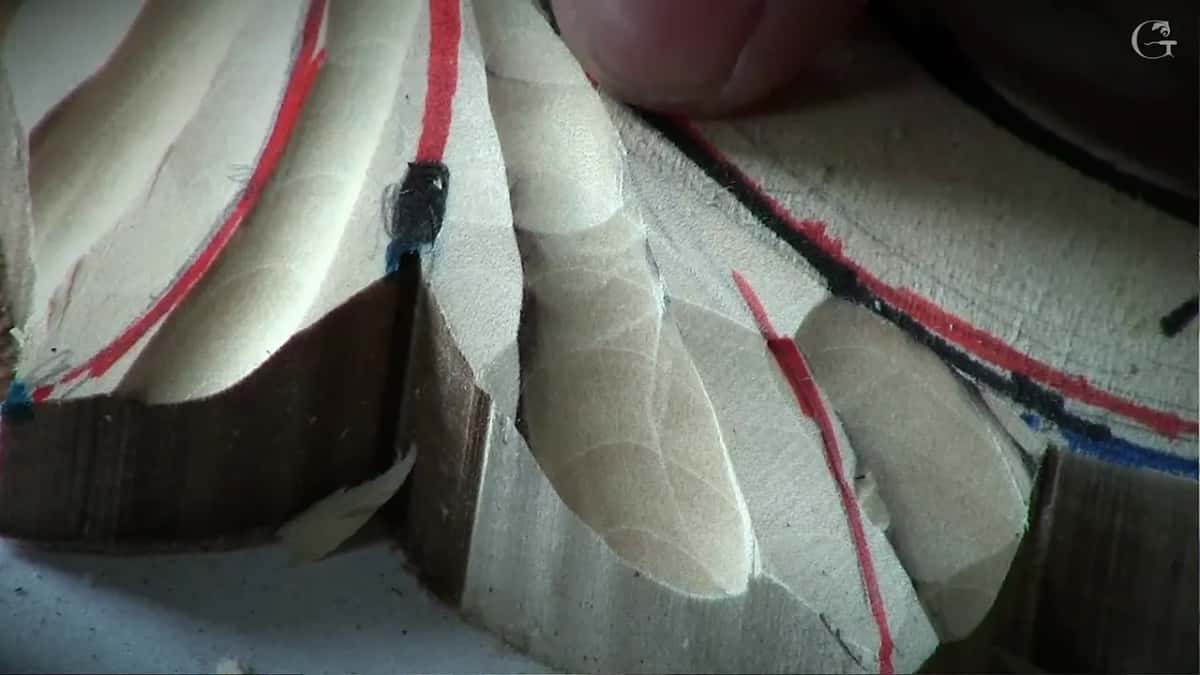
A 3 millimeter (1/8 in) number 11 veiner, which looks like a U shape. Wherever I see an eye, I make a beautiful movement there, with one part of the leaf going over another, just a little overlapping section.
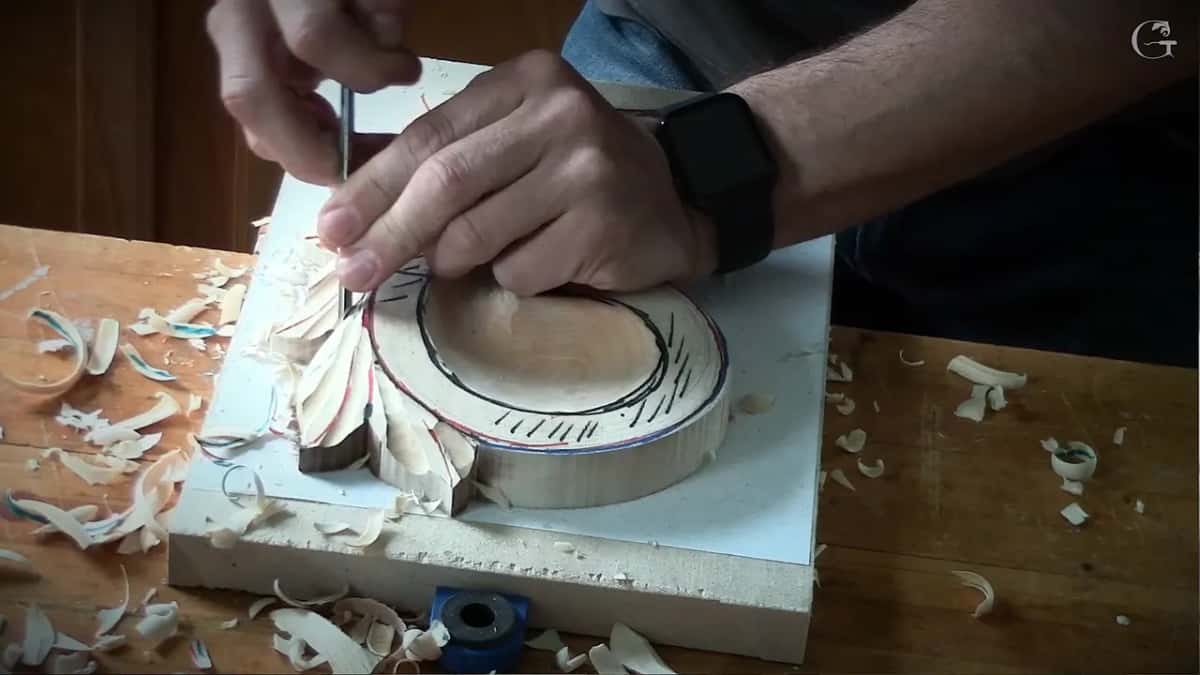
First decide what overlaps what. Then place the tool right on that mark, twist it a little to the right so the flute sits at about 2 o'clock, and carve. Not as far as 3 o'clock. Everywhere else on the leaf it's the same idea, a 2 o'clock cut repeated.
It was hard to see on the screen, so I asked for the camera to zoom in closer. On the opposite side I turn the tool the other way, so it is not 2 o'clock but about 10 o'clock. That was the task, and we had to finish it really quick.
How do you blend the eye after that?
With a number two turned upside down. I showed two steps at a time, because I don't want to overwhelm anyone, like Fibonacci on the easier side, not 20-something steps.
Place the tool upside down and blend in the transition. Then take the ridge off. Slightly, with the same tool, and make it really smooth, and do exactly the same on all of those areas.

Stay on the right side of the tool. If upside down doesn't feel comfortable, use the normal way, but the goal is still to make it feel like it is overlapping. That part right there overlaps another one, and I asked the room if they could see it on the screen. Again, right now we are working just on the eye, and if you need to make it a little deeper, you can do it now.
Someone in the class asked which leaf should do the overlapping, the one at the top or the other. The upper one overlaps, and the lower one goes below.

Which way should the convex climb?
Uphill, not backward. I wasn't sure I could explain this part, so I asked the class to come right here and surround me, and please don't touch the camera, I told them, because I'm still filming.
It wasn't the end yet. There was my eye, my concave and the blend, but it was no bueno. I would like to see the convex going uphill, not going backward.
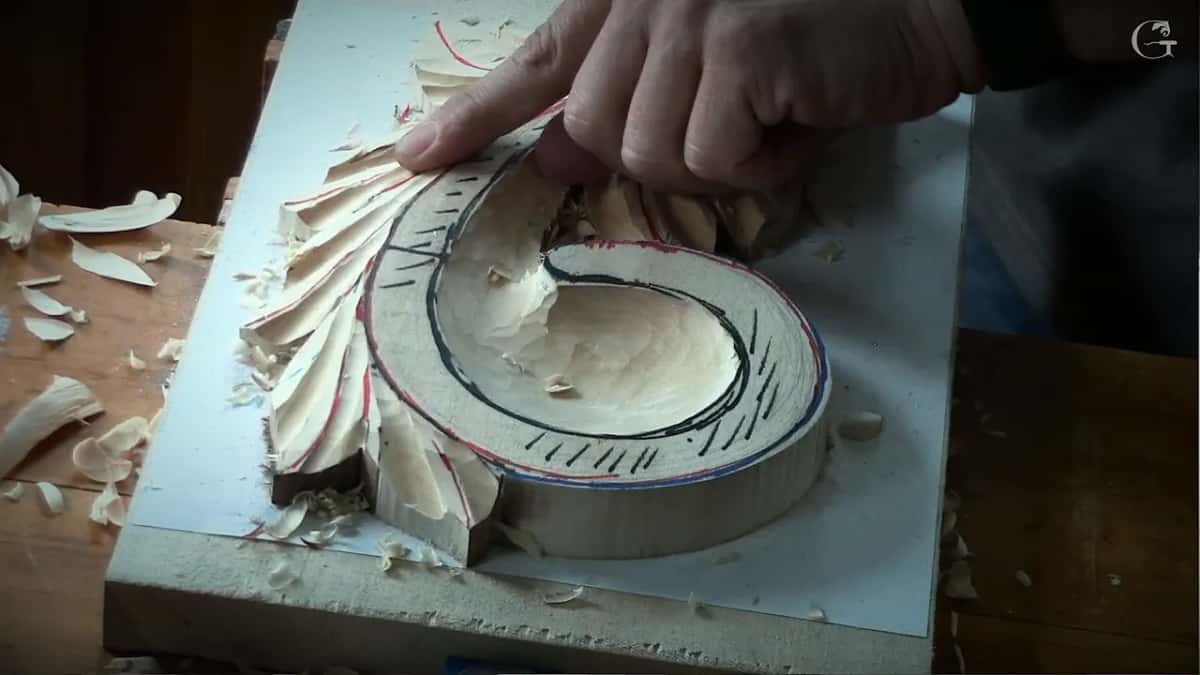
So I took the same tool and excavated a much deeper concave on that side. I don't worry about it, because I can reestablish it. But not all the way, of course. I still have to have some space.
I really want to see the raised part like this. With a knife or anything else, it is exactly the same idea, still blending but going uphill, and then the movement looks more organic. And I went a little deeper on this side too.
Why does a Byzantine leaf get a convex middle?
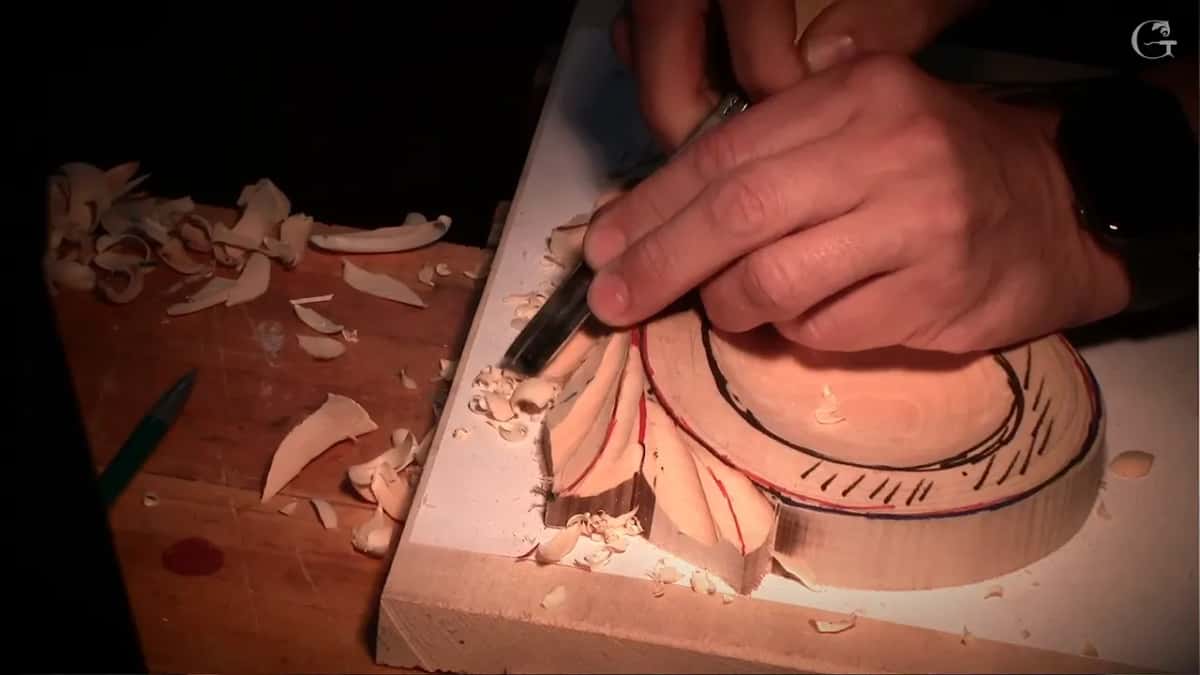
Different acanthus leaves have a different structure, and I am talking about in art. The middle stands up. An acanthus in the Greek manner carries a sharp vee cut inside it, the Roman one carries a hollow, and the Byzantine has a raised convex where both of those go down.
We want to be authentic to the true Byzantine. If I did this acanthus in the Roman style with that twist, it would not look as nice. It would look really weird. There would be too many lines, it would not be as soft, and it would not be good for the gold leafing.
So it is concave, concave and a convex right in the middle. Then we soften it, with gilding in mind. The Greek style had already brought in some curvature, and the Byzantine took it to the extreme, as I explained to the class. They put the curvature into three dimensions. That was a really big, big improvement, and I wanted everyone in the room to say yes if it made sense.
The Byzantine acanthus course page walks through the whole leaf, and my Greek acanthus and Roman acanthus courses carve the other two.

What goes on the bench for this lesson?
Multi-color markers, a number 9 gouge of 10 millimeters (3/8 of an inch), the small 3 millimeter veiner (1/8 in) and a number two. I took pictures of the marked leaf as I went, and I keep them for the online students too.
If you don't understand something, stop me and ask me a question, I told the class near the end. This is lesson 3 of the course. Lesson 4 comes next, and Access opens every lesson of it, with the video of each one.
How it's done
- Draw the high spots in orange. Every orange line runs to the center line of the leaf, with no T-stops, and each one will be convex.
- Set the middle line by the 40-60 rule. 40% on one side and 60% on the other, flipped on the inner part of the two leaves.
- Mark each eye. One at every meeting of two leaves, no bigger than five millimeters (3/16 in).
- Put blue between the orange lines. Straight lines, almost parallel to each other. Each one marks a concave cut, and I do them all at once.
- Carve the blue with a number 9. I use a 10 mm (3/8 in) gouge with a slicing movement, light where it starts and deeper toward the edge, without going too deep and without touching the black line.
- Turn each eye into an overlap. My 3 mm number 11 veiner goes in with the flute at about 2 o'clock, or 10 o'clock on the other side. Then a number two upside down blends the transition, and a deeper concave beside it lets the convex climb uphill.
Frequently asked questions
Are the red marks and the orange marks on an acanthus leaf different?
Both names mean the same high lines on my Byzantine leaf. Each line marks a high spot. A high spot on this leaf is always convex. Blue is the other color, for the concave cuts that go in between them later.
How big should the eye be on a Byzantine acanthus leaf?
Five millimeters at the most on this leaf, which is about 3/16 of an inch. I draw one in every place where two leaves meet. Later a small veiner of 3 mm, with its flute near 2 o'clock, starts the overlap there.
Should the concave cuts fan out between the high spots?
Mine go straight and almost parallel, in every space between two orange lines. Where they end, the spacing is still somewhat 40/60, but I said that part is not critical. I carve all of them at once with the number 9.
What to carve next