

Alexander Grabovetskiy, woodcarver, School of Woodcarving · Published 2022
How do you carve a volute in wood?
Quick answer: A carved volute on this floral panel is three curves sunk one after another. In profile it dips roughly three millimeters into a concave, then comes a convex near a quarter inch, then another concave. I take small bites, no force, and fix the roundness after.
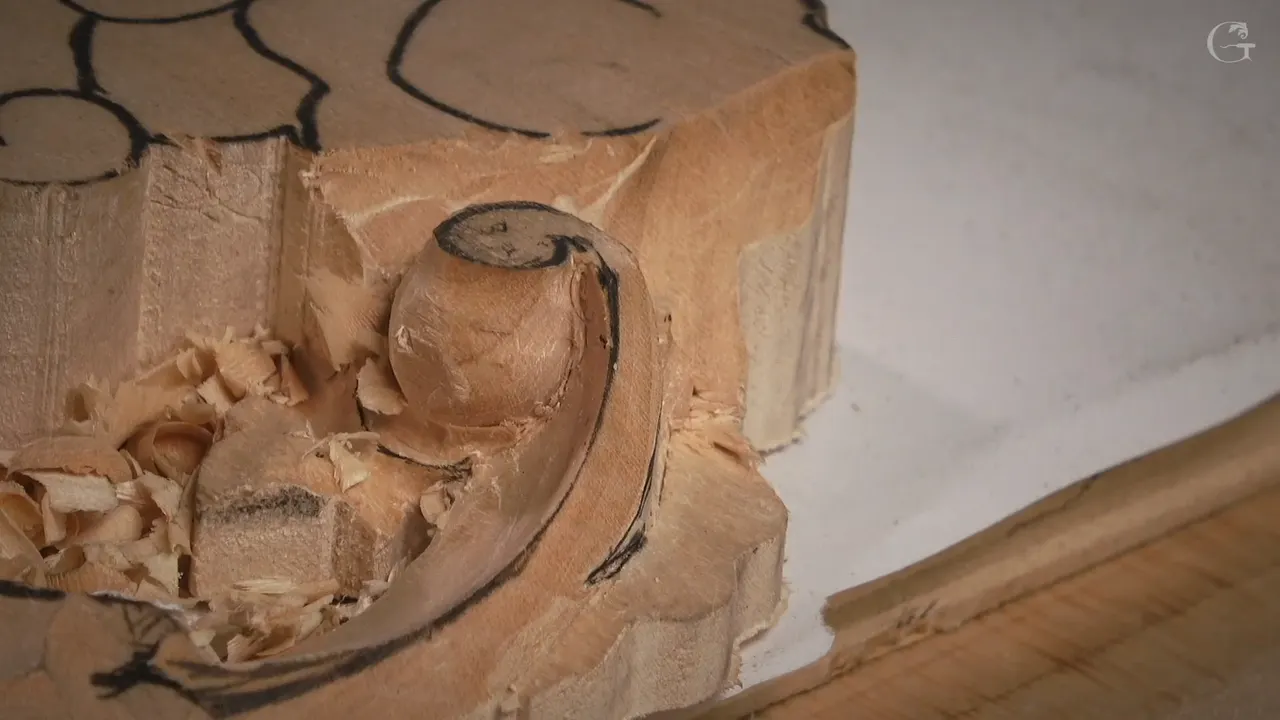
Carving a volute in wood is, on this floral panel, sinking three curves in a row. Seen from the side, it drops about 3 mm (1/8 in) as a concave, then comes a convex of about 6 mm (1/4 in), then one more concave. Those numbers belong to this one volute. They come from the third lesson of this course, three videos long, and the curl still needed cleaning when the camera stopped.
Do you want a scroll that lies almost flat, then rises and curls? Would you like the second panel to mirror the first one? Then sink it in small bites, the way I do here, and let the roundness wait.
First comes the molding, then the shell I only lower, then the slope and the curl. There's also a phone trick for the mirror image.
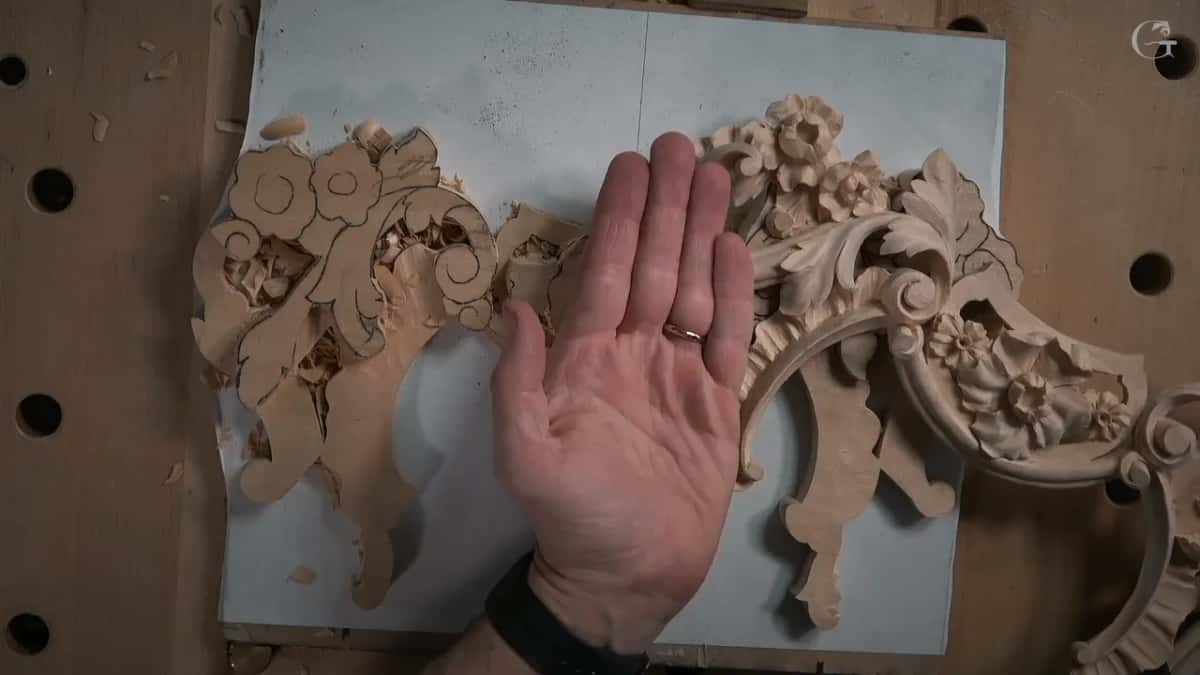
The volute in six short lines
- The molding comes first, with a macaroni tool and then a router plane from both directions.
- The shell only gets lowered, to a height read off the first panel.
- Next to the volute I leave about 1.5 mm (1/16 in), because that volute will have some sloping going on.
- My ridge line is roughly three millimeters wide, and in one place it narrows to about two and a half.
- The two halves are not the same, on purpose.
- Partway through the clean-up the curl still isn't round, and I'm okay with that.
What is a volute, and what's special about this one?
Wikipedia describes a volute as a spiral, scroll-like ornament, and says it forms the basis of the Ionic order, on the capital of an Ionic column.
That section of my panel has several details. There's some molding, a small shell, a flower on one side and a little acanthus, and the volute sits among them. And this volute is really interesting.
On the piece I did before, it has a twist. It goes almost flat, then it rotates and heads off another way, and on this second piece it goes the opposite direction. I know it doesn't look like much on a block of wood.

Late in the first video I even lost the word for it. I asked out loud how you call that thing, then said volute, of course, and admitted I was getting brain tired. It's a special volute, I said, because it's going to have some sloping going on, so I didn't let my tool get too close to its line.
How do you carve a volute that lies flat, then curls?
Slowly, and it starts at the end of the first video. I left about a sixteenth of an inch, about one and a half millimeters, between the little acanthus and the volute, then went all the way down. A number seven of 14 mm, a little bigger than half an inch, started the sloping motion.
Not everywhere, though. Where it's already scrolled, a slope is impossible, so it won't work there. It isn't a huge slope when I look at it, but it's still somewhat.

In the second video the big number seven, about 28 and a half millimeters, more than an inch, ran along that whole area. Looking at it sideways, I tried to keep my line really nice and flowing.
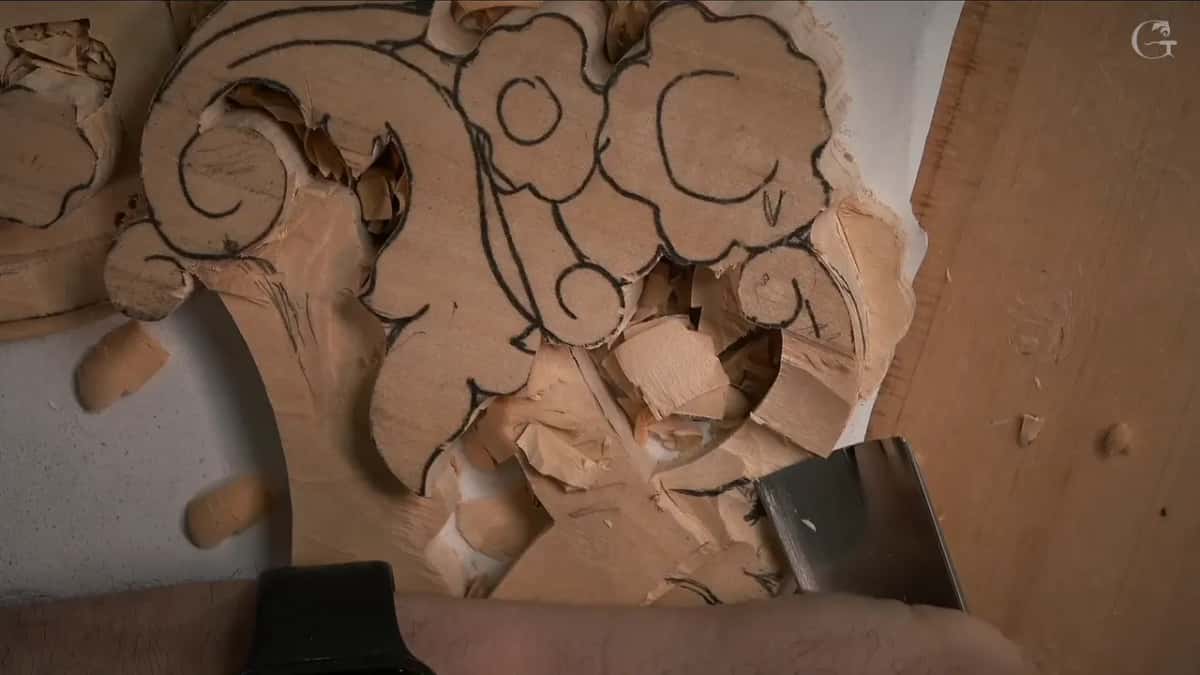
Next I drew one more line, the ridge, because it's really important for me to draw it so I can see it. It's approximately three millimeters, an eighth of an inch, one way, a little wider in one spot, and closer to that part it narrows to maybe 2.5 mm (3/32 in).
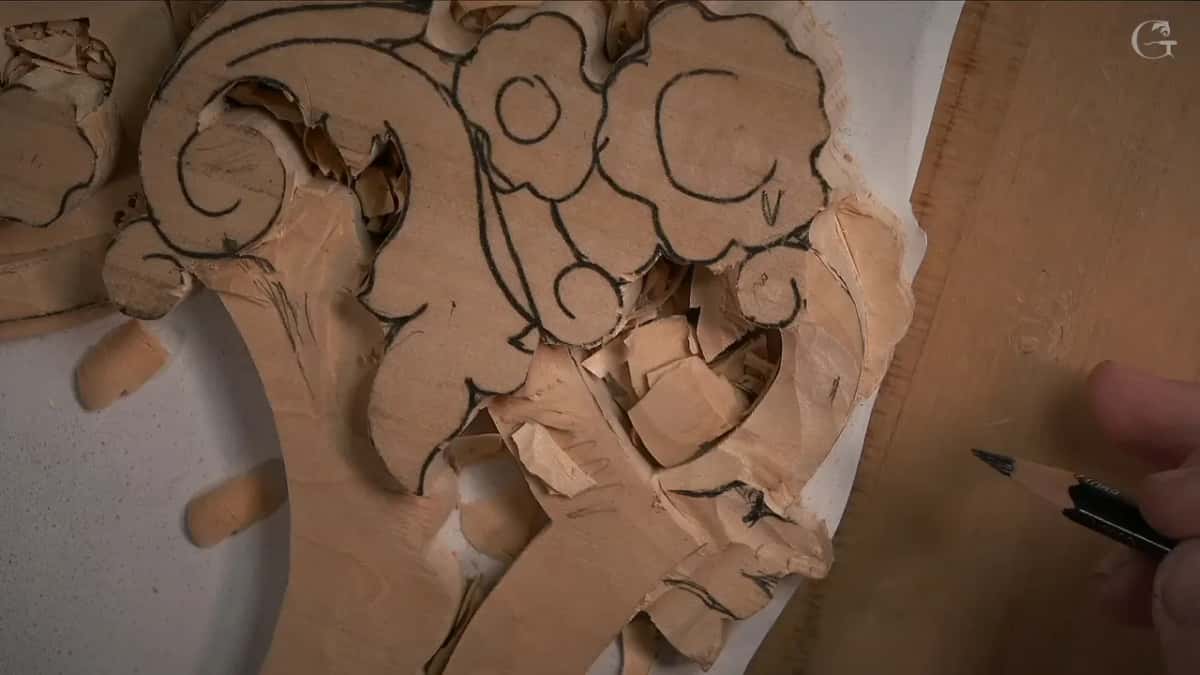
Like every volute, I said on camera, this part has to slope this way and then go up. Any tool will work. A flatter one such as my number two would be really good there, and when one side kept dropping right down, I needed a second line that had to flow with it.
I didn't do what I drew there. I raised it a little higher. Coming from one side was no good for me, so I attacked from the opposite side, and seen sideways it looked good. I still wasn't too happy with the overall movement, so I went slightly deeper and lowered that spot just a little.
Then the future acanthus needed its outline. It's really tiny, so a much smaller tool did it, a quarter inch number nine, 6 mm.
The next part was hard to show, and I said so. No camera fits into an area like that, so I held my iPhone over it and apologized for how shaky the picture was.
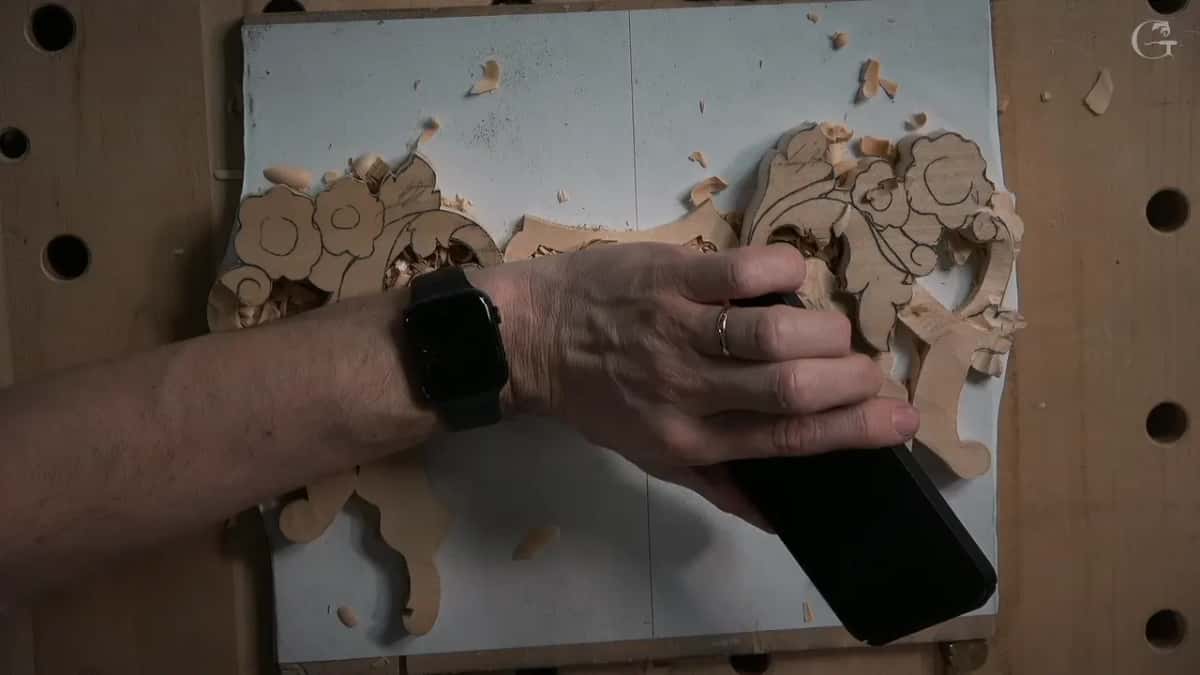
With the phone I showed which volute will be the lowest point of that whole side. My line starts there and runs almost to the background, and it can't be a straight line, it has to be really nice and smooth. That whole section becomes a concave, and the effect I'm after is almost lying flat, then rising, then curling.
I can't hold the phone and carve at once, so from there you see it only from above. For that pass I took a number three of 12 mm, about half an inch, a spoon, and went in carefully, both ways, down to the background. It's still a concave, only a shallow one, equal to a number three gouge.

I thought about a number five or a seven to make it more pronounced. I don't want to overdo it. The seven would work, I said, but I left that for a little later.
A smaller tool came next, a number 11 of maybe 3 mm, with no force, little by little, because this volute has a twist and it's not a straightforward, easy pass. After it, a 6 mm number three made a straight down cut. Barely any wood came off there. That area is shaky, and no mistakes are allowed. Last, I picked up a really good tool for that spot, a skewed gouge, a number seven.
What does this volute look like from the side?
In the third video I liked having an initial volute, but it wasn't the end yet. Seen from above, this part is small. On my previous piece it's only about six millimeters, so I left some space at the edge of my drawing for that movement.
Its movement is concave, convex, concave. First it drops, about 3 mm, into a concave. The convex, as far as I see, is approximately 6 mm, a quarter of an inch, and then there's another concave that goes all around.
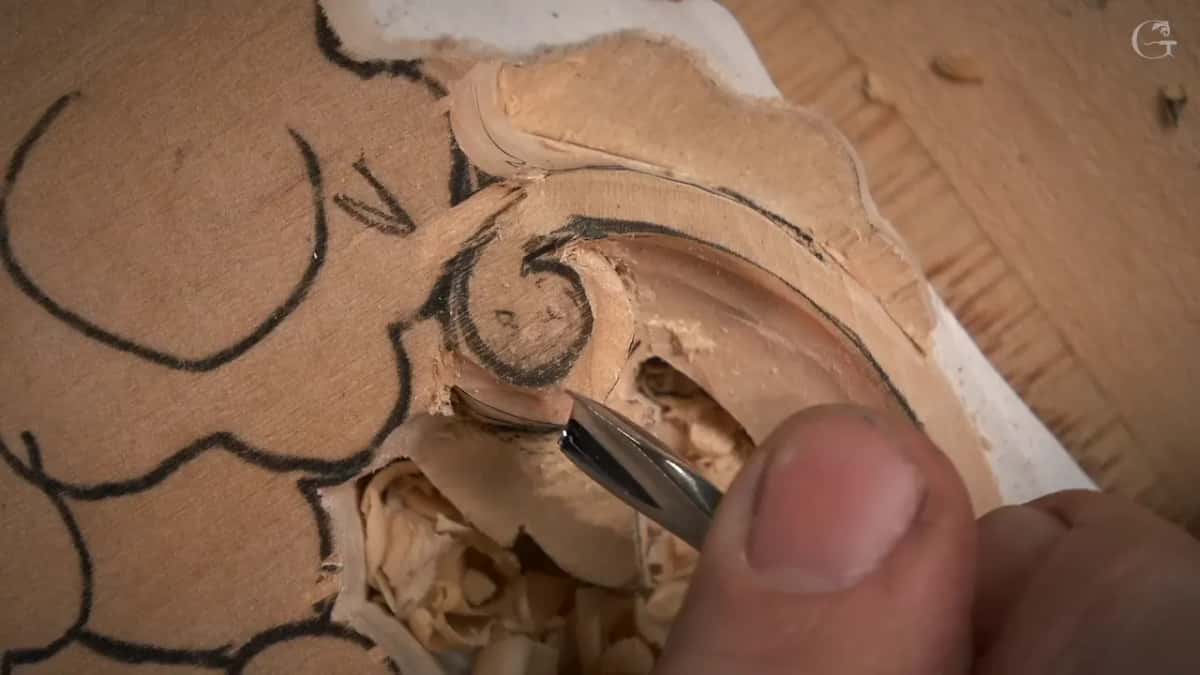
I used my finger again to place a line. I don't have to, but it helps a little. The right tool here was a number nine, a quarter inch, coming in sideways. Absolutely no reason for forcing it.
I didn't want to damage my concave, and I took small bites, really tiny bites. Soon I could see the overall movement was absolutely not round, which is okay, absolutely fine, and I said I'd fix it. I had to be really careful how I came at my convex.
The flower beside it got lowered too. I checked my previous piece, saw I was safe dropping it a little lower, went around with a 6 mm number nine, then a 10 mm one, and took down some of the future petals. I stayed away from my final line, because it's really important for me not to mess up. Then a 14 mm number seven went to the line, and that gave me the concave around.
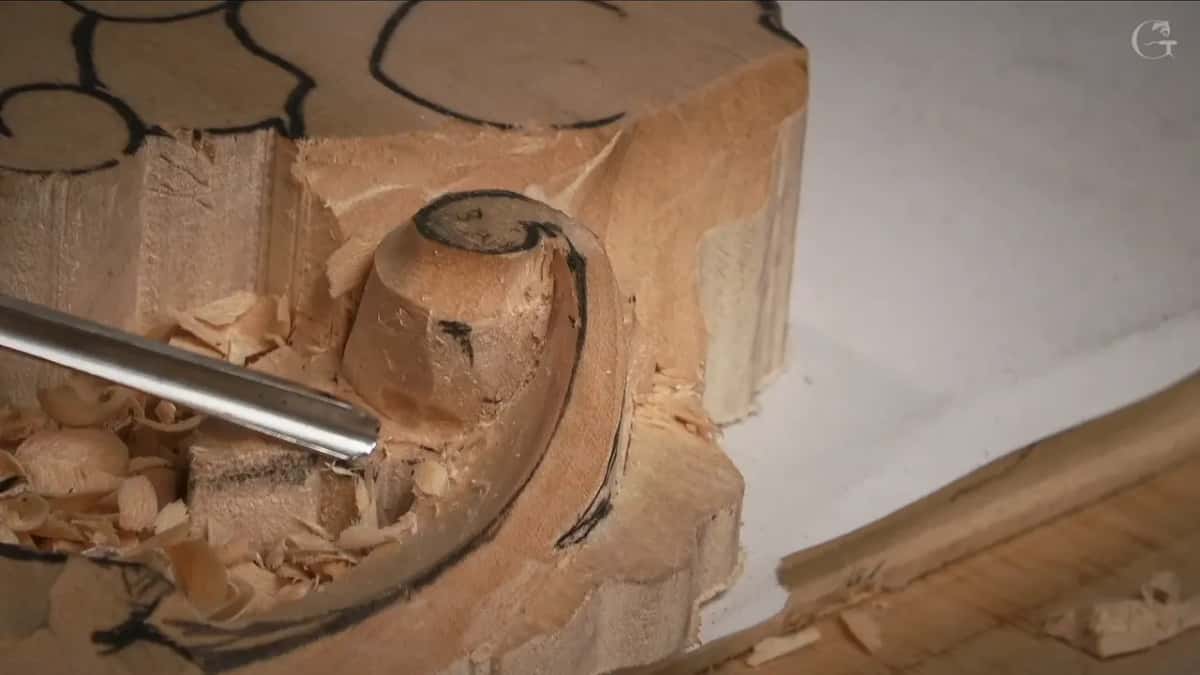
With the upper concave done, the lower one was somewhat challenging. A 3 mm (1/8 in) number nine started it. It doesn't have to be a really deep concave, by the way. Just establish the idea, and that's enough for me.
There's an acanthus leaf right below, so I lowered that part slightly with the same tool, just to separate the acanthus from my volute. I'm not working on the acanthus movement yet.

After a cleaning pass along the side with another tool, the convex was already convex, but I wanted it even more so. One approach is a filleting, or fillet cut, little by little, with that same tool. There are other approaches, of course. A back bent would be really nice right then, if you have one, and I think a number five still works, so I tried a quarter inch number five.

I could spend longer on it, but you can see the detail it makes is beautiful. To clean the concave after that I went really, really small, a number five of only an eighth of an inch.
| Tool | Job | Size |
|---|---|---|
| Quarter inch nine | first pass around the curl, small bites and no force at all | six millimeters |
| Fourteen millimeter seven | reached the line for the concave around | just over 1/2 in |
| Eighth inch nine | started the lower concave and parted the acanthus from the volute | three millimeters |
| My number five | another way to make the convex more convex | also a quarter inch |
| Tiny knife | took the facets out and cleaned to the line | no size given |
Does the curl need to be round right away?
Mine wasn't, and I said I was fine with that. Somewhat happy, I got closer to the line, which in my case was a little too thick.
Sometimes small knives really do the trick. I took a really, really tiny one, cleaned the curl, took the facets out and got right on the line. Then another tool cleaned that whole surface, because it didn't look nice, and that way you see much better what you still have to fix in the roundness. It needed sharpening a little, or buffing, I should say.
I made the downhill transition really smooth. It still wasn't close to round, and I'm absolutely okay with that.

With a really sharp pencil I reestablished my roundness. After that I refined it, first with a knife, then with a number seven, then with something smaller, maybe a number five. That's much better. Up close, I get my face nearer and maybe put on some glasses, because I can see much better that way.
Seen whole, it just rolls, then heads off, and I'm really happy about this detail. There's still clean-up to do. For now we're only setting stuff in, and there are still some details around it to work on.
Why carve the two halves differently?
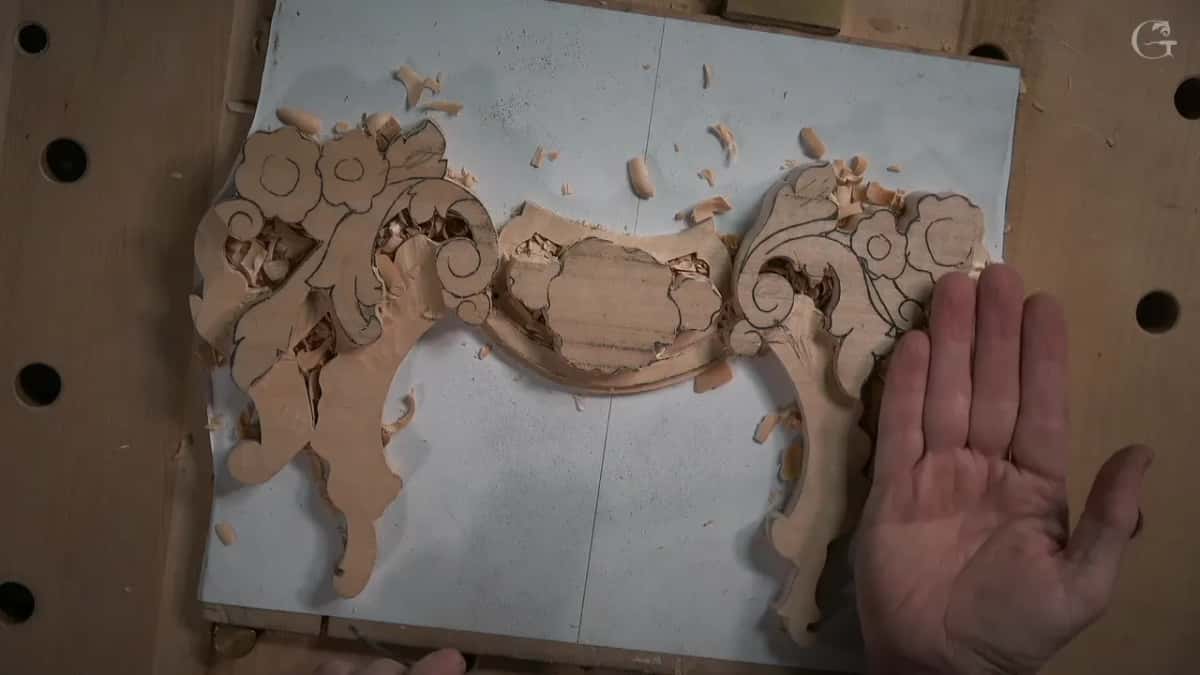
I started on the right-hand side, and the left comes after. The two sides are really close, almost the same, but not the same at all. Look from above and you'll see two shapes that repeat each other and point the same direction.
Even if it looks symmetrical, it's absolutely not. The movement on this side differs from the other side, and that's what creates beauty in a design like this.

I could do both directions the same. People probably wouldn't even notice, and the client probably wouldn't notice either. But it wouldn't be so interesting for me to work on, and I want to make sure I'm having fun when I'm carving something. So when I designed it, I made different movements, and soon after I said I could make some changes, so it's not exactly the same.
In lesson 1 I said the same about the whole design, that it only looks symmetrical.
Can a phone help you copy a mirror image?
It helped me on this panel. The leaf above has to copy the previous piece, flipped the opposite direction.
One of the tricks you can use is your phone. Make a picture of the piece you're working on, go to that picture, hit edit and flip it. I use an iPhone. On camera it was kind of dark, but boom, it's done.

Now I know exactly how it's going to look, and I can recreate that acanthus movement. I think it's a good tip. I know they didn't use phones back then. We do have them, and I don't see any problem using one, because at least I'll be pretty close, and it's fast.
Which tool finishes the molding before the volute?
The lesson opens on the molding, and other tools can make the same pass, but the one I really like for it is the macaroni tool. I showed it in case you want to buy one. It has two sides, two cheeks, and the bottom.

It's actually a furniture maker's tool, so if you're a furniture maker, it's probably the tool to invest in. It really does the job. It attacks the sides, and it cleans the upper surface as well. Then I changed position and went the other direction.
In lesson 8 I put it another way, two sides and a bottom, that's three chisels.
After that the router plane came back, with its blade lowered, and I was right on the line. I did the opposite direction too, so now I know for sure the height of that molding is the same all the way.

Then the blade came out again. I keep my blades separate from the body of the router plane, in a special place of their own.
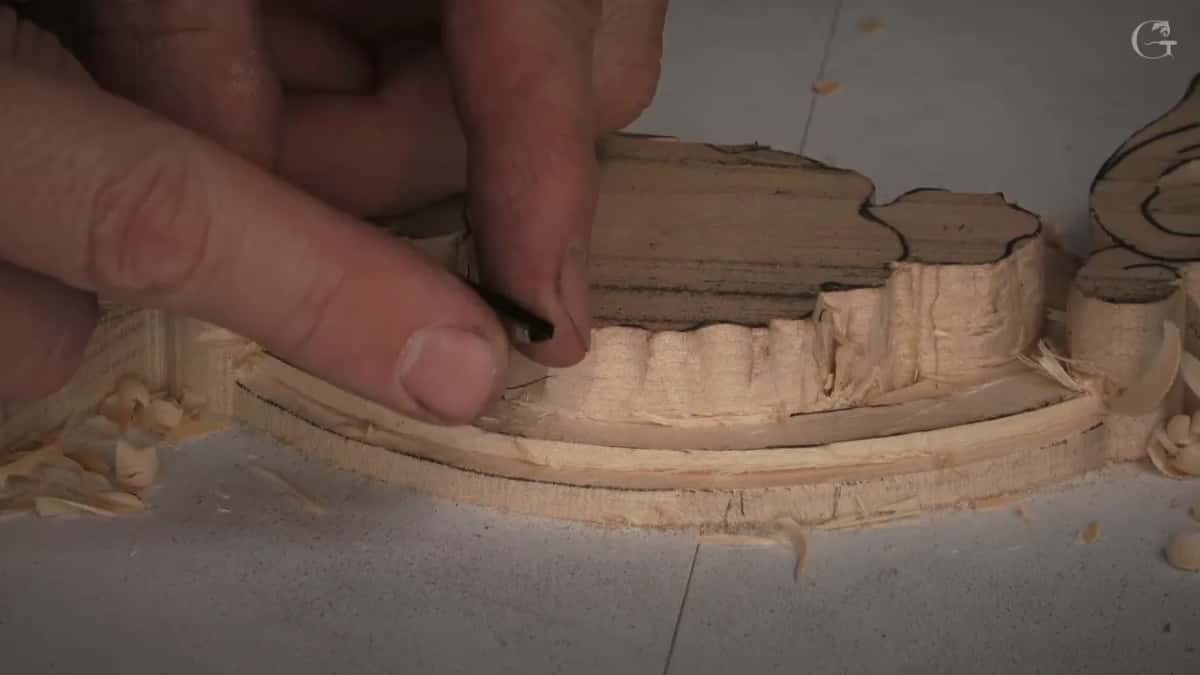
Where do the heights and depths come from?
From the first panel, read with my pointing machine. Before the shell I went by the old piece and found the highest spot of the shell. The shell itself doesn't get carved yet. I only lowered it, setting that detail in for later.
There was a gap, so I had to press it, and the high spot came out slightly higher. My finger was the guide for the line, and I put a clamp on the piece before going at it, which I almost forgot.

The small acanthus came out at pretty much the same height as my shell. Really quickly I can transfer a height with that tool, although on a piece like this I could probably just eyeball it. I really like to use it anyway, especially on a human face or a lion head, where every slice matters and a little deeper means you messed up.
If it's just generic, that's not as big of a deal. At the start of the second video I measured the depth between the leaf and the lowest spot on the previous piece. I was almost there. Really dangerous. I almost messed up, I didn't, but it was really, really close.
The pointing machine has its own lesson in the tools course, if you want to see the tool itself.
Why change direction when the grain catches?
Lowering the shell with a 10 mm number nine, 3/8 of an inch, I saw it happen. Going on with that pass would have been a big mistake, because it catches the grain and I could easily break it. So I attacked it from the opposite direction.
I also didn't want to dig underneath that side, which would be a big mistake too. Then a triangle area needed relieving with a straight down cut, using the same tool. See, I'm doing a rotation cut, or slicing, I should call it, because the proper name is slicing.
A flatter tool, my number two, sat on the line and went downhill. Please make sure you don't place your tool at a different angle, people, and keep it at 90 degrees down, as close as possible.

I thought about the bigger number seven to clean a little more, then said no, too dangerous. Most of it was grabbing, but if I kept going it would zig off that way, so I put it back and cleaned with another tool.
By the way, end grain shows you the difference in color between a super sharp tool and one that needs sharpening. That one needed buffing soon, and I could feel its resistance. That's not good.
Where this lesson sits in the course
It's lesson 3 of fourteen in the course. Lesson 2 is about getting the background flat, and lesson 4 about carving to an exact depth. The detail is part of a bigger Venice Room project, a real-life one, I said in the last lesson.
For more volutes, there's a twisted one that rises from under a leaf, the hollow inside a volute, and a scroll on the Hashemi panel. Tool choices have their own course, and so does sharpening.
Would you like to sink this curl next to me, one tiny bite at a time? Access to the school opens every video of this course, phone trick included.
How it's done
- Finish the molding first. A macaroni tool takes both sides and the upper surface, then a router plane from both directions keeps the height even along its length.
- Lower the shell to a measured height. Read its highest spot off the first panel with the pointing machine, then lower it without shaping it yet.
- Draw the ridge, then slope. Close to 3 mm wide, narrowing in one place, then a flat tool such as a number two for the slope.
- Sink the three curves. A concave dropping 3 mm or so, a convex near 6 mm, then another concave, all in small bites with no force.
- Separate the acanthus. Lower the part above the leaf just enough to part it from the volute, then make the convex more convex with a fillet cut.
- Clean, then redraw. A tiny knife takes the facets out, a clean surface shows the roundness, and a pencil, sharpened well, puts it back.
Frequently asked questions
Do you need a macaroni tool for the molding?
Other tools can make the same pass, I said in lesson 3. I like the macaroni, though. It attacks both sides and cleans the upper surface as well. Furniture makers use it, and if you build furniture, it's probably the one to invest in.
How deep should the lower concave be?
Shallow, on mine. A small number nine began it, the 3 mm one, and I said it doesn't have to be really deep, just establish the idea. There's an acanthus leaf right below, and the same tool lowered that part a little to separate the two.
Why make the two halves of the panel different?
For me a copy wouldn't be as interesting to work on, and I want to have fun when I'm carving. People and the client probably wouldn't notice the difference. On this panel the movement on one side differs from the other, and that's what creates beauty, I said.
What to carve next