

Alexander Grabovetskiy, woodcarver, School of Woodcarving · Published 2023
How do you carve a small flower without breaking it?
Quick answer: Keeping a tiny carved flower in one piece is, on my walnut panel, a matter of order and a light hand. The center hole goes in first, before a dome can make that spot weak. A shallow outline comes before any rounding, and the undercut comes last, done gently.
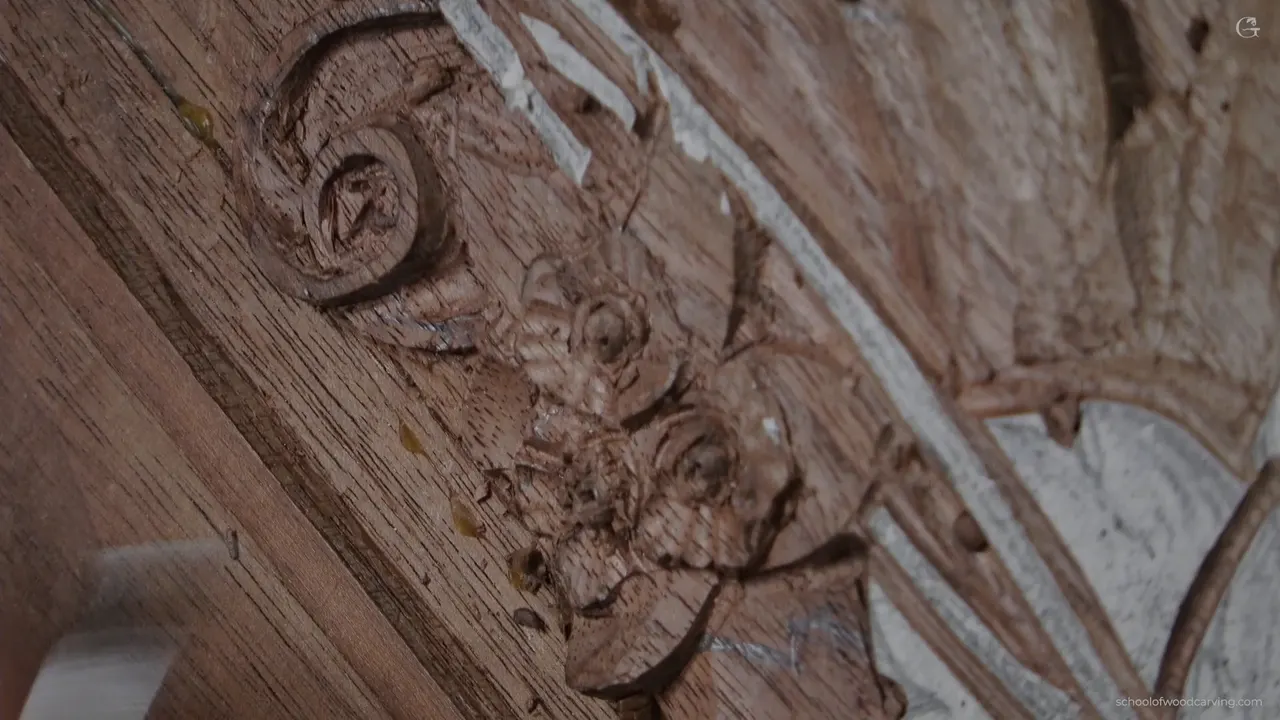
Carving a small flower without breaking it is about the order of your cuts and a light hand. In lesson 32 of this walnut panel I worked on a bunch of three tiny filler flowers, each dome about 5 mm (3/16 in) across at the widest, maybe 4. The center hole went in first. Then came a shallow outline, rounding, petals, and last of all the undercut, which is where I went too far and a piece came loose on camera.
You want the middle of a tiny flower to look dark and deep, right? And you want every petal still on the board when you're done? Then watch the order more than the tool. I'll go through each step the way I did it on this panel, with the tools I named and how deep I went.
The order of cuts on these three flowers
- Outline the whole bunch first, and never below the background.
- Sink the center hole before the dome exists, since a dome gets weak.
- Outline each dome using a 2 mm veiner a millimeter deep, then round it with a gouge turned upside down.
- Cut down vertically, then tidy with the tool's side, a bit at a time.
- Hold the dome as the high spot and drop the leaf below it.
- Undercut last, and gently.
What is on this part of the panel?
Three small flowers and one bigger flower, with some kind of stuff growing out of the bigger one all the way around. A few years ago one of you asked me what that thing is and what it grows on. I have no idea. But we are working on an 18th century panel, and that element was common, not everywhere, and I saw it personally multiple times.
The board is the purple walnut from the design course, only 10 mm (3/8 in) thick. I jumped to this spot from another section, because you get tired of one area sometimes and I think it's wise to jump.

Early on I chose what goes where. Part of that flower is just a leaf, and I decided to drop that leaf underneath the little bunch. That would be nice, I said.
Why outline the whole bunch before taking wood out?
To keep the whole composition in front of you. Outline first, I said, so you don't lose the sense of the overall picture. For that I used an antique number 11, a German one, 2.5 mm (about 3/32 in) wide, and a good brand by the way, with the mallet and the flute up to 12 o'clock.
Keep an eye on how deep you go. In this section I wanted the outline at about the level of the background, no deeper, and beside the leaf I could not go deeper than the leaf itself, since part of it sits on the left side.

Then the bulk came out. I held the tool at almost 90 degrees and dug straight down from different points and angles, a bit like a plug cut, though not really a plug cut. Nothing has to be perfect yet. You are only removing the bulk and setting the main shape, and the flute stays straight up at 12 o'clock, slightly higher than the background, because undercutting this early would be a big mistake.
It is always like that in wood carving. You work the overall shape first and dig the details after.
How do you keep a thin part from snapping off?
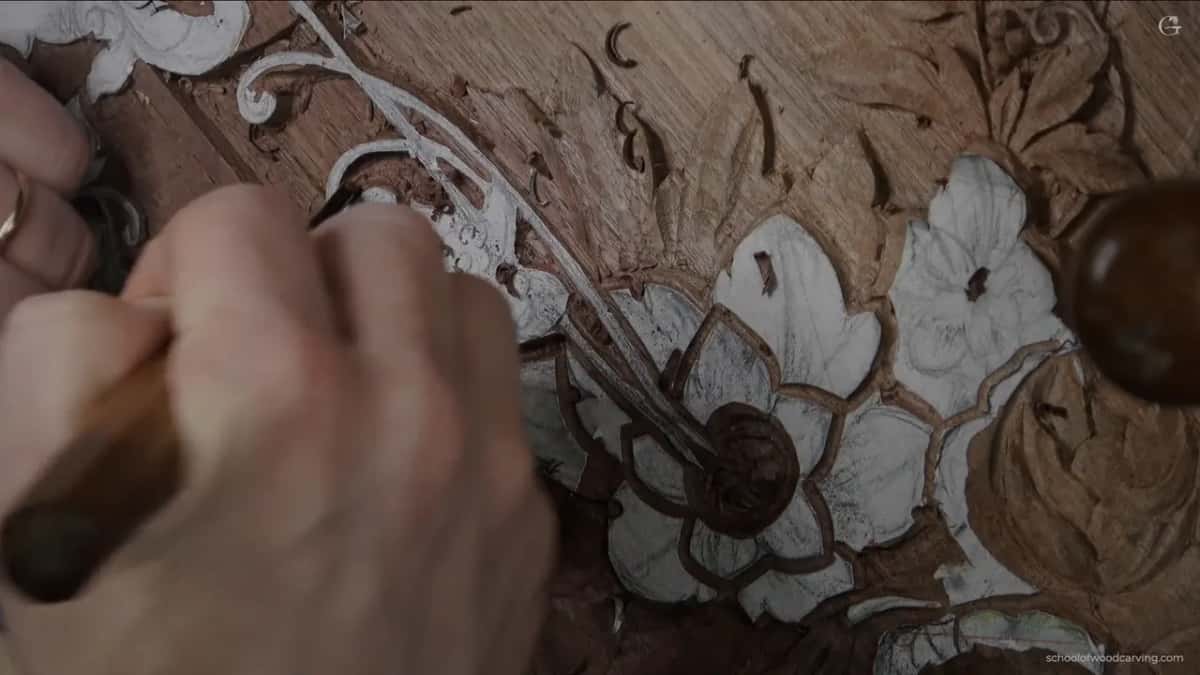
Go straight down first, then clean with the side of the tool, little by little. Watch what the grain does, especially in the small details, because those are weak spots and it is easy to chop too much. This is walnut, and in my case it is a little forgiving. Some species are really crunchy, though. Take too much in one cut and you can snap off the whole detail.
That's why I chopped down first and cleaned with the left side of the flute, not trying to take much material at once. Pay attention to how I hold the mallet. It sits right in my palm, I'm barely touching the tool, and I'm not holding the mallet by the handle, which gives me much better control.
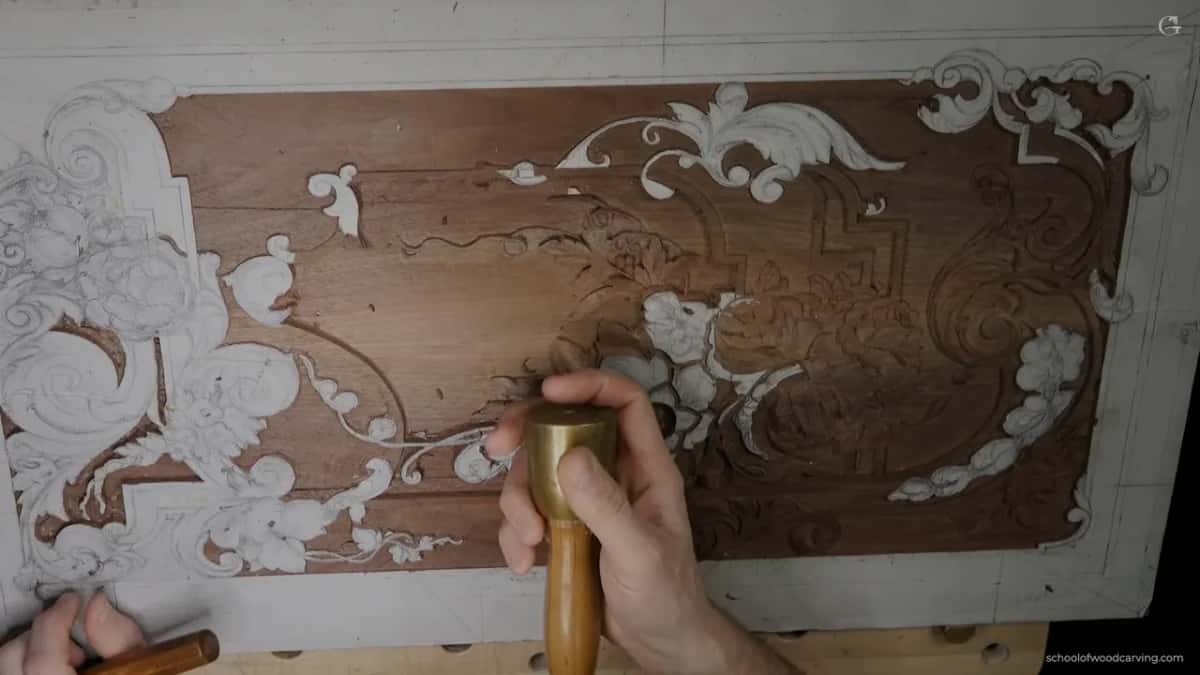
Near one section I still used the mallet, but carefully, since I could chop that section right out. It's kind of weak, I said, and then I fixed my own words. Weak.
With the tiny 0.5 mm number 11, don't hit strongly at all, because you can break the tool itself. And don't push too hard on any straight-down cut, or you damage the background, and that is really hard to fix. Just a gentle cut.
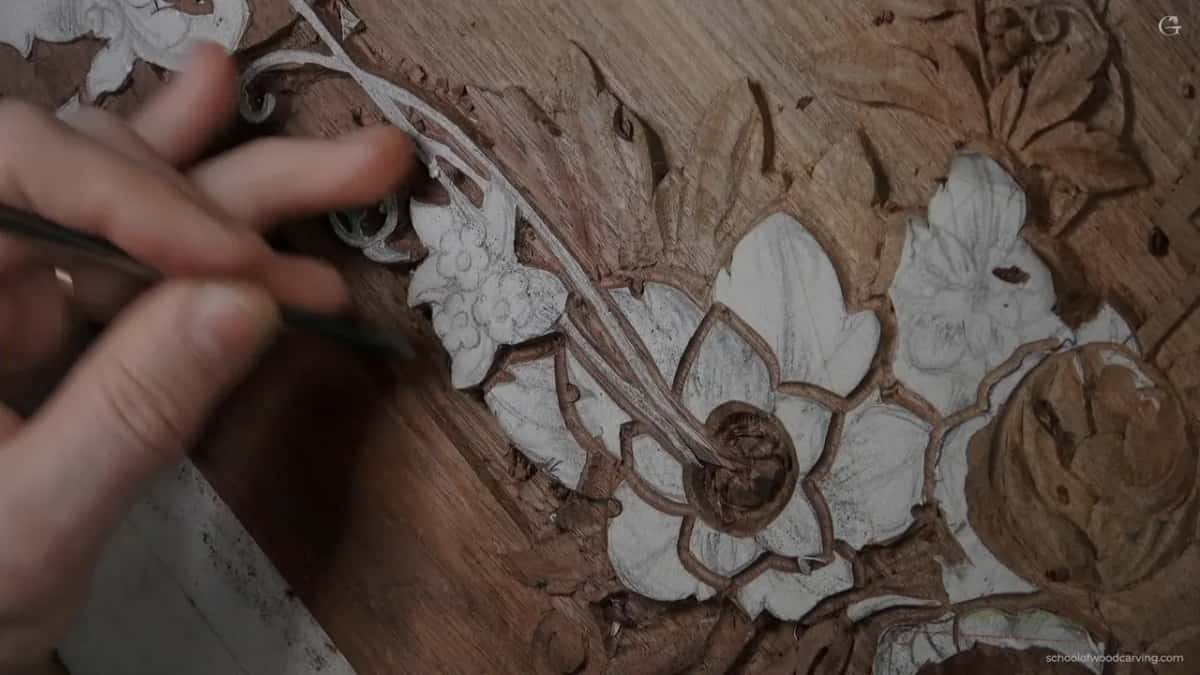
The tendril itself is no wider than about one and a half millimeters, and you could even go a little less. For a tight loop there I took a small micro tool by Dockyard and chopped straight down at 90 degrees all around until I was happy. Lesson 24 has a flower only 10 mm (3/8 in) across and the same worry about its middle.
Which way should you carve the middle of a filler flower?
That depends on the shadow and light you are after. A filler flower is just what the name says, it fills the space, and some other wood carvers call it the same way. Gibbons would just stick those flowers everywhere, I said. I drew filler flowers on this panel back in design lesson 12.
There are a few ways to carve one. You can excavate the center deep and send all the other cuts toward it, which gives a really good shadow spot but not many details. A dome is the second way, raised, with a small dark spot in its center, and it shows a little more detail. Or you keep the dome and put a bunch of small beads around it, the way some carvings have it. I'm not sure you want to overcomplicate things, but I think it would look really good. I kind of like the dome idea, so the dome it was.
| Way | Carving | Result |
|---|---|---|
| Deep center hole | Excavate the middle deep and aim every other cut at it | Strong shadow, few details |
| Dome, dark spot | Raise the middle as a dome with one small dark hole on top | Shadow plus more detail |
| Dome with beads | Leave the dome and ring it with small beads | Looks really good, more complicated |
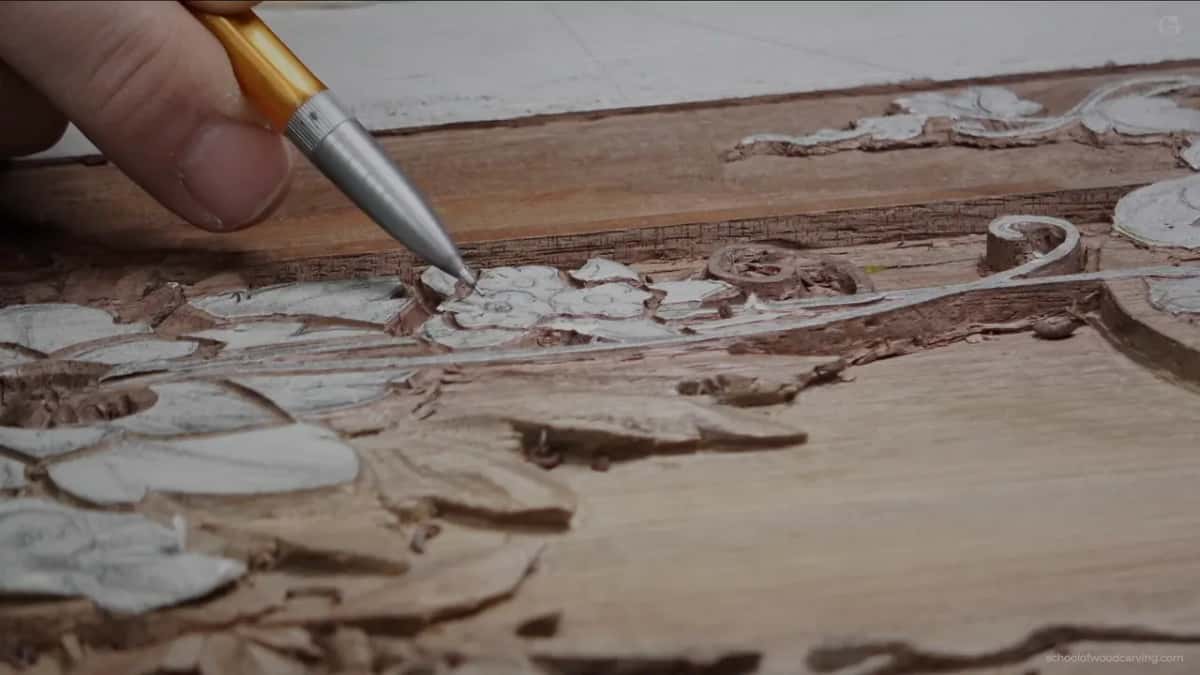
Why does the center hole go in before the dome?
Once you carve the dome, that spot becomes weaker, and a gouge driven into it then could break it. I don't want that, so the centers are number one. My tool was a small Dockyard gouge, about 1/16 in (1.5 mm). A number 9 would probably be better, but a number 8 will work, and Dockyard is just a brand. Whatever small one you have will do.
Think about how each flower will slope before you start. On a flat carving like this the angle is not a big thing, but it's still a good idea, and one of mine slopes downhill, so the cut was not 90 degrees. I tipped the tool to follow a slope that wasn't there yet.
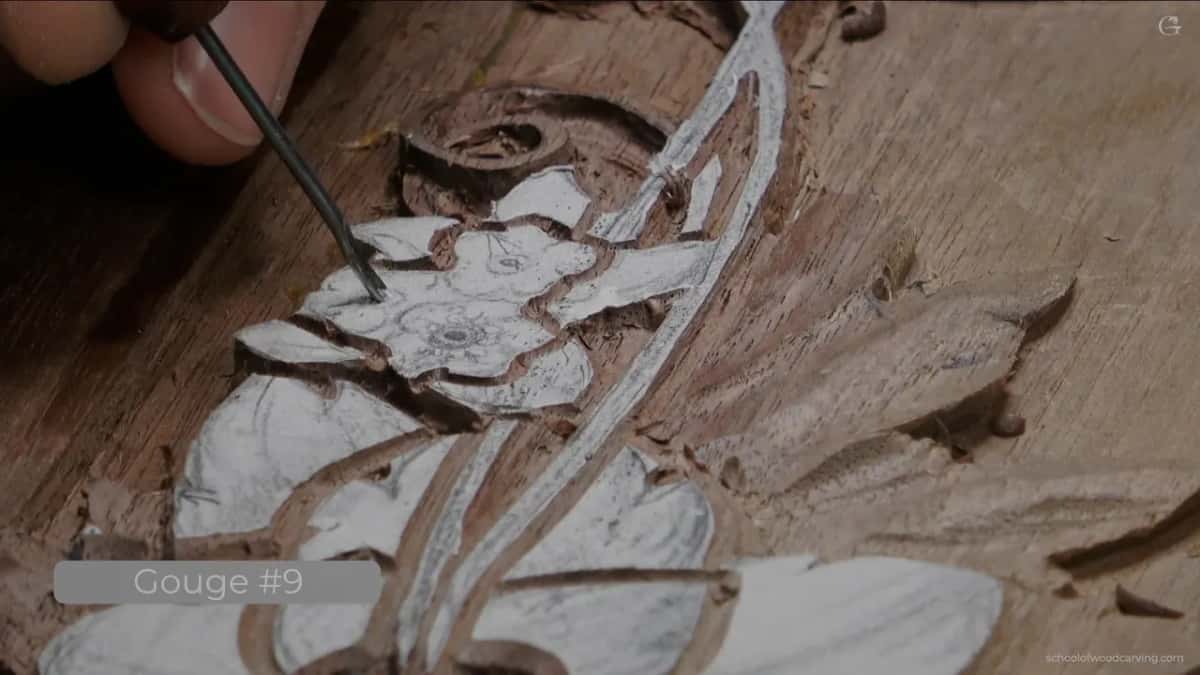
I didn't go deep. There is no reason. One cut already makes a really dark spot, and that's all I need. On the floral panel I also set each hole to its flower's slope, and in lesson 29 the hole leaned toward a center hidden under the petals.

What does the outline around a dome do?
The outline is a relief cut, and it lets the wood fibers break off at the edge. To make each dome I outlined it first with a 2 mm number 11. It doesn't have to be perfect, by the way. The dome is about 5 mm at the widest, could be 4, and I went only about 1 mm (1/32 in) deep, which is all it needs.
On camera I asked why I even bother with that outline, and the reason is the fibers. You really need to relieve them so they break off there. Without the cut outside, the weak spot would end up in the middle, the fibers would just squash, and I would break them.
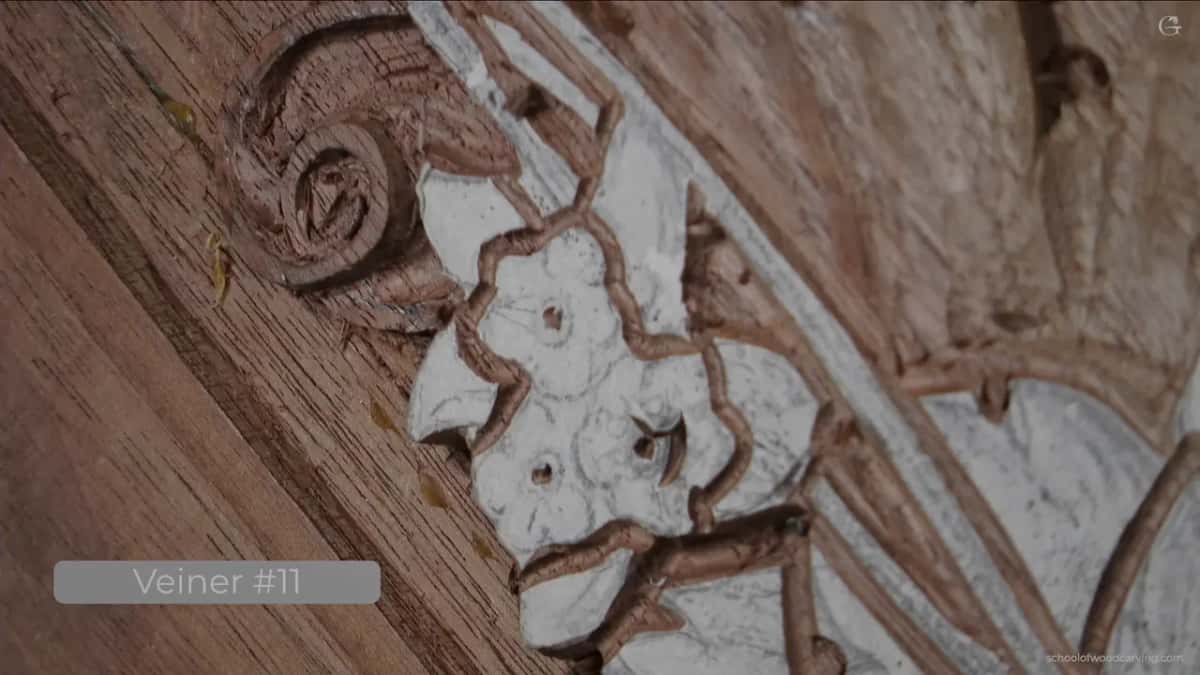
For the rounding I took a number 8 by Dockyard, 3 mm (1/8 in), turned it upside down, zeroed in carefully from one side, then went the opposite direction. That's the dome. Just a couple of cuts, nothing complicated, and I cleaned off the paper there because I don't want to see it. You could even use the mallet here, carefully. In the end I had three small sections, and everything goes to the same dome.

Why must the dome stay the highest spot?
Whatever goes around the dome has to be lower. Nothing is supposed to be higher than the dome, I said, though it could be a little higher, but not much. The dome is more important than anything else on that flower.
For the slopes and leaves I grabbed a flatter tool, a number 3 about a quarter inch (6 mm), and any flatter tool works. I wasn't worried yet about what overlaps what.
Under the bigger flower I went a little deeper, because that gives really good shadow play. Then I took the whole thing lower with a bigger number 3, about 20 mm, three quarters of an inch. Why not?

Around the flowers I went about 1/16 in deep, up to 2 mm in some spots if you wish, but go deeper than that and you lose the feel. The three flowers overlap too. One is the highest, another tucks under the other two, and the right one sits under the left.

The leaf goes right under the flower. I still want to keep it, but it's not supposed to scream. Here it's a secondary detail, an indication and not the focal point, so it gets few details.

What goes into the ring and the petal separations?
The tiny number 11 again, the 0.5 mm one, before the final outline of the petals. I cut a small ring, a groove, about a sixteenth of an inch out from each dome. One millimeter deep is plenty there, maybe a little more than that. A sixteenth there would be a little too much.
Next, every future petal comes down to that groove. A flatter tool is best if you have one, but any gouge works, even a number 9. If you skip the flatter tool, at least think about the center, because all the cuts go to the center and all to the same depth. Don't overdo it, since this is only step one of this stage.

After that I made the dome a little more pronounced with the number 3 and the number 9 from before, and the same tiny veiner went around it with small cuts toward the center, really carefully.
Most people make one cut toward the center at each petal separation, and that's it. I don't think that gives really good depth. To get depth I excavate small, deeper spots at the separations, closer to the center. Flute up, I dig a really deep spot with that half millimeter tool, then turn the flute upside down, undercut a little, and pop the chip out.

Be careful here. If I get too crazy about it, I will break what I just carved. Closer to the dome you get a deeper shadow, and that's what I like about these flowers, those shadow spots.
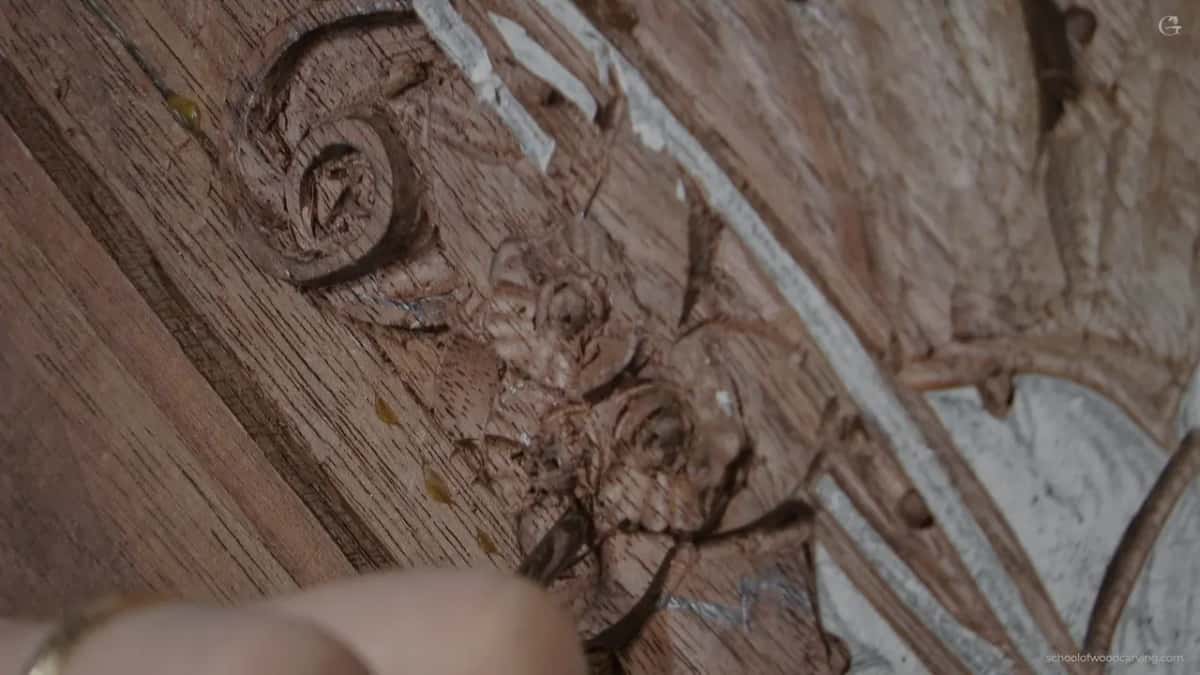
Between the petals there is no space at all. They overlap each other, so you have to decide what overlaps what. On this bunch my left petal goes under the right one, and I kept going the same way. The flower in lesson 29 went the other way round, and lesson 33 takes up how to work out which petal should lie on top.
Should the outer shape of the petals move?
You don't have to do it, and a plain rounded shape still looks nice. I went a little crazy and gave the overall shape some movement, not an arch, with a number 9 or a number 8 turned upside down, chopping those sections slightly. The petals are really small, so don't overdo them. You could add one small cut right in the center of each, and that's it.

What happened when the undercut went too deep?
A piece came loose. To show you how the bunch would look, I started undercutting right under the petals, flute to about nine o'clock. To undercut even better I really have to use a number 11 with the flute to the side, laid on its side, going right underneath. Be careful not to dig into the background, and don't dig too deep.

Oops. That was a little too much. I dug too deep, and you could see the piece come loose. I could have removed it and cut a little deeper, but I didn't want that. I said I would glue it back. Then it just blew out, so no glue.
I cleaned the mess with a number 3 spoon gouge, never going below the background. Even with that part lost, all I have to do is lower that section, the leaf, and make it again. This panel has old glue in it anyway, because the board had cracks and some glue went in to hold it together. I'll clean that a little later.

Don't do what I just did, because it was a big mistake on my part. But the only person who will know is you, and I'm not telling anyone. It's not a big deal, since I can always fix it. A piece came off on the floral panel too, and I didn't need glue there either.
Should you use a router plane on a small background?
Here I didn't really need one. I could probably use the small router plane in this section, but I don't really need to, and a flatter tool brings the background to the same level. If you really like your router plane, though, this is the time to attack with it.
It is one of the really must-have tools for wood carvers, and I showed you three. The big one, sold by Lee Valley in Canada, takes tiny blades, a sixteenth of an inch in mine and down to 1 mm for the tiniest spots. Then there is a mini, and an even smaller micro router plane.
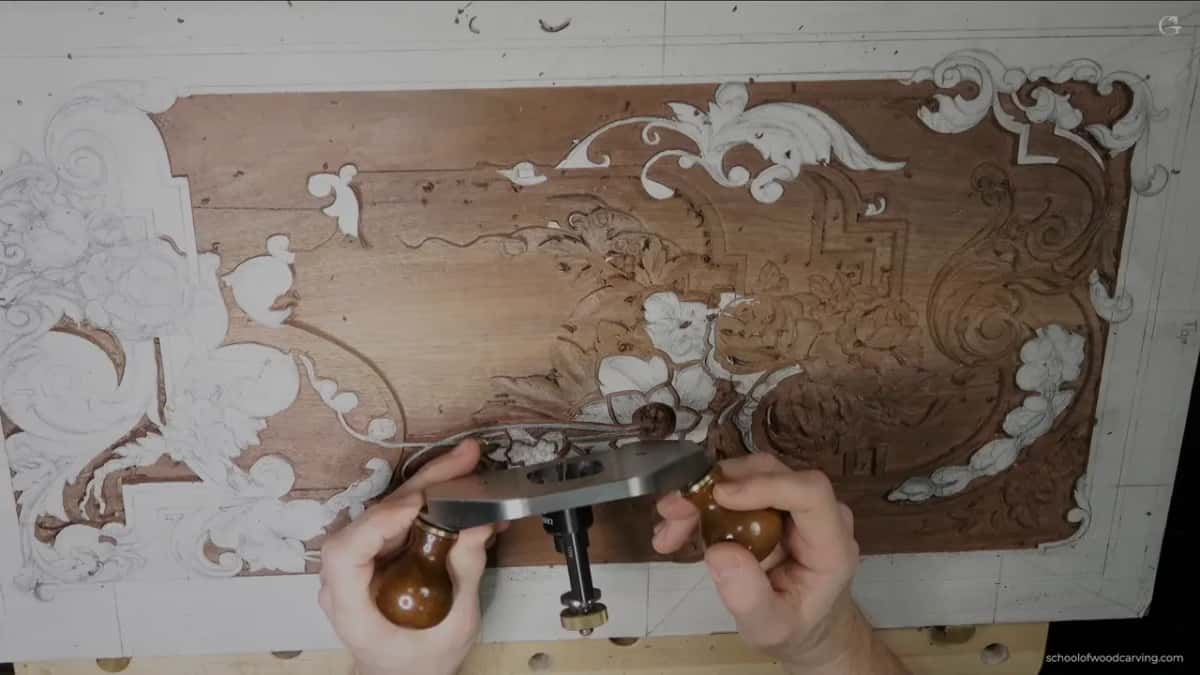
The micro one's blade is really small and tiny, and you still get really good support. It has some limits. In small spots like these it is a really good tool, and it can even lay right on the molding, which is about the same height once the paper is off. A big plane there would be almost impossible. I'm not trying to sell you anything, and I make no money from it.
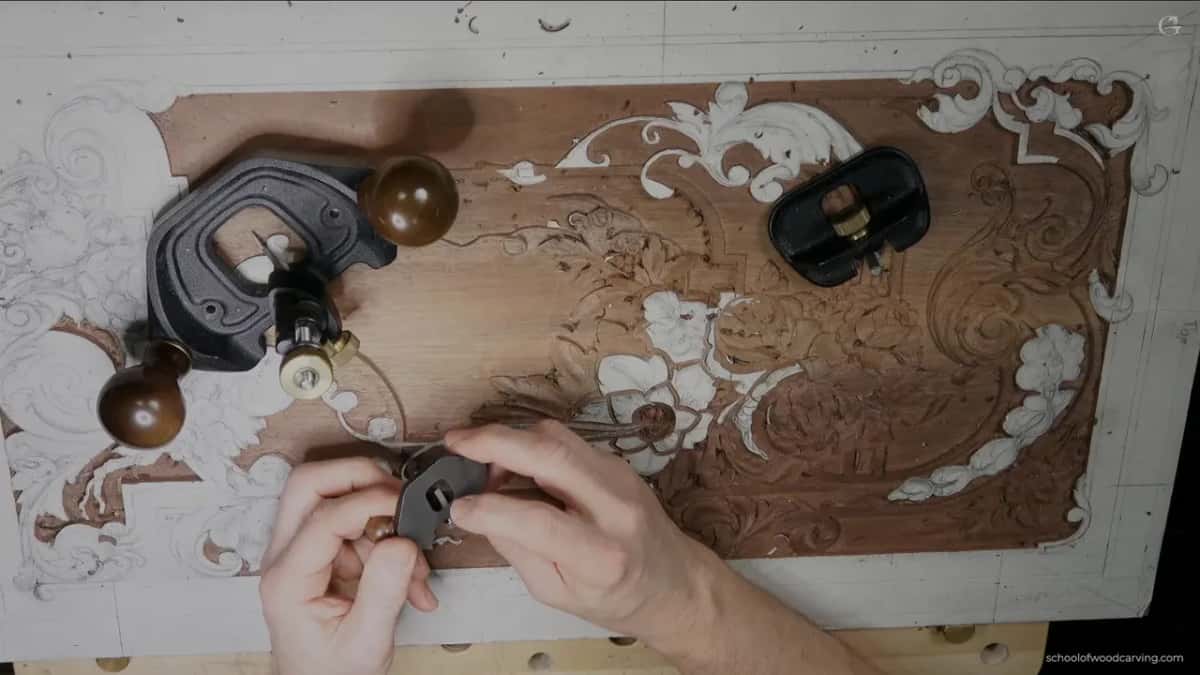
Furniture makers often use a router plane for a few jobs, like cleaning up a tenon or a rabbet, and that's it. In the 18th century it was one of the best tools for wood carvers and furniture makers, and almost every furniture maker back then knew how to carve.
Why change the design once you start carving?
A drawing doesn't show how a piece will look in real life, even one drawn right on the board, and even if you are really good in 3D space. Once you carve it in real 3D, it sometimes looks different from what you expected, and you want changes. That's okay on this panel, because I'm not working for a client. With a client it can create a problem, since they pictured the drawing and it is not always easy to convince them a change will look better.

So I decided things on the way. One part of the tendril could sit on top or underneath, and I put it right underneath, which felt more logical, with a small detail showing on the side. One pencil mark had to go early because it just threw me off, and later I drew again whatever I wanted to see.

Is the bunch finished?
Overall, I do like it. Don't judge yet, though, because it's not done. The rest of those flowers I'm doing off camera, since it is the same idea, and once it's done it should look awesome.
Lesson 25, back in Part 2, gave the hero flower a center like half a sphere, lesson 31 comes right before this one, and the whole course lives on the Carving Furniture Panel, Part 3 page.
Want to see those dark spots show up as the chips pop out? Then carve this bunch along with me, and find Access on the Tuition page.
How it's done
- Outline the bunch first. Run a number 11 around the flowers and the leaf before removing any waste, flute up, and stay level with the background or a hair above it.
- Open the center holes. Using a small number 8 or 9, sink one shallow hole in each middle, tipped to the slope that flower will get. A single cut already reads as a dark spot.
- Outline and round each dome. Circle the dome using a 2 mm veiner, a millimeter deep. Then flip a small gouge over and round it in two passes, one from each side.
- Lower everything below the dome. Drop the leaf, petals and ground around them using a flatter gouge, going no more than 2 mm down even in the deepest spots.
- Groove the ring and bring the petals down. A half millimeter veiner makes a groove just outside the dome. Every petal then comes down to it, each pass aimed at the middle.
- Pocket the separations. Flute up, dig a small deep spot where two petals meet near the dome, then turn the tool over and pop the chip. Pick which petal tucks under first.
- Undercut last, lightly. Lay a number 11 on its side and slide beneath the petals, off the background. Stop well short of deep, because that is where mine let go.
Frequently asked questions
Should a filler flower get a dome or a deep center?
Either one is fine, and so is a dome ringed with small beads. A deep middle with every other cut aimed at it gives one strong shadow spot and few details. A raised dome with a dark hole in its top shows a bit more, which is why I picked the dome for this bunch.
Why did a piece come loose under the undercut?
I went too deep. Laying a number 11 on its side and sliding beneath them works, but these petals are really small. First I planned to glue it back. Then it blew out, so I cleaned the spot with a spoon gouge and will lower that area and redo it.
Can a router plane clean such a small background?
You can if you like using one, though on this bunch I didn't need it and named a flatter tool instead. A micro router plane has a tiny blade and still gives good support, and it can ride on the molding where a big plane cannot fit.
What to carve next