

Alexander Grabovetskiy, woodcarver, School of Woodcarving · Published 2022
How do you carve the center of a flower in relief?
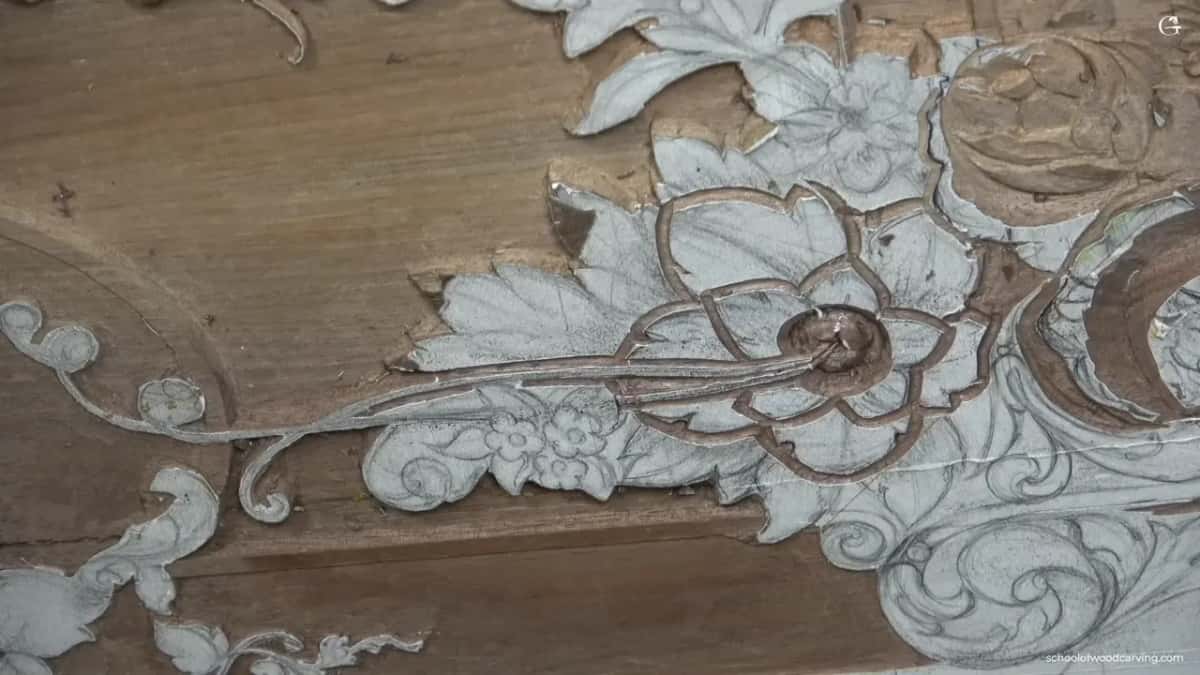
Quick answer: The center of a relief flower is, on my walnut furniture panel, half a sphere with an opening dug inside it. I outlined it 1/16 inch deep with a number 11, dropped the wood around it to about 5 mm, rounded it with a number 5, then dug the opening so the tendrils seem to grow from within.
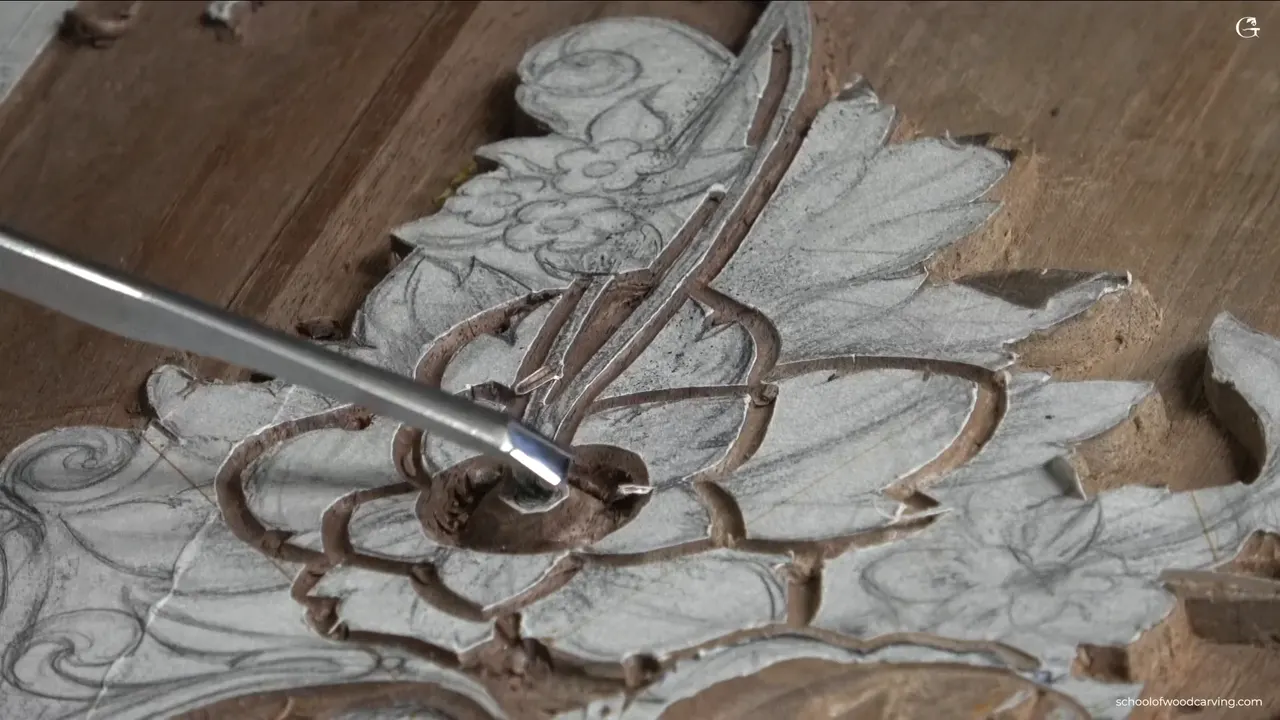
A relief flower's middle on this walnut panel is a half sphere with a dark opening dug into it, and the long tendrils look like they grow out of that opening. This is lesson 25, the last one in Carving Furniture Panel, Part 2. The board is the same walnut board from the design course, 10 mm (3/8 in) thick, and this flower is the hero of the whole design.
Have you seen carved flowers with thin stems running right out of the middle? Ever wondered where the shadow inside them comes from? Then follow the order I used, because on this flower the sphere came first and the opening came second.
Below you get every tool and depth, plus the spots where I was careful. Three short videos hold all of it.
Six moves for the flower's middle
- Outline perimeter, inner movements and center using a number 11, never deeper than a sixteenth of an inch.
- Drop the wood beside it to roughly 5 mm (3/16 in).
- Round the middle into a sphere using a flatter number 5, 6 mm wide, with a few slicing cuts and an eye on the grain.
- Open the inside with your smallest tools.
- Pencil five divisions on the dome, placed differently from the separations in the outer petals.
- Lean each separation so the left part lies over the right, flute near one o'clock.
Why does one flower get a 3D center?
In the design lessons, we drew a cluster of flowers, and that cluster was the main hero of the whole design. This flower belongs to it. While I carved, I called it the hero again, the main focal point. So right in its center I wanted something that looks 3D. Full 3D.
That meant dropping the areas around it, making a half sphere, and leaving some kind of opening inside it for the tendrils to grow from. I could do that here only because the background in this spot was already lower, and I had really good material to drop into. Lowering the background was the work of lesson 15 through lesson 19 in this course.
What are the long stems coming out of the middle?
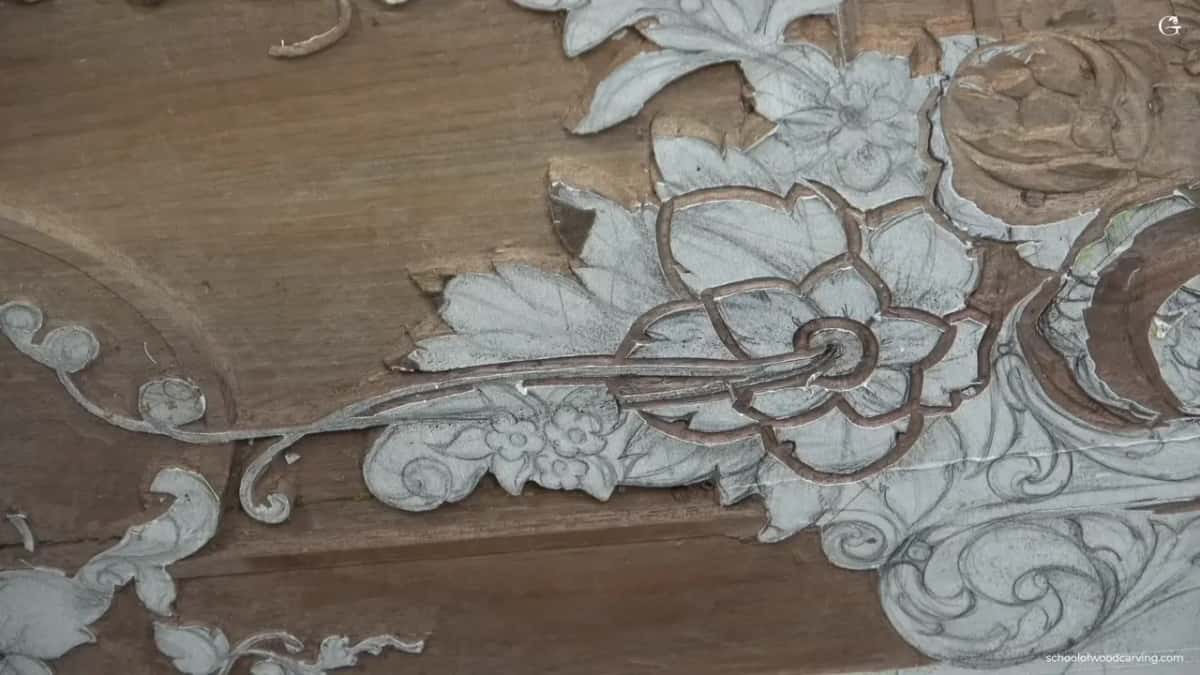
I call them tendrils. Even that name is a guess. They are not tentacles, because this is not an octopus, but they do look like something crawling. Botany has its own word for the real plant part. Wikipedia says a tendril is a thread-like stem or leaf that a climbing plant uses for support.
If you would ask me why I would do that, I don't know. I never saw any flowers in life like that. It is more stylized, and I wanted to stay authentic to the period, because that is what they did. In the first video I even said I am not necessarily a really big fan of it, but I still think it is good to follow what they did.
By the third video they looked like tentacles to me, and I said I really love how they look. I even asked you to tell me the right name.
Tendrils come back on this same panel in Part 3. During lesson 32, I kept one tendril no wider than 1/16 in, about a millimeter and a half, and said you could even go a little less. Over in lesson 31 I worried about breaking them, because they are going to be tiny.

How deep should the outline go?
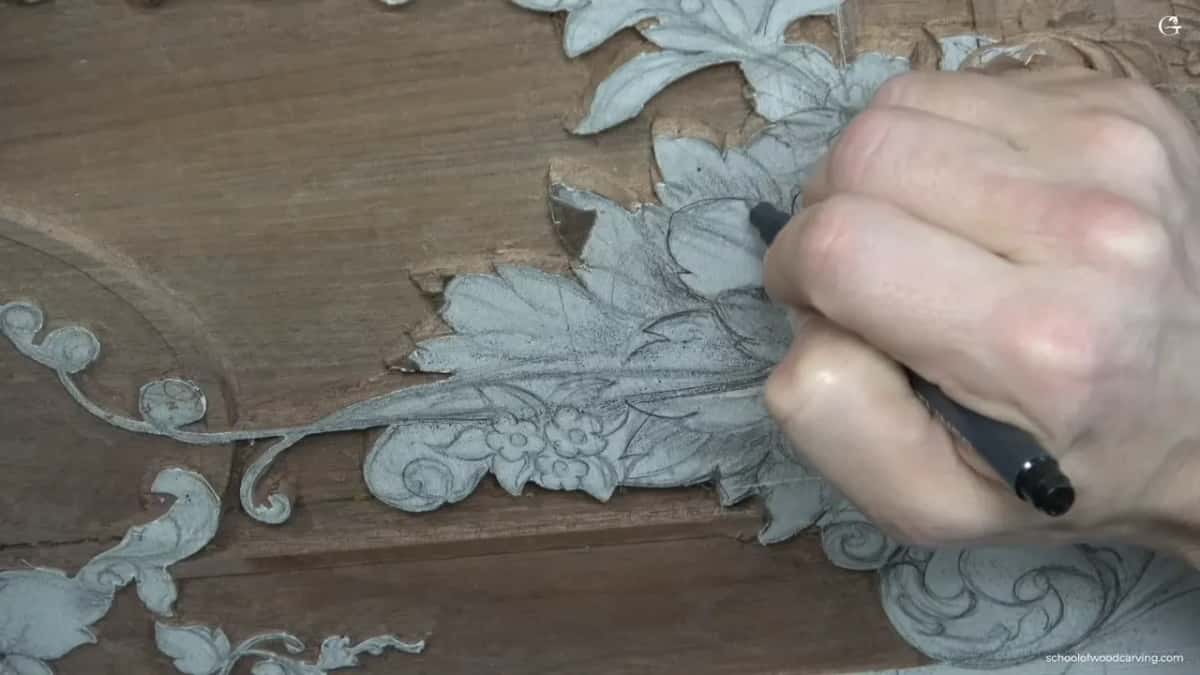
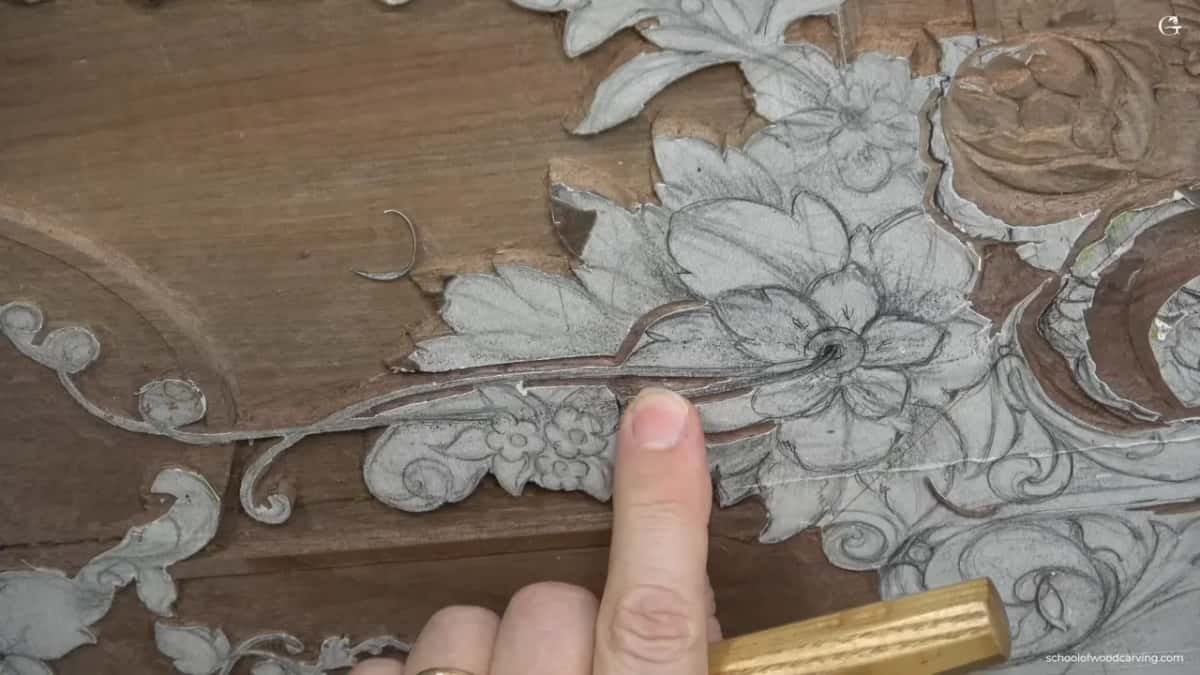
Only about 1.5 mm, at most. Before that, I went over the drawing with a marker, though I don't have to. A marker gives me a better line, and I remember the shape much better after tracing it.
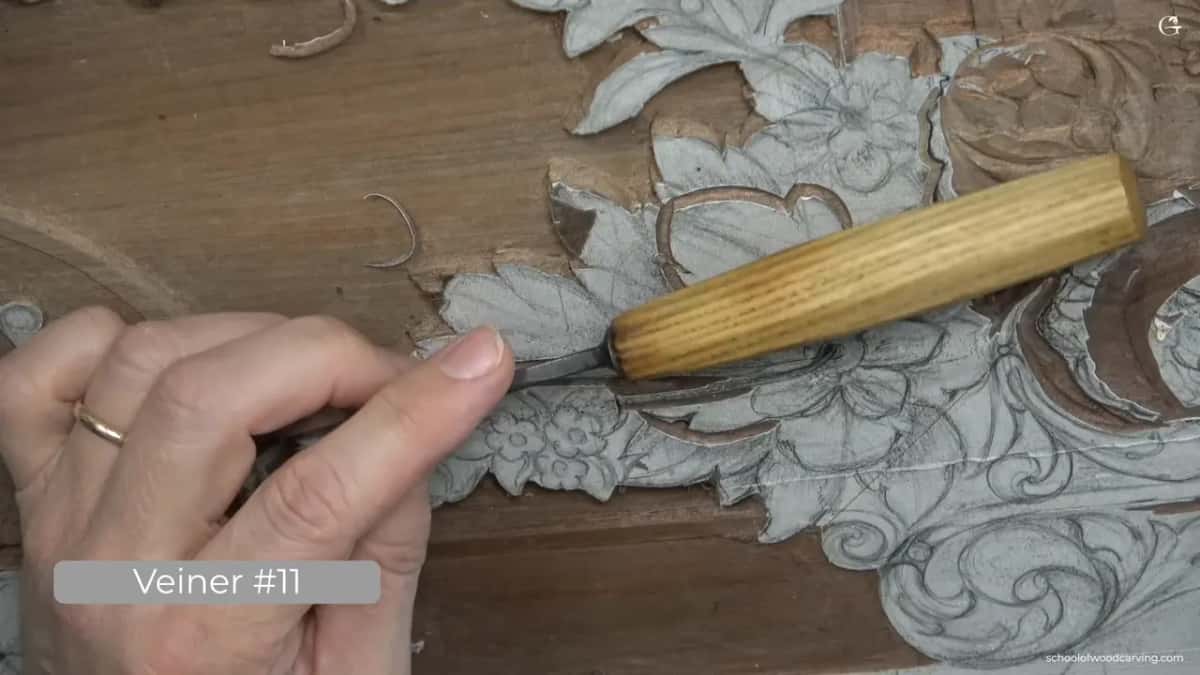
My first tool was a number 11, 1/8 inch, about 3 mm. I love number 11. This one is an antique, and I really like its steel. Most of the world calls it a number 11 veiner. While the outline went in, I talked for a while about the history of tool development, because I really like that history.
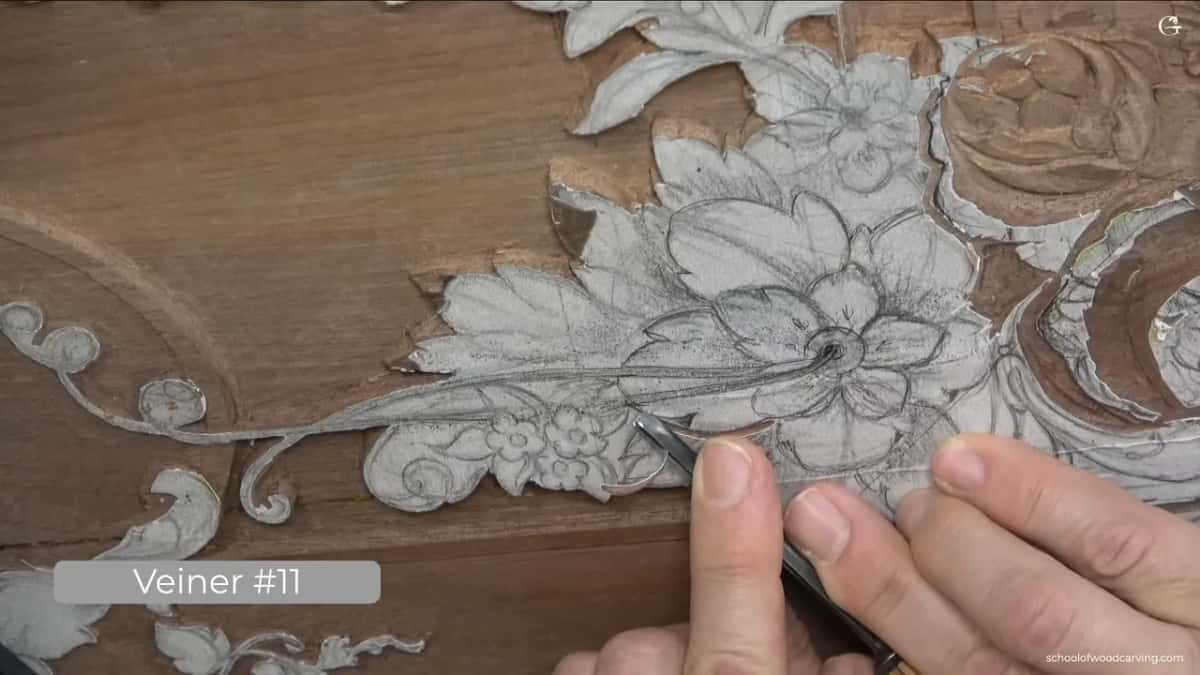
I outlined three parts: perimeter, inner movements and center. The small triangles in between could wait until a little later. My line went only to about one point, since I didn't want to go all the way through those two movements.
Where one part drops right underneath a leaf, I had to stop. In one spot I said I could probably do a little zipper cut. And where a big triangle opened up, I said that separation could probably go in right away, safely.
Why use a mallet on work this small?
Control. A mallet actually gives you a lot more of it, and I know I have said that multiple times. You can outline just by pushing the number 11, and that line becomes your stopping point. Still, a mallet is a good idea sometimes. Not a big one. Mine is a small bronze mallet placed right on my palm, and that gives you really good control.
Back on this panel in Part 3, lesson 32, I asked you to pay attention to how I hold it. It just sits in my palm. I am barely touching the tool, and I am not holding it by the handle. One more rule came up while I outlined. It is a good idea to always carve with the grain.

How do you turn the middle into a sphere?
You go down around it first, and only then do you round it off. After the outline I said I could go a little deeper in this one area, with absolutely no problem. The plan was to make the middle like half a sphere, almost, and the deep background let me go to about 5 mm.
At about 3 mm I said I have to be really careful, because I was already really deep. So I cleaned a little around it with a flatter tool, a number 5 about 6 mm (1/4 in) wide by Ashley Iles. I like that tool maker too. Their steel is one of the best in modern days.

Then the number 11 went back in, slightly deeper, until I was really close to 5 mm, about 3/16 inch. Next came the number 5, going around the sphere with a few slicing cuts.
What I like about walnut is that it is somewhat forgiving. Sometimes you could go against the grain, and nothing bad is going to happen. You still have to keep an eye on what the grain does. But it is not the same as other species. Really forgiving.
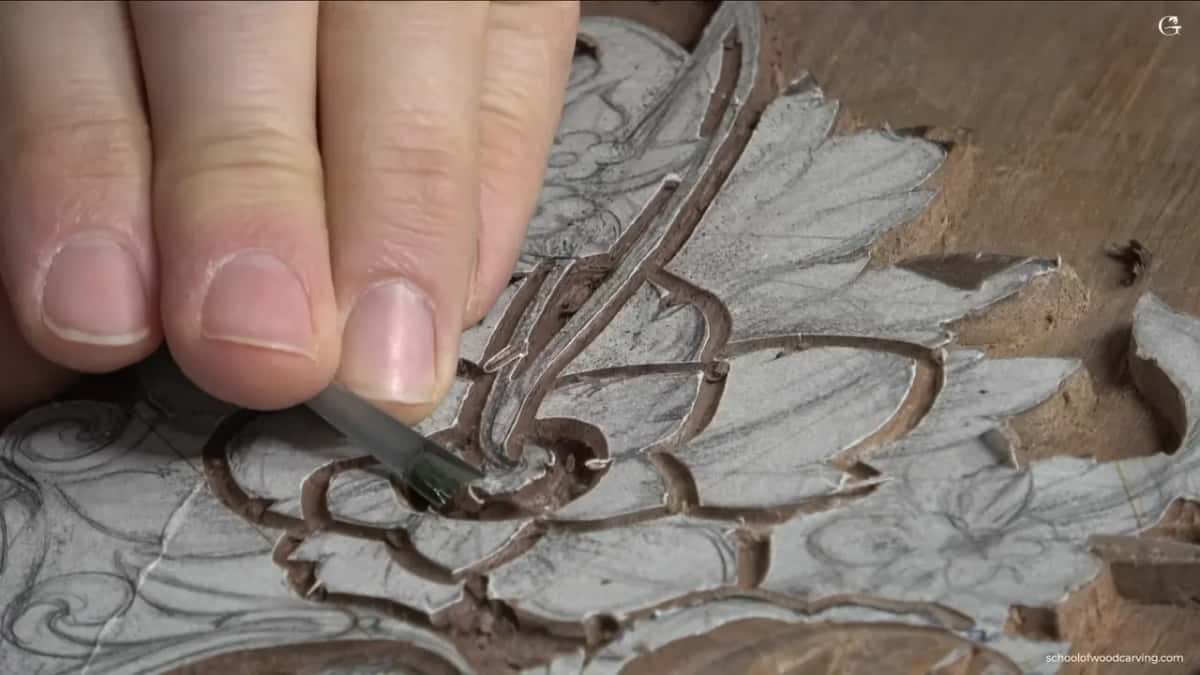
I said the same about walnut in lesson 32. In my case it is a little forgiving, but some species are really crunchy, and if you take too much material in one pass you can snap off the whole detail. So there I went straight down first and cleaned with the side of my tool, bit by bit.
That was step number one. A really nicely rounded sphere.

Which tools dig the opening for the tendrils?
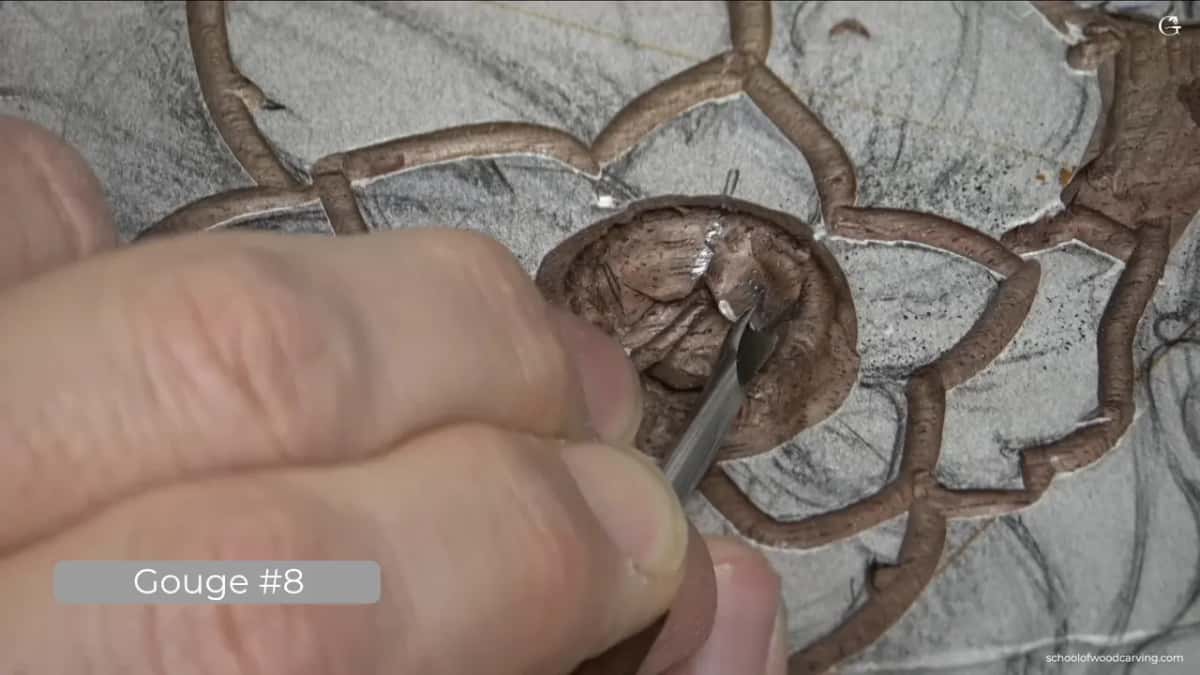
Really small, tiny tools, and a lot of care for the border. Step two was to excavate the hole right inside that area. I picked up a number 8 by Dockyard. Dockyard is just a brand of really tiny tools, but they are really good for that job. I believe this one is only 1/16 inch, about one and a half millimeters. Not expensive tools, but really nice.
I wanted the illusion that the tendrils grow from right inside, which means I had to excavate much deeper there. Even that tool could be a little too big. Number 8 or number 9? I could not really say. By the profile it is probably an 8, and it doesn't really matter. I grabbed a smaller one, supposedly one millimeter. I doubt it. I think it is slightly bigger, which is okay.
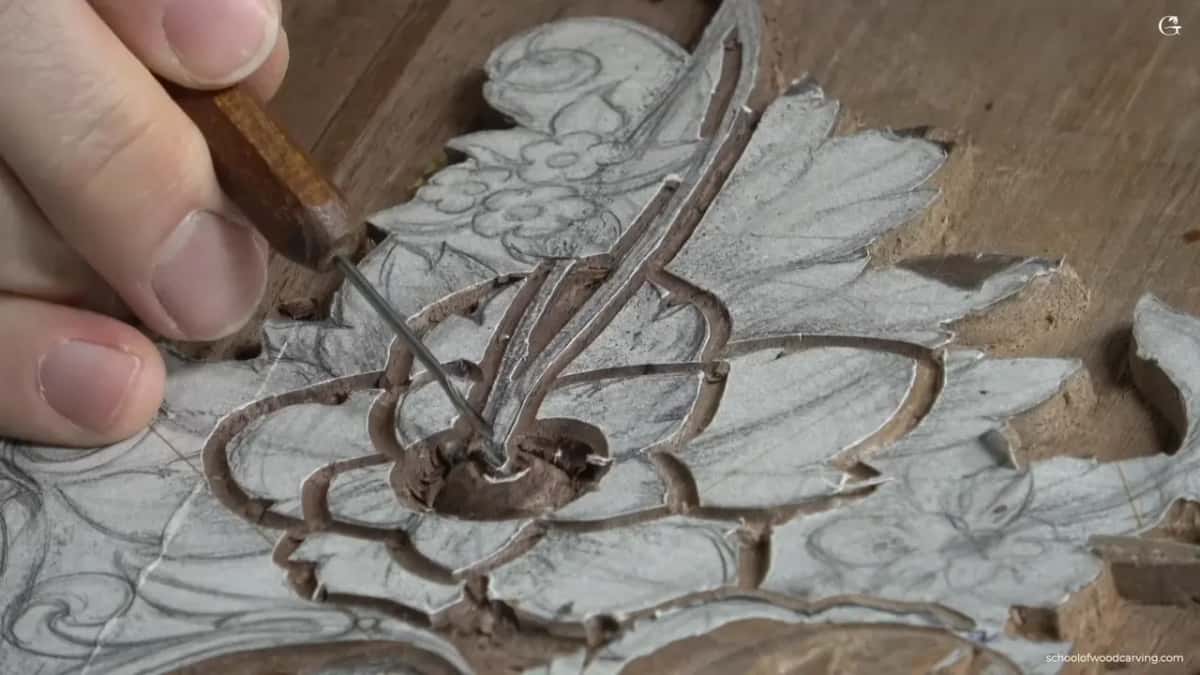
I did not want to destroy the border. My goal was to excavate inside and create that shadow on the inside.
Next, the sides of the tendrils came down a little, so they feel like they grow from that center. For that I used a really tiny number 3 by Peter Benson, and Ashley Iles makes those. Really thin, and I can do a lot of details with it.
Losing my earlier lines did not worry me. I went back to the 1 mm tool from before and cleaned it all. Just be patient. I have to tell myself that. I guess it is one of the benefits of wood carving. It builds your character. Or maybe you are becoming patient with me.

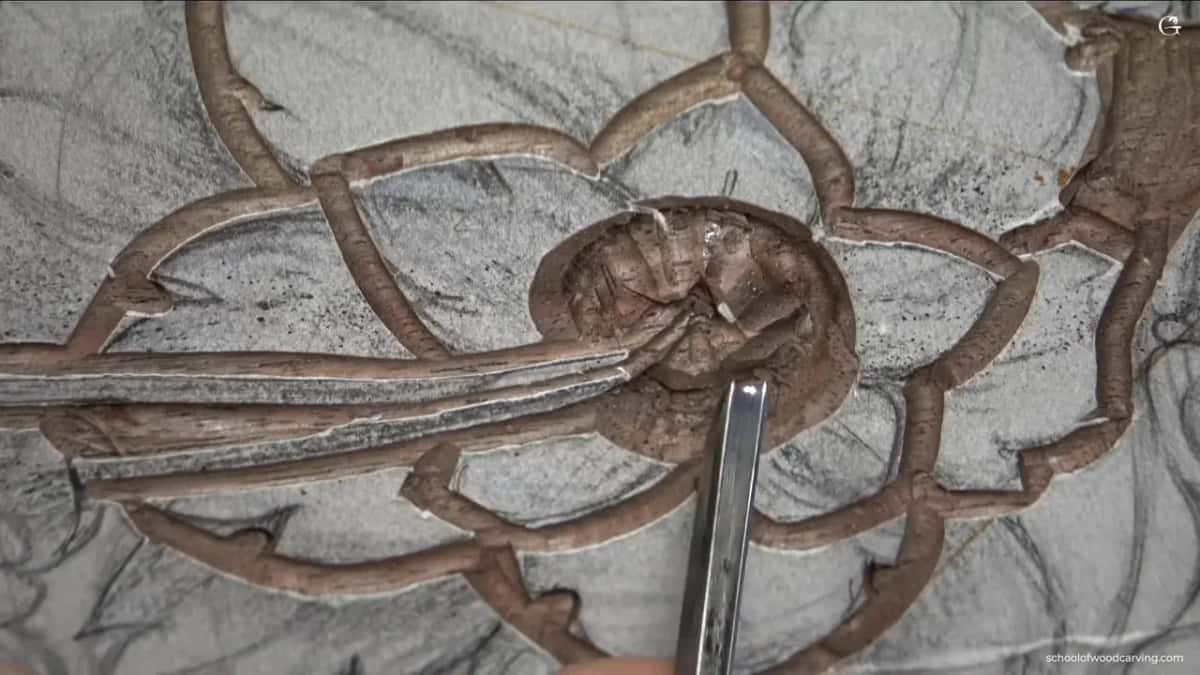
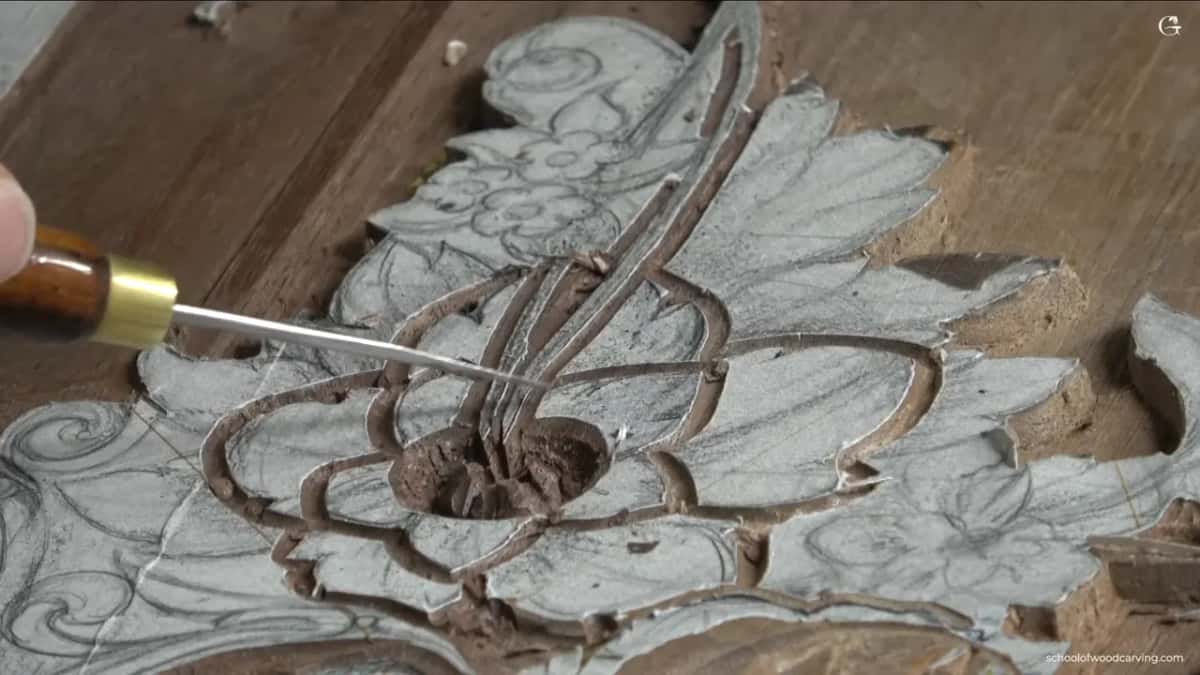
I carved on both sides of the tendrils, and as I went deeper a beautiful shadow developed. Then I went a little bit right underneath. Somewhat like undercutting, almost. Not a full undercut, but I really love the shadow it gives.
Between the two tendrils I made a separation cut with the same tool, all the way in, and now they do look like they scroll from the center. There is no end to how deep I could excavate under that area. But I had plenty of shadow, so it was okay.

Does the half sphere always come before the hole?
Not on every flower I carve. On the Floral and Molding panel, lesson 13, drilling the center hole was step number one, with a tiny tool of about one millimeter held straight, 90 degrees to the surface, as a plug cut. Its label said 1.5 millimeters, and it was smaller. So when you buy tools, don't count on them being really accurate.
In lesson 7 of that course, after the half sphere, I had to reestablish my hole in the middle. A number 9, 1/8 inch, did it. Drilling it would also work, I said. That center was about half an inch, maybe 12 mm.
And one lesson before this one, in lesson 24, the flower was tiny, only about 10 mm (3/8 in) point to point. There I warned that when carving toward the center along the grain, if I push too hard, I can snap out that middle part. On this hero flower there was room for a deep sphere first, and the opening came second.
Why put five divisions in the dome?
The dome gets exactly the same idea as the outside petals and the second layer of petals. It has separations too. So I took a pencil and marked five divisions right on it. Their positions, though, I did not want to repeat, so I started mine from somewhere in the middle.
Don't worry about the mess at this point. Once it's done, it is going to look really awesome. The number 3 came back, the same one as before, 3 mm, 1/8 in. First I wanted some kind of shape, so I removed a few triangles and made it a little curlier. Those small parts in the center are not really petals, and I have no idea what you call them.
Next, the middle of each of the five should be raised. Bulging up. That makes it convex, and to get a convex I have to make a concave on each side of it. One of them will also go underneath another one, so the movement is not just a sharp edge. I left that overlap for later.
For the concaves I took a number 8, and I don't even know its size. Not 3 mm, not 2 mm, maybe two and a half. Roughness did not worry me yet. All I worried about was the movement, the curliness.
Then a smaller number 8, a sixteenth of an inch, went along the side of the first bulge to make the curl of the edge stronger. Not every one of them needs it, but it gives me some interest.
Which way should the separation cuts lean?
To one side, so one part lies over the next. I wanted an overlapping effect, not a straight down separation. For this I reached for a half millimeter number 11 by Two Cherries, and said you could actually use any other tool too.

Then I picked up an antique number 16 instead, about 35 degrees. If you don't have one, any tool will work. I just like the idea that somebody used that tool before me. It has history attached.
My aim was the left part overlapping the right one. For that I point my flute, the middle part of the tool, to one o'clock or so and make the separation. All of them get exactly the same.
In lesson 29, on this same panel, I explained the clock. The flute is the center part of the tool, 12 o'clock is straight up, one o'clock is toward the right, and 11 o'clock toward the left. There, too, the right side went underneath the left, with the flute at about one o'clock, and I said it is just approximate.
What makes it read like a real flower center?
A little undercut. I said we have to undercut that middle part somewhat, so it looks just like the center of the flower. Most of that comes later. A preliminary pass with the number 16 was enough for now, and the same tool made a sharper, thinner line between two of the shapes.

Cleanup came next, with the number 3 at 3 mm, the Peter Benson one again. I just love that one. Used upside down, it takes off the facets and makes them smoother. Take your time and make it look really nice. It doesn't have to be perfect.

With the same tool I made a rolling backward effect and started undercutting. Be careful here, because you can break your tool, and you don't want to break your tool. Little by little, cut by cut.
Seen from above, the outside is not a perfect round. Those petals have separations between them, so I removed small triangles there. You can get a really deep undercut if you want to, and it looks really nice when you get a little deeper. And I got a really good shadow going.

My undercutting in lesson 29 was done with a half millimeter number 11, again with the flute near one o'clock. You could already see how dark a shadow it casts. That is what I am after.
The main tools from the three videos, in the order I used them.
| Tool and size | What it did on this flower | Left behind |
|---|---|---|
| Antique number 11, 3 mm (1/8 in) | Outlined three parts of the flower, never deeper than a sixteenth | A stopping line |
| Ashley Iles number 5, 6 mm | Cleared the wood beside the middle, then rounded it | One nicely rounded sphere |
| Dockyard number 8, about 1.5 mm | Dug deeper inside, so each tendril seems to grow from within | A deeper hole |
| Peter Benson number 3, 3 mm | Lowered the tendrils, then shaped five divisions | Five rough parts |
| Small number 8, maybe 2.5 mm | Made a concave beside each division, so its middle bulges up | Convex middles |
| Old number 16, about 35 degrees | Leaned each separation, the left part resting on the right | An overlap |
Why did this panel take so long?
This panel is not for a customer or a client. I am doing it just for school. I had a huge project, and with a real life project I have to honor the deadlines, so for a while there just was not enough time to carve this one. I really love the overall idea now. A lot of rules of design went into it.
You get tired sometimes when you are working on one spot, and you really have to jump. And I jumped to this flower. Some of the other flowers I did not finish yet. Next time comes the rest of them, and that work goes on in Carving Furniture Panel, Part 3.
Not working for a client has another side. A design on paper sometimes looks different once it is carved, and then I make changes, as I said in lesson 32. And it is okay on this panel, because I am not working for a client. With a client, sometimes it is not easy to convince them that the change will look better.
Do you like the look of a carved flower with a deep, dark middle? Would you try one on a small panel of your own? Then start with the outline and the half sphere, and take your time on the opening. Every lesson of this panel is open with Tuition.
How it's done
- Outline three parts. Take a number 11 near 3 mm and run the outline around the whole flower, staying shallow. Small triangles can wait.
- Drop the wood around the middle. Where the background is deep enough, clear beside the middle with a flatter number 5, then bring the number 11 back toward 5 mm. Be really careful once you pass 3 mm, because by then you are already deep.
- Round the half sphere. Slice around the middle using the number 5 until it reads nicely round. Watch the grain, even in walnut.
- Dig the opening. Use the smallest tools you have, around one millimeter, and excavate inside without destroying the border. Lower both sides of each tendril so it seems to grow from the center, and be patient.
- Divide the dome in five. Pencil five divisions placed differently from the separations of the outer petals. Raise the middle of each by making a small concave on either side of it.
- Lean the separations and undercut. Point the flute to about one o'clock so the left part overlaps the right, then smooth the facets and undercut little by little so you don't break the tool.
Frequently asked questions
What gouge outlines a flower center?
A number 11 veiner of 3 mm made the outline here. Mine is an antique with steel I really like. Pushing it works, though a small mallet resting in the palm gives more control, and that first line stays shallow, a sixteenth at most.
Is walnut forgiving to carve?
Somewhat, on this panel. Sometimes I could go against the grain on walnut and nothing bad happened, though you still watch what the grain does. Some species are really crunchy, and taking too much material in one pass there can snap a small detail right off.
Where does the shadow inside a carved flower come from?
From depth and a slight undercut. I dug the opening with tools of one to one and a half millimeters, kept the border whole, and went a little underneath the edges of the tendrils. The deeper I went, the more shadow showed, until there was plenty.
What to carve next
- Carving Furniture Panel, Part 2, the carving stage
- Carving Furniture Panel 24, the lesson before this one
- Carving Furniture Panel, Part 3, where the panel continues
- Designing Furniture Panel 12, the flower cluster
- Carving Floral and Molding for the Panel 7
- Carving Furniture Panel 32, tendrils on the same panel