

Alexander Grabovetskiy, woodcarver, School of Woodcarving · Published 2025
How should you hold a gouge for fine detail work?
Quick answer: Holding a gouge for fine detail work is a matter of where the fingers sit. On my grape onlay the tool lies right on my middle finger, another finger presses on top of the steel, and my pinky rests on the wood as a support. With that grip I have a lot better control.
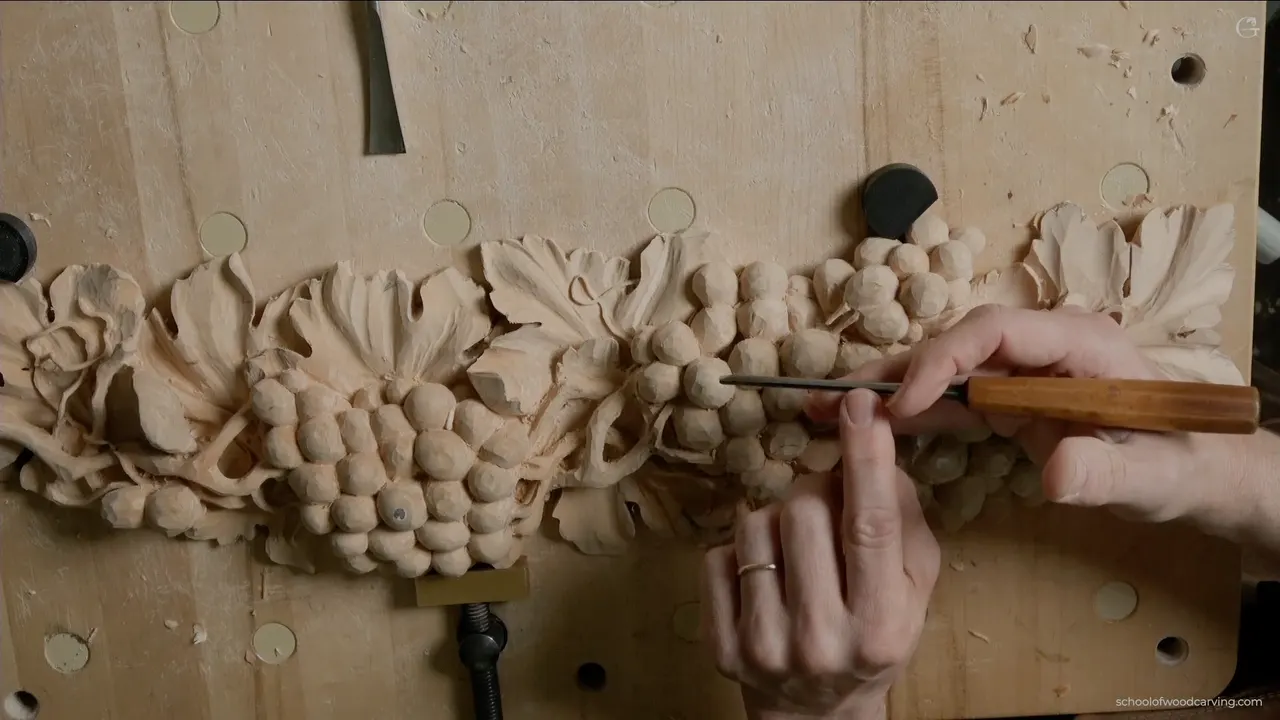
Fine detail with a gouge is finger work. Early in this lesson I told you to pay attention to how I am holding my hands, because it is really important. I place my tool right on the middle finger and put one more finger on top. My pinky goes down for support. And then I have a lot better control.
Do you want a small gouge to stop right where you aim it? Would you like the grape beside it to stay the way you left it? Then begin with your fingers.
In the last video I said I wasn't going to finish this piece. I'm really busy right now with shades for a pipe organ that's going to New York. But multiple guys asked me, so I went ahead and did part of the work. Most of it is small. A few choppy grapes got refined, a micro stem went in between two of them, and my tools went all the way down to 0.5 mm.
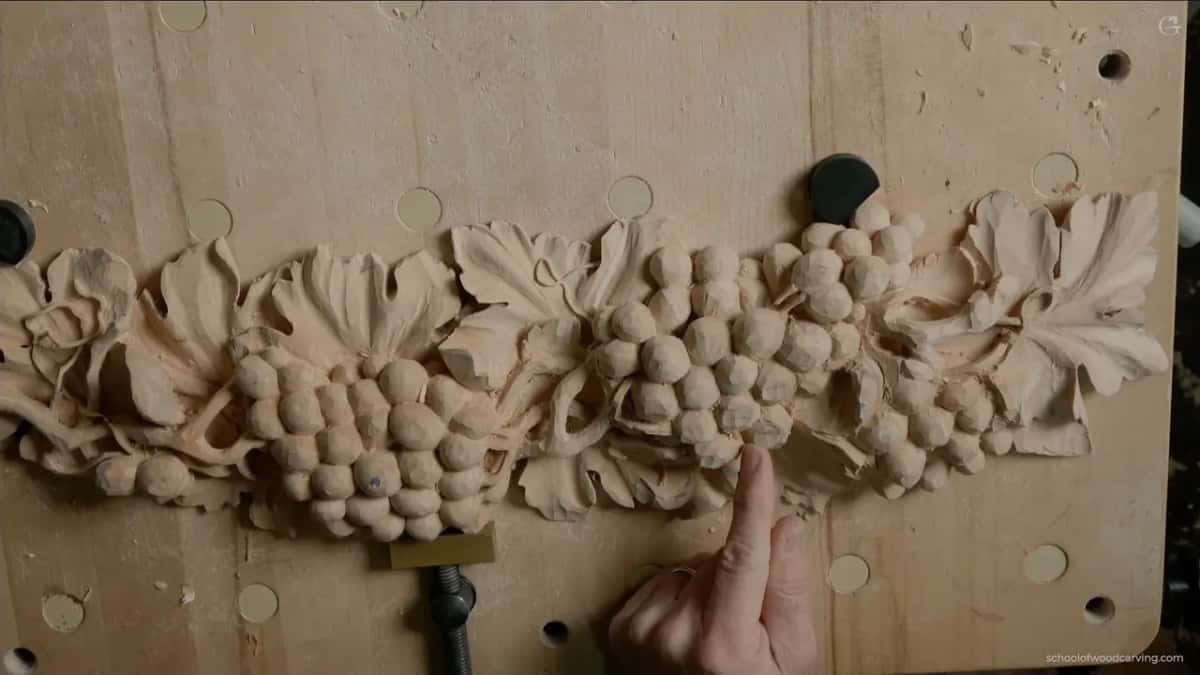
Three fingers and two hands on the board
- Middle finger under the tool.
- A second finger holds the steel from above.
- The pinky sits on the wood as my point of support, even where the camera can't show it.
- Two fingers go down whenever the pinky can't be used.
- Both hands stay down.
- Thin stems get tiny passes from each side in turn, with no cranking.
Where does each finger go on a small gouge?
The tool goes right on the middle finger, and another finger sits on top of it. That is the whole setup. I showed it with a number 11 of two and a half millimeters, outlining a new spot between two grapes, and my pinky was the support. You don't really see it, I said. Maybe you'll see it from this camera. See that pinky? It's really good support.

I gave the middle finger a name on another project, the furniture panel in lesson 18. There I was working inside one spot with a one millimeter number 11. That's my controlling finger, I said, the middle finger. It holds the tool, the other hand pinches, and that way you can gain much more control.
After that came the other half. Also important. Both hands really, really solidly on the board, and do not raise your hands. Lift them in the air and try to do something like airbrushing, and it doesn't work in wood carving. Support your hands.
What is the pinky doing down there?
The pinky limits how far the hand can go. Back on that furniture panel, in lesson 20, I took a half millimeter veiner and held my finger really tightly to stop the slipping. I was blocking my movement with my pinky. So the pinky is not moving at all, only the finger which is holding the tool.

Sometimes one hand has to come up off the board. In lesson 18 my right hand was raised up, and I still placed my pinky down and just supported with it. You just find some point with the pinky. It's all about controlling your tool, and if I can't use my pinky, I'll place two fingers. Either way I'm really solidly placed, so I know for sure I'm not going to slip with my tool.
The reason for all that came on the Greek acanthus leaf. When you work with the grain, you have a tendency to push too hard, and you can chip a section and it's going to fly out on you. It is not the safest. I control the movement with the pinky and with that hand, using just my hand muscles, and at the really tiniest details, almost weightless, like air, you can easily break it if you don't have enough support.

The same habit is in other lessons too. On the lily box I was working with just fingers and used my pinky to limit myself, so I could avoid slippage. For the Hashemi flowers it went right below the spot as a support, because I couldn't press too much there. And on the modern acanthus I was raising my hand, and my pinky was still holding solidly.
Why slice with a gouge instead of pushing it?
A push is not good for every pass. Before the tiny tools came out, I refined a few grapes with the main tool for that part, a number five of about 15 or 16 millimeters, about five eighths of an inch. Right now they look choppy. I've got a lot of rough areas, but that's okay. My corner goes right inside the triangle between grapes, carefully, because I don't want to damage the neighbor one.

See how rough that side is? Really, really rough. No good. But the trick is to make it really nice and shiny, and for that you don't push your tool. Lots of guys place the tool like this and they push. I know my tool is sharp, and in my case it's okay, but it's not good everywhere.

What I do instead is slice, with a kind of rotation motion while I carve. And because I'm slicing and my tool is absolutely sharp, the grain direction doesn't really matter in this case. Later the same idea took the facets off one grape, with a 14 mm number seven, slice by slice.

How small do the tools get for a micro stem?
Down to half a millimeter, and by then I had magnifying glasses on. The micro stem is the little thing that goes between two grapes, and honestly I don't know how to call it. I'd said before that we could take this to the extreme. I picked a good spot for it. Adding stems or whatever is connecting things, make sure you just follow the overall flow.
That same tool outlined it. Close to the previous grape I needed a much deeper pass, because the stem is supposed to come from underneath, so I excavated the excess and went back in with the previous tool, about two millimeters. My next tool was smaller. The 6 mm number five looked almost like a number three, so I grabbed a number two of five millimeters, three sixteenths of an inch, for two tiny spots and poked from above, down, on both sides.

Smaller again after that. The next number two was only 2 mm, and it took a few passes straight down, nothing aggressive, little by little, from the left grape and then the right grape. After it came the really tiny ones, a number 11 of half a millimeter and a number nine by Dockyard of about one millimeter. With the flute upside down, at six o'clock, I started excavating right underneath. Carefully, carefully. As deep as I could.
I could feel it fighting me next. I grabbed the 0.5 mm, made an even deeper channel, and went right underneath that little stem. I attacked from the other side too, kind of hook, hook, and hook out, the flute upside down again. A one millimeter tool got rid of the mess inside, and from the far side I drilled all the way through with a wiggly pass going down. By then my stem was about a sixteenth of an inch, roughly 1.5 mm.

| Tool | Job | Video |
|---|---|---|
| A number five, about 16 mm (5/8 in) | Sliced the rough grapes smooth, the corner going right inside that triangle | First video |
| Number two at 5 mm (3/16 in) | Poked from above, down on both sides, to reach two tiny spots | First video |
| Half millimeter number 11 | Sank an even deeper channel right underneath the micro stem, from each side | Second video |
| Number two at 2 mm | Small passes straight down beside both grapes, then the tiny chamfers | Second video |
| Back bend number three, about 6 mm (1/4 in) | Could easily get inside the corners where both sides stood higher | Third video |

What does no cranking mean on a stem that thin?
It means little by little, without forcing the tool, because a crank breaks the stem. I said it on camera. I'm not forcing, and I'm also not cranking on this one, because if I crank, I'll break it. I even corrected myself there. I shouldn't say I'd be able to. I'll break it.
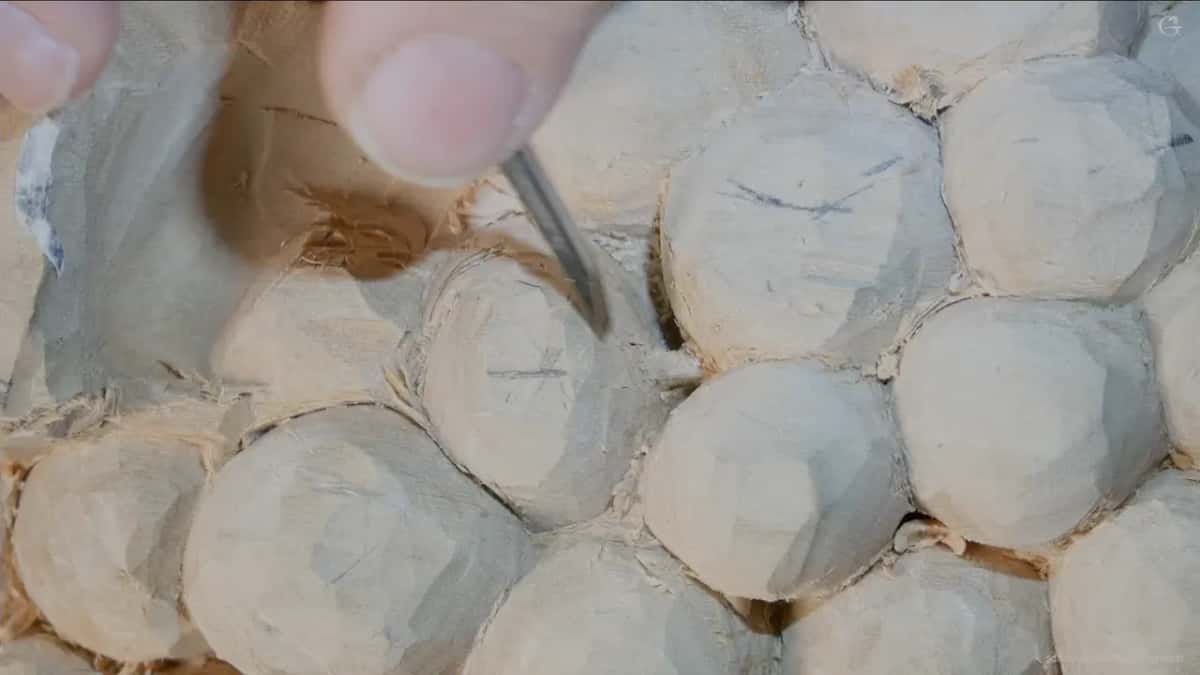
I broke one of these before, on the piece I traveled with from the Marc Adams School. It did not survive the trip. On this relief I kept an eye on how tall the detail was. I wasn't too happy with how deep I'd excavated at that point and wanted to get a little deeper, but I don't want to excavate too much and then regret it. In lesson 10 I said the same about not cranking on a part that was airborne.
Where the stem meets the grape, I made a connecting point. When you look at real grapes, they do have one: the connection goes like this and joins the grape itself. That same 2 mm tool, a little bigger than a sixteenth of an inch, went in with my flute toward the grape. Small, tiny chamfers followed from that point. Hope it makes sense, at least some of the sense.
Which tool would I rather have had for this spot?
A small tiny spoon. In this case I probably should have used one, and I showed you this gouge on camera. I can get right underneath with it, and see how quickly it takes all that waste out. That would probably be the best tool to use. If you can find one, it's a really good tool to have.

When do the magnifying glasses go on?
When I can't see anything anymore. I said those words right as I left the tools of up to half an inch and switched to a smaller one for the micro stem, and I put on my magnifying glasses. Before that I placed a couple of lights.
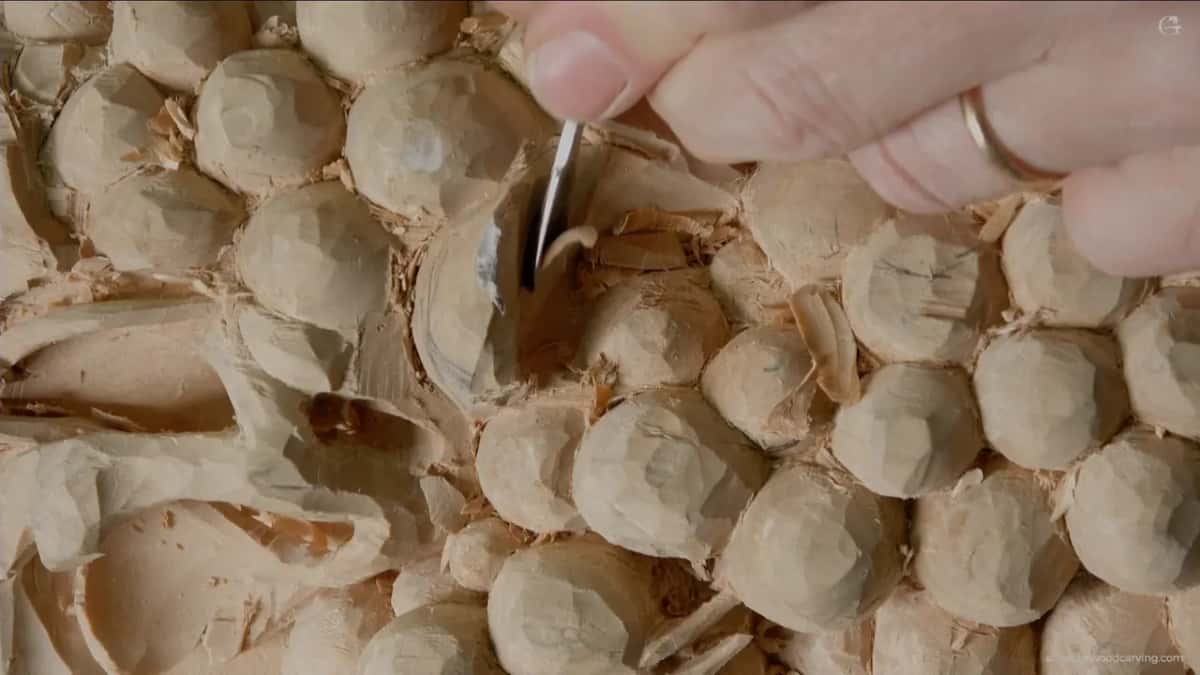
They came off later, when I picked up a 10 mm number two to chop the side of a grape straight down. That grape looked a little too wide for my taste, and it's not supposed to look wider than longer. I got my pencil, chopped that side out, and started shaping it a little smaller.
There were a lot of shadows on the wood by then. I think it's not a bad idea to see those shadows right away.
Should every grape in a bunch be the same size?
No, and in this lesson I said it outright: not all the grapes are supposed to be the same. Because I brought that motion in for the stem, one grape had to become a little smaller, which is okay. I guess it was a good grape to work on.

Since I was changing the size of that grape completely, I outlined its approximate shape with the tool already in my hand. It comes out somewhat like a golden ratio. Look from above, take this point, that point and this point, and it falls approximately to the golden ratio. There's my 62 and there's my 38, the same numbers I used for a point on the leaf in lesson 8.
Filling another opening later, I reminded you of the rule from when we did those grapes. We are aiming for the triangles next to each other, so try not to get quads. The placing itself is in lesson 2.
How deep should the wood drop around a grape?
About 10 millimeters, three eighths of an inch, for the grape I wanted to read with the full body. The leaf there can go much deeper, so I could drop it and excavate much deeper beside that grape. That put me approximately at the depth I was after.

There's a point where it gets hard to go deeper, and there I switch to a spoon. Under one leaf a number 11 spoon did the best, and it gave me a beautiful, beautiful shadow. I still had paper, and I'm happy about that. It means I'm still using the full body of the material.
One more section wanted to go much deeper for a much better shadow, and the best tool for it would have been the half millimeter. But it's probably too early to excavate too much. Reason why, I don't know what I'm going to do with that section yet. It's raised up, and I like it. So I took a little off the side with a big skew, because it's the quickest, and left it about five millimeters (3/16 in) thick. Later on I want it almost paper thin. That was enough for one day, and I said I'd see you next time, in lesson 14.

Would you like to watch the micro stem go in, pass by pass, from the second camera? Then come carve the whole grape onlay with me in the full lessons, and set the tool on your middle finger before the first grape.
How it's done
- Lay the tool on your middle finger. I place my tool on the middle finger. I called it my controlling finger on the furniture panel, and the other hand pinches.
- Press a finger on top. Another finger presses on the steel from above. With that and the middle finger under it, I get much better control.
- Set the pinky down. My pinky rests on the wood and limits my movement, so it is not moving at all, only the finger holding the tool.
- Use two fingers if the pinky can't reach. When the pinky can't be used, I'll place two fingers instead. I stay solidly placed either way.
- Keep both hands down. I don't raise my hands in the air and carve like an airbrush. They stay on the board, and that prevents slippage.
- Work the stem from both sides. On a thin stem I take small passes from one side, then the other, and I don't crank on it, because a crank breaks it.
Frequently asked questions
Why should both hands stay on the board while you carve?
Raised hands carve like an airbrush. In wood carving that fails, so on the furniture panel I told you to support your hands and keep them down. When one hand has to come up, I still find a point for my pinky, or two fingers, so my tool won't slip.
When should you put on magnifying glasses for carving?
On this onlay I put mine on once I couldn't see anything anymore, as I switched to a smaller tool for the micro stem. A couple of lights went in first. I took the glasses off again for a wider number two, ten millimeters, chopping the side of a grape straight down.
Is a spoon gouge worth having for small work?
For the spot under that micro stem I said a small tiny spoon would probably be the best tool to use. I took one out to show how quickly it gets underneath and clears the waste. If you can find one, that would be a really good tool to have.
What to carve next