

Alexander Grabovetskiy, woodcarver, School of Woodcarving · Published 2017
How do you carve one leaf overlapping another?
Quick answer: Carving one leaf overlapping another is a matter of two levels. A straight-down wall goes on the leaf that lies on top, with the V tool held square to it, and the piece underneath is lowered by knife or gouge. The undercut comes later in the course.
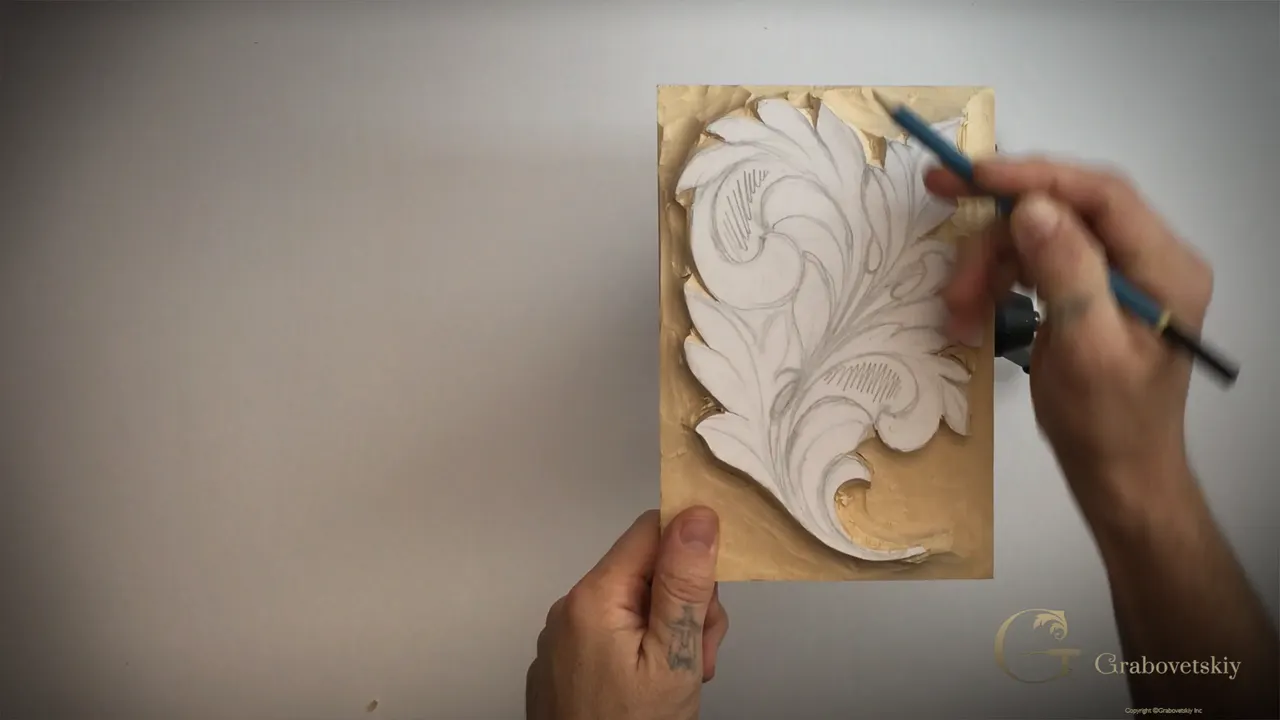
Carving one leaf over another is a job of two levels, a straight-down wall against the leaf that lies on top and a lower floor for the one that goes underneath. For the Greek acanthus I put marker lines on the overlaps, set my V tool with one side standing 90 degrees against the upper leaf, and then lower the other piece with a knife or a number 7 gouge.
Have you ever looked at a carved acanthus and seen one lobe pass over the next one? Would you like to know how that happens in the wood? This is the lesson where it happens, on a lime panel.
The order matters. The pockets inside the leaf come down first, every wall goes straight down next, and only then do the overlaps get their walls.
What happens to the leaf in lesson 3
- Three pockets in the leaf drop to the level of the main background.
- The number 12 knife outlines them first, with a slight bevel.
- Your carving hand rests on the wood, and small pushes from inside the palm move the blade.
- Every wall gets a straight-down cut before any shaping starts.
- A marker shows the overlaps, and the V tool walls the leaf on top.
- Undercutting waits for a later lesson.
Which parts of the leaf come down to the background?
Three sections inside the design. I point at them right at the start of the video, this section, that section and one more right here, and all three end up at the same level as the main background. If this leaf were pierced through, those sections would simply be cut out, the way openwork goes right through the board.

Ours still has a background. The wood is lime, as I say in lesson 5, and the block is the same size as the one for the Corinthian leaf, as I mention in lesson 1. Lesson 2 gives its thickness as about one inch and an eighth (29 mm), with the background about five-eighths of an inch (16 mm) down.
Why does the knife leave a bevel first?
The bevel protects the side of the leaf. We start the way we started on the whole acanthus leaf in the last lesson, with the number 12 chip carving knife, which is probably one of my favorite tools, as of now at least. I tilt the blade a little, not a big bevel, and follow the line.
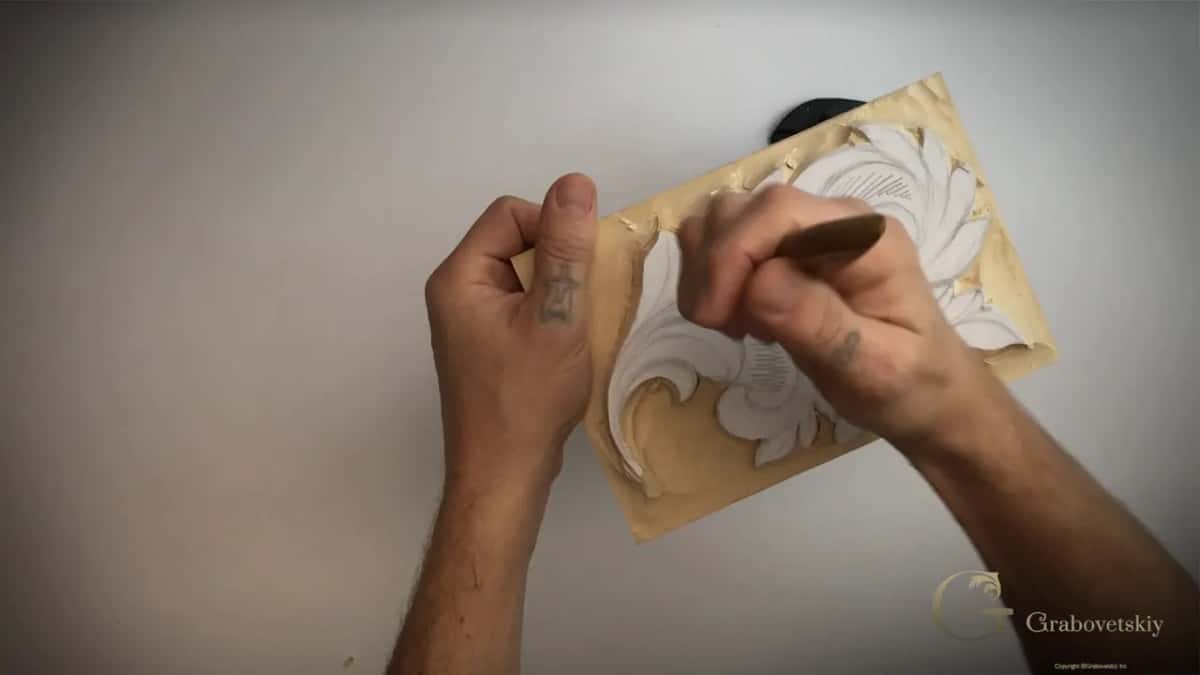
If you don't feel safe making that pass right on the line, stay about an eighth of an inch away, about 3 millimeters (1/8 in), and you should be fine. I feel comfortable on the line itself.
The bevel pays off later. When I go in with another gouge to take the waste out, I'm not afraid of damaging that sloped side, because it will be removed later on. By the end of part one the gouge has left a lot of marks inside the walls. Good. When we undercut, all of it will be gone.
Where does your hand go while the knife works?
On the wood. When I make that kind of pass, I reference my hand on the piece of wood itself, not in the air, and I'm working with the muscles inside my hand, inside my palm. A micro push. Then I release, move this part of my palm a little farther, and push again, which is a lot easier to control.

There is a lever in it too. One finger pushes on the top, those four fingers push toward me, and with that leverage my blade can go much deeper.
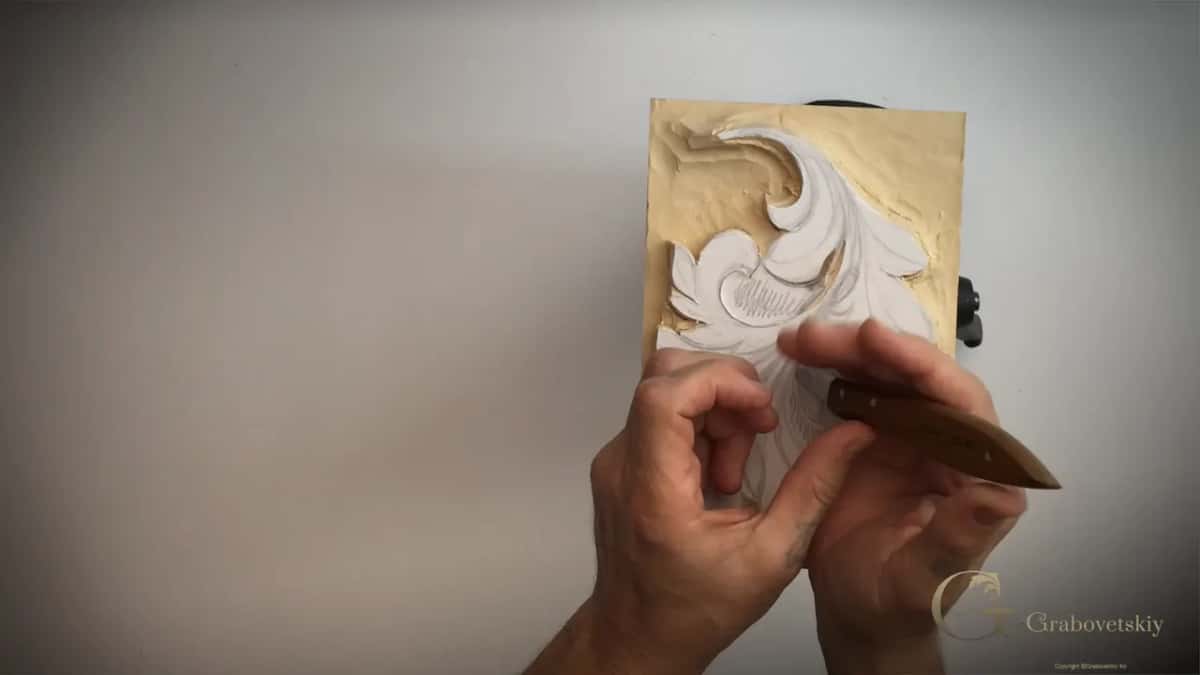
Resting the hand is not always possible. On a really complicated piece that is pierced all over, it's almost impossible to reference, and you can break a piece. This leaf I would still call semi-relief carving, a prototype of relief carving, somewhat, because it still has a background.
And the rule I have mentioned a few times: never place your second hand in the path of the blade, because you can easily slip and cut your hand. Keep it on the opposite side.

The panel turns while I work. That is a carving vise made by Veritas, so I can rotate the work while I'm carving it. Wikipedia lists Veritas as the manufacturing arm of Lee Valley.
Two ways to get the waste out of a pocket
The first way uses a small gouge. The number 7 we used before goes in, 14 mm (9/16 in) in this case, and I remove waste in both directions, rotating the panel to come at it from the other side. It doesn't have to be the same gouge I have; any small gouge will work.

I go until I'm about the same level as the main background, and I don't overdo it. If there is a way to come at a section across the grain, that's the better way to remove it, even if some passes are not really clean, because those are no big problem.

The second way uses the same number 12 knife, beveled again, but now the blade travels toward the first line. I place the knife about a quarter inch away from the line, or 3/16, about five, six, seven millimeters, and start removing. For the middle part I lay my knife almost horizontally and shave away from myself, then toward myself.

That technique is quick. A lot of wood comes out, but you can't always go all the way to the background level with it. I make a little zipper from one side and then from the opposite side, and what is left in the middle I call the meat. Any gouge will do for that, so I finish it with the same one.
One tiny spot is too small for the knife. There I take a number 7 at just 4 millimeters, which the card on screen gives as 5/32 in (4 mm), and I keep an eye that I don't go deeper than the background next to it.

Does a messy pocket matter at this stage?
Very little, for now. The most important thing for me at this stage is to make it quick without losing too much time. I called it not a really important stage and then corrected myself, since every stage is probably important. But if it's a little too messy right now, that's absolutely fine with me.

Six tools from lesson 3 and the job each one did
| Tool | Job | Note |
|---|---|---|
| Knife, number 12 for chip carving | Outlined the three pockets with a slight bevel, then shaved the middle of the waste nearly flat | Any chip carving knife will do |
| Number 7 gouge, 14 mm (9/16 in) | Took waste out from both directions, finished the meat and lowered the leaf underneath | Any small gouge |
| Small number 7, 4 mm (5/32 in) | Cleaned one tiny spot where the knife was not enough | Watch the background depth |
| Auriou number 3, 20 mm (3/4 in) | Went straight down wherever its curve happened to match the outline of the leaf | Not a lot of spots |
| V tool by Pfeil, 8 mm (5/16 in) | The first V tool I picked up for the walls, one side held straight down | A slight undercut is no big deal, but not yet |
| Number 15 V tool at 45 degrees, 6 mm (1/4 in) | Got into the really tiny spots, then lay on its flat side to clean out the waste | Too early to undercut |
Auriou made the number 3 and Pfeil made both V tools, as I say in the lesson, and the cards on screen agree.
What is a wall cut, and why does it come before shaping?
A wall cut is a straight-down cut, like I mentioned in lesson 2, and we need one before we do any shaping. It goes on the outside perimeter and on the inside, around the pockets we just removed.
One option is a gouge. I have a 20 mm (3/4 in) number 3 by Auriou, and I look for areas whose curve matches it. I know I won't find a lot of spots, but some spots I can easily find.
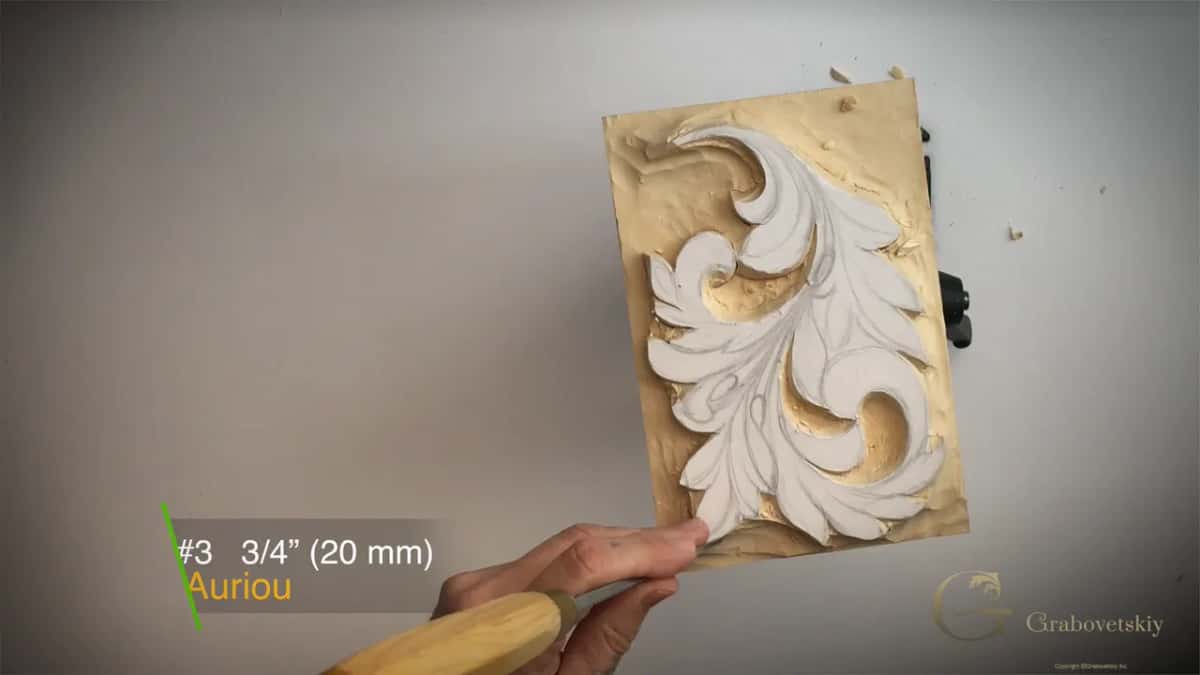
The other is a V tool. Mine is a small European size V tool, 8 mm (5/16 in), by Pfeil, and its card shows it as a 60 degree tool. A V tool has two parts, like two chisels, and one chisel part goes 90 degrees down.
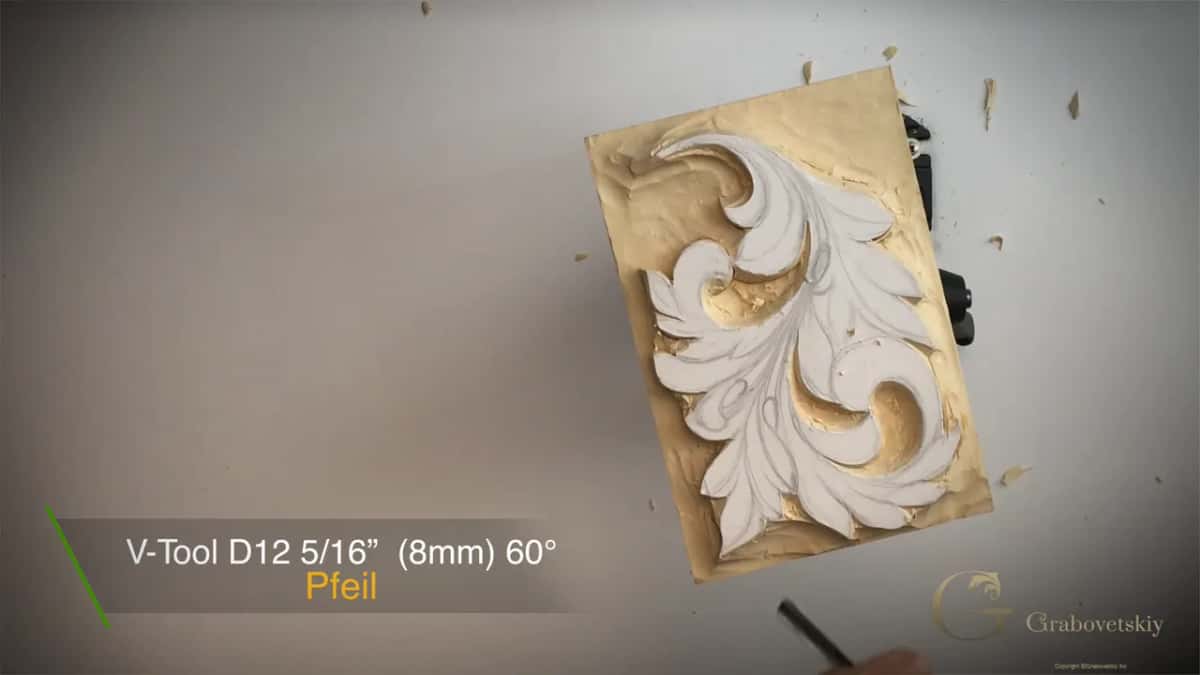
If you're not really accurate and you slightly undercut, it's not a big deal. I still wouldn't do that yet. Then I take my mallet, and little by little we outline the piece, keeping an eye on how deep we go, because with too much force you can easily destroy an area like the one I point at.
Why a 45 degree V tool for the tiny spots?
You can see the 90. A V tool at 45 degrees shows you visually where your 90 degrees is, and for the inside I use one, a number 15 at 6 mm (1/4 in) by Pfeil. With it you can go straight down in an area like that and just chip away, right into the really tiny spots.

One spot is really tiny, so I have to make sure I'm not undercutting, and my side stays at 90 degrees or close to it. Then the 14 mm number 7 takes the waste, across the grain again. Go with the grain there and you can easily dig inside that section and break it off.
After that I stand the V tool with one part straight down and then lay it on the flat of one of its parts, like a chisel, to clean out the waste. Careful there, since it has a tendency to undercut. On the other side the wall comes out really clean, because we had that bevel protecting it on the inside.
How do you carve an overlapping leaf in relief?
With a 90 degree wall on the upper leaf. When the walls are done I stop going deeper, and the next stage is to work the planes. On this Greek acanthus leaf there are different levels, or planes, I would say. Not really planes, but still.
A couple of spots overlap, and I take a marker so you can see better. This part is overlapping this leaf, right here is also overlapping this one, that side is overlapping this piece, and the small area right here overlaps too. Four marks.

Since I have the V tool in my hands, I show that approach first. Hold it so one side is exactly 90 degrees, and put that side against the overlapping piece. The idea is the same straight-down wall as before, only now it stands on the upper leaf.
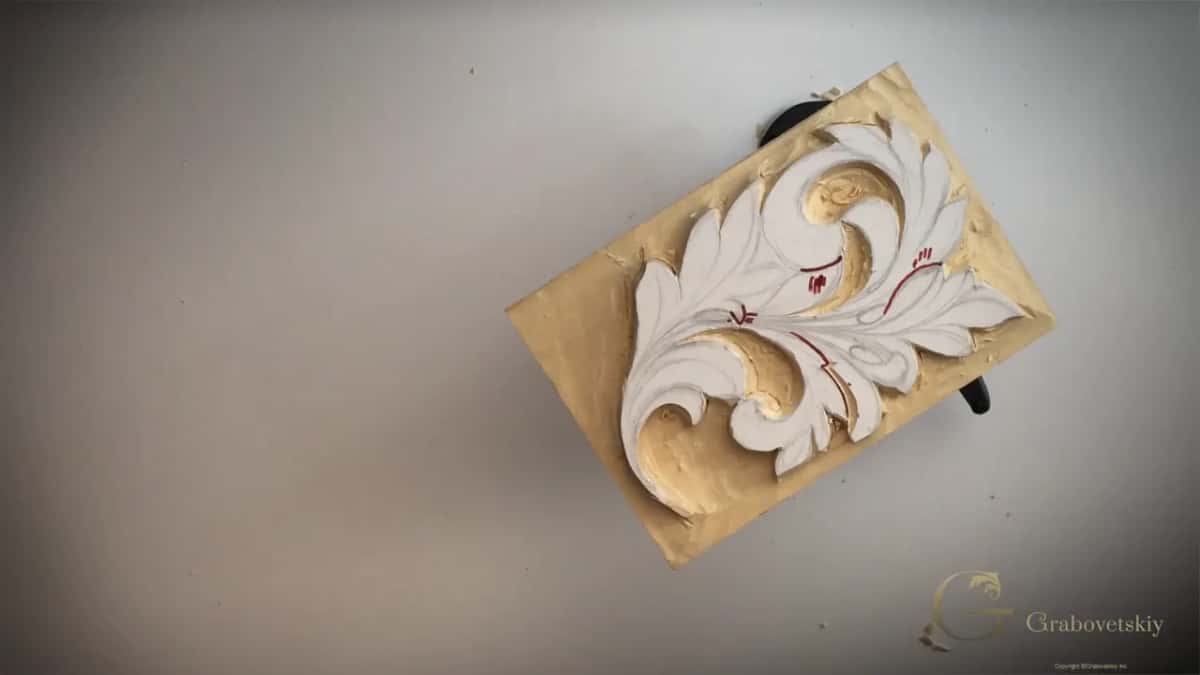
How deep should the overlap go?
Deepest out at the edge. If you ask me how deep we should go, we can go actually deep in this design, although it's going to be deeper at the edge than in an area like the one I point to. A mallet will help you there, and you control a lot better with the mallet. While I'm doing it, I see another overlap that I did not catch right away, a good one, so I keep the same tool in my hand and go really carefully.
Can a knife set the overlap wall instead?
Either tool does it. The knife makes exactly the same straight-down wall, but with this tool you have a tendency to break easier, so be really careful and make sure you're not going too far.
On another overlap I go in from the opposite side with my knife too. My first pass is 90 degrees, all the way down, and the second one comes in with the bevel. You can see how quickly a big chunk of wood comes out.

Then the piece underneath has to come down. I could lower it with my knife, and that would be absolutely fine, but in our case it's the number 7 at 14 mm, going slightly with the grain until it meets the overlapping piece. I clean it with the V tool, and the knife would give exactly the same result.
Deciding which leaf goes over
I say it out loud in my other classes. In lesson 3 of the Byzantine acanthus, wherever you see an eye, one part of the leaf will overlap another, and before the tool goes in I say, let's make the decision what's going to overlap what. There I set a 3 mm (1/8 in) number 11, which looks like a U shape, right on the mark and twist it so the flute sits at about 2 o'clock.
In the Grinling Gibbons class in Maine, class 4, I say it again: I have to make the decision in this case what's going to overlap what. Then a preliminary cut on the line, and later on we create the undercut. So the overlapping is easy. I draw with a pen there and say the pen helps, actually, because you can see better, which is what I say about the marker here.
When does the undercut come?
Later. This whole lesson I keep saying it's too early, and near the end I remind you that later on there's going to be an undercut. You don't have to undercut it. I just love to see a carving with undercutting, and I think it looks much, much, much better.
Lesson 9 of this course is where I start what I call the initial undercutting. The same 6 mm number 15 lies on one of its sides as a chisel, and slightly removing some material from underneath already creates the shadow line we are looking for. That stage is not as easy as it looks.
I once did some work for a company that did plaster work, and I could not undercut the models I made for them, because they would cast them later. On a standalone wood carving, as art, I'm always undercutting, because of the shadow, and on Grinling Gibbons pieces it's probably the most extreme undercutting you ever saw. This Greek leaf is carved a little deeper than the Corinthian one, so the undercut here can go deep.
At the end of lesson 3 I say it is enough for today. Every part of it is on video in the Greek acanthus course, and lesson 4 picks up from there. Your tuition opens all of it.
How it's done
- Find the pockets. Three parts of this leaf drop to the level of the background.
- Outline with the knife. The chip knife, a slight bevel, on the line or an eighth of an inch off it. Keep your hand on the wood and work from inside the palm.
- Take the waste out. A small gouge in both directions, or the knife beveled toward the first line from about a quarter inch away and then laid almost flat. Finish the meat with any gouge.
- Set the walls. A straight-down wall cut outside and inside, the V tool held so one part stands straight, and a mallet.
- Mark the overlaps. A marker line wherever one leaf overlaps another.
- Wall the upper leaf. Stand the 90 degree side on the overlapping piece. Go deepest out by the edge.
- Lower the piece underneath. Knife, or the 14 mm gouge slightly along the grain, then clean up using the V tool or the knife. Leave the undercut for later.
Frequently asked questions
Why draw on the overlaps before carving them?
To see them better. I mark four overlaps on the Greek leaf, and later in the same lesson I find one more that I did not catch right away. In the Gibbons class in Maine I say the same about a pen, that it helps.
Which side of the V tool goes against the upper leaf?
The side you hold at exactly 90 degrees. Two chisel parts make up a V tool, and in lesson 3 the wall from that upright side belongs on the overlapping piece, while the leaf underneath gets lowered afterward with the knife or a small gouge.
How deep should an overlap be carved?
Deep, in this design, though more out by the edge than in the spot I point to on camera. A mallet will help you in a case like that, and lesson 3 uses one to drive the V tool too, little by little round the outline, where too much force can easily destroy an area.
What to carve next