

Alexander Grabovetskiy, woodcarver, School of Woodcarving · Published 2017
What tools do you use to undercut a relief carving?
Quick answer: Undercutting a relief carving is work for a small kit of tools. On my Corinthian leaf a V tool laid on its side opens the wall, a plain number 5 held upside down slices under it, and a back bent, a knife, skew gouges and a 1 mm V reach the tight spots.
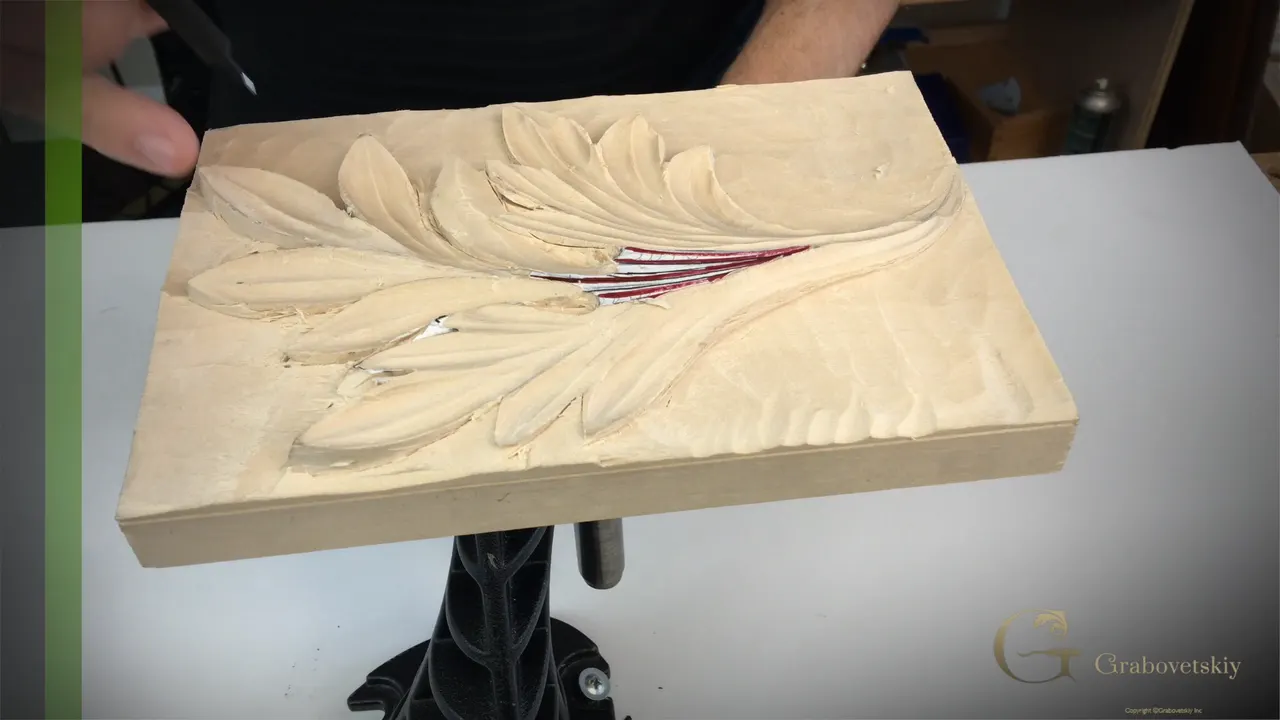
The tools I use to undercut a relief carving start with a V tool, then a gouge turned upside down, then a few odd shapes for the tight spots. On this Corinthian acanthus leaf that meant a low angle V and a mallet, a number 9 to tidy up, a plain straight number 5, a back bent gouge, a knife, a tiny V tool of one millimeter and some skew gouges.
Your leaf has its hollows from lesson 4, and the wall still goes straight down all the way around it. You have a mallet and at least one V tool on your bench, right? And you would like a dark line under every lobe before the background even goes lower? Then pick up the V. Below is the order I took each tool in lesson 5, and the spot where each one stopped being enough.
The part we remove now is called the wall, because in lesson 2 we went straight down. Now we undercut it. There are different approaches to undercutting, and I like to do extreme undercutting.

Undercutting tools in the order I used them
- First a V tool, laid on its side and driven with a mallet, and any V will work.
- My pick is 45 degrees.
- A number 9 cleans a choppy edge, really carefully.
- Next comes a plain number 5, which I hold upside down and slice with, never push, so chunks come out from underneath the leaf.
- Back bents are a lot easier.
- Where lobes meet, a knife is pretty much the only thing that gets in.
- Then a tiny number 16 V and a few skews clean whatever is left underneath.
Why does undercutting start with a V tool?
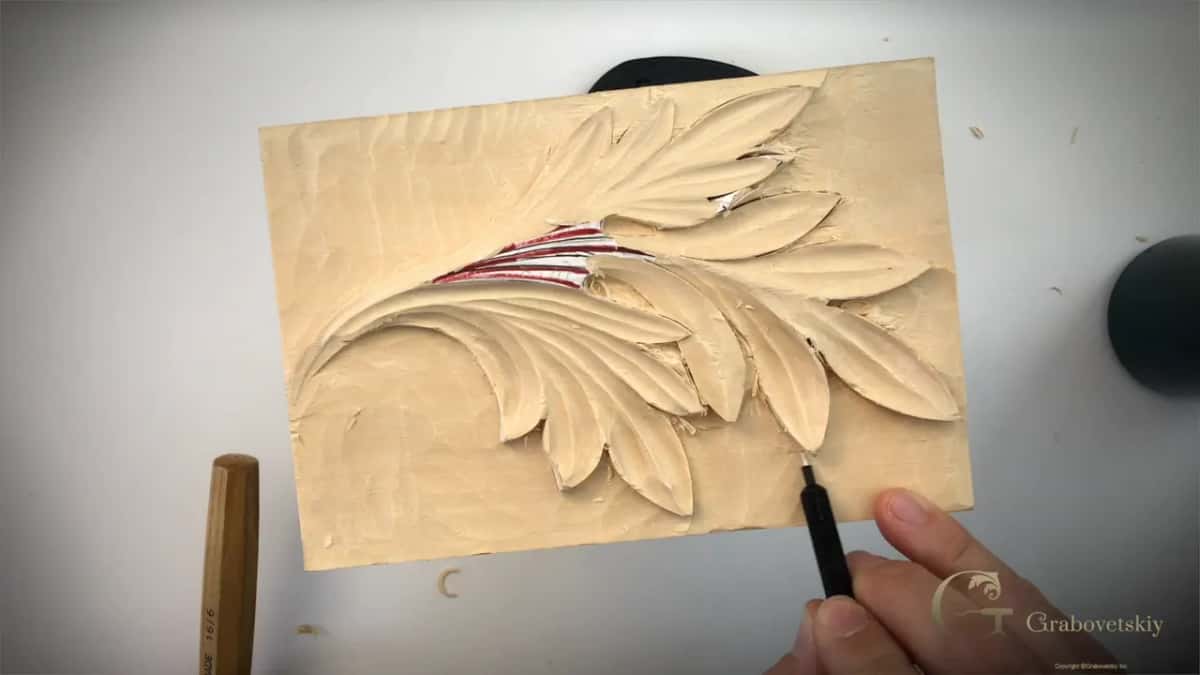
A V opens the wall a little at a time. Step number one, what I usually do, I take a V tool, and any V tool will work. I pick up a mallet and place my V on one of its sides, so the flat chisel part of the tool lies right on the background. Little by little I start removing.
That is probably one of my favorite parts to do. I just go around. This first pass is only a preliminary undercut, and the step is still establishing form, so later on we clean everything.
Even so, you can already see some shadow. The light hits that point and it is creating shadow, although it is not a complete undercut yet. On the Greek leaf, in lesson 9 of the Greek acanthus course, I started the initial undercutting the same way, with my V laid on one side and used as a chisel.

Is a 45 or a 60 degree V tool better for undercutting?
The low angle one, if you have it. Like 45 degrees, it would be the best, probably. Not sure what the difference is? Hold a normal 60 degree V tool next to a 45 and look at the two profiles.
The 60 will work also in this case. It just takes you nearer the edge. Partway through part 1 I switched to my 60, and you can see it gave about the same results as the narrow one.
But the 45 gives me more flexibility to go in even at the lowest points. In one spot the leaf was really close to the background, and I was still able to undercut it there, and a shadow line showed up right away.

| Tool | What it did for me on this leaf | When in lesson 5 |
|---|---|---|
| Low angle V | At 45 degrees it gets into the lowest points | Start of part one |
| Normal 60 V | Gave about the same results, staying nearer the edge | Later in part one |
| Number nine gouge | Cleaning a choppy edge, carefully, really carefully this time | End of part one |
| Straight number five | Upside down, slicing chunks out from under each lobe | End of part two |
| Back bent | A lot easier, and the opposite lobe stays safe | Start of part three |
| Chip carving knife | Angled in where lobes come together, then laid over | Early in part three |
| Left and right skews | Slightly bent ones that reach really tiny spots | After the knife work |
When does the number 9 come out?
When an edge looks choppy. Partway through, I took a number 9 gouge and cleaned one part just because I didn't like how it looked. Later on I'll clean it even better, but for now, it should do.
A little further on I had another choppy edge. So I took the number 9 again and carefully, really carefully, cleaned it. We are still far from the last step here. But on the way, try to get as clean a surface as possible, and it will help you later on.

Should furniture get the same extreme undercut?
Not the extreme kind. Some people say you should not undercut that much, and that is probably true if you are doing it for furniture. If it is going to be heavily used, if people touch it all the time, or if it sits against other pieces, I would not suggest extreme undercutting.
A piece of art is different. There I go to the extreme. On some of my work you can see it is so much undercut that it can easily break.
I still like undercutting even on furniture carving, even on really low relief or shallow carving. Give it a slight undercut, nothing extreme, and it still creates the shadow, so the whole carving looks like it is almost floating. The furniture panel course, lesson 19 covers undercutting on a panel like that.

How far can the V tool lean in?
Only slightly. I hold the V flat, but you can always move inside a little, because we left about one sixteenth of an inch (1.6 mm) above the final background line. Turn it maybe 15 degrees and you should be safe, with no problem. Be careful on areas like that.
Please note how close my fingers sit to the edge, really close, so I can control the tool easily. My hand also lies right on the wood. On some of the complicated work that is not always possible, but here it gives me extra support, which we all need.
And be careful with your mallet, because it is less safe than you think. Really good undercutting takes some training.
How do you undercut with a straight gouge?
Upside down. When the V had done enough for now, I took a number 5 gouge, just a plain straight one. Usually you hold a gouge the normal way, but for undercutting you turn it over.
Then you work by slicing. Make sure you don't push it, only slice toward the background, and you will see how easily chunks of material come away. After that, turn it back the normal way and clean the surface.

Watch my moves when I clean. I am slicing everything, with my hand placed right at the edge. Be really careful. The effect is that the leaf looks like it is floating above the ground, and on mine you could already see it.
I went almost to the edge and left approximately maybe 1/32 of an inch (about 0.8 mm). Your wood will act a little differently in different areas because of the grain, so don't push your tool in.
What makes a back bent gouge easier for undercutting?
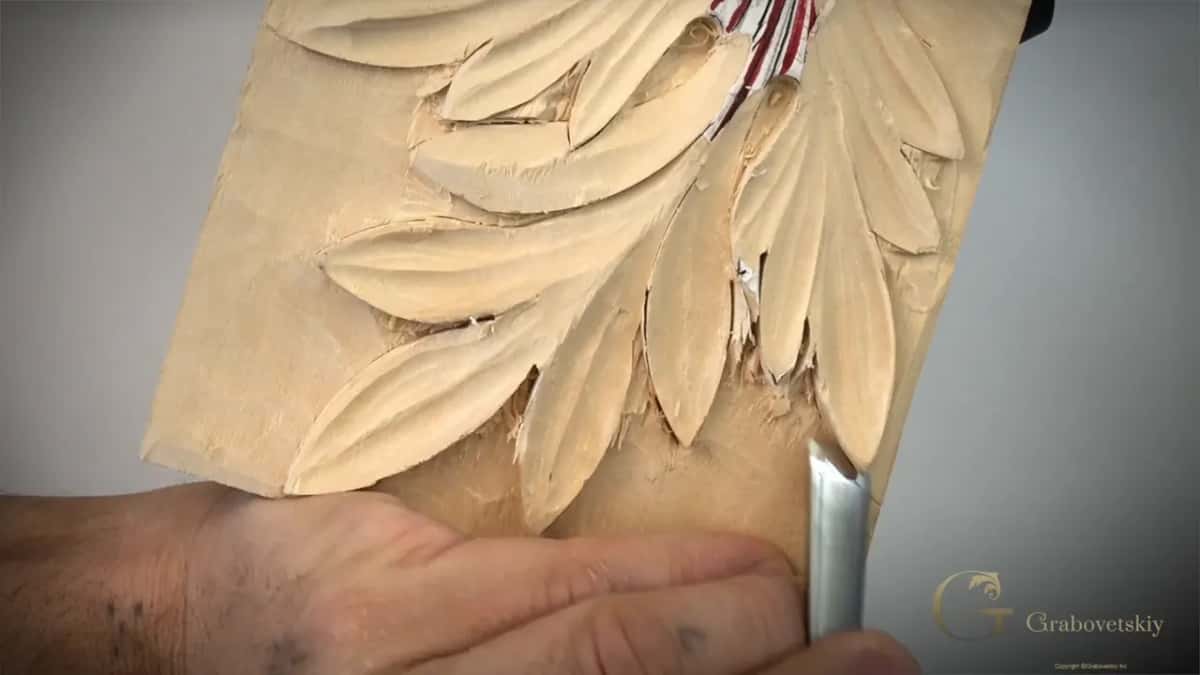
The bend keeps the far side safe. A straight gouge works, but a much better way is a back bent, if you do have one. On camera I held one up, and it is a lot easier to use for undercutting. The idea is the same, and you are still slicing.
Why do I like the back bends so much? With one in your hand, the side behind the blade stays safe, and you can undercut one lobe without touching the opposite lobe.
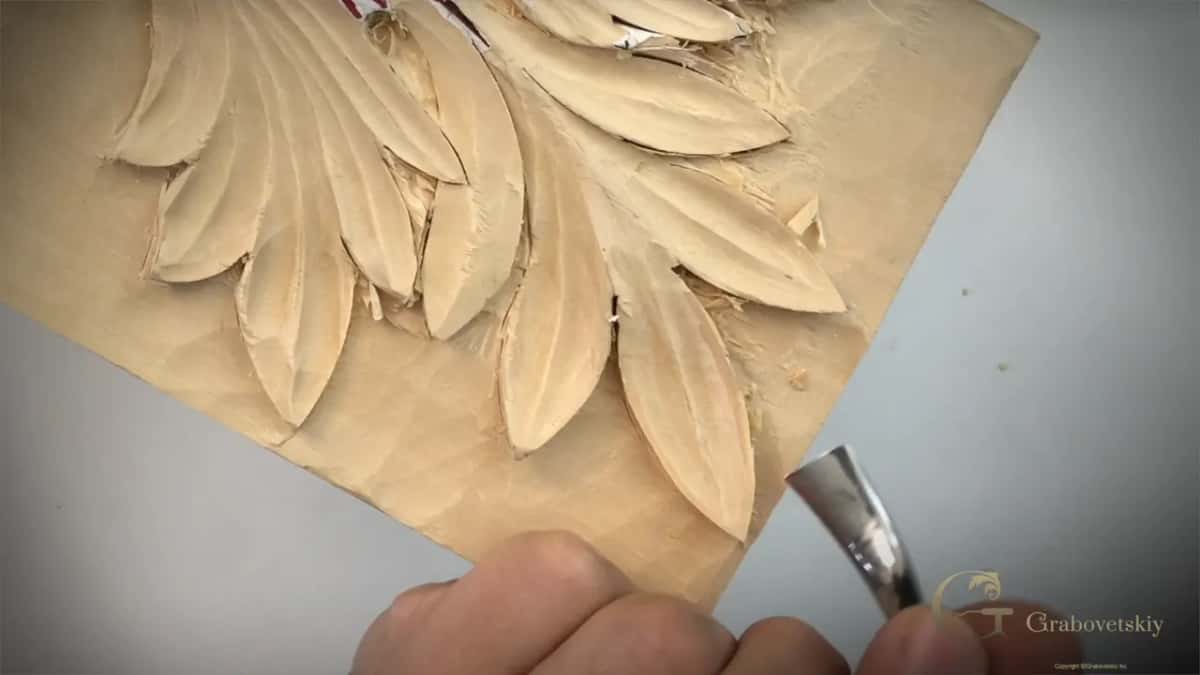
When someone asked me to show how a back bend is used, in a lesson on back bent tools, undercutting was the second way I named. That tool is so nice when you are working your way right underneath. Sometimes there is something right in the way, and no other tool can do it.
In that lesson I showed some huge back bents for big carvings and some really tiny ones, about one eighth of an inch, three millimeters, with different curvature. Those back bends are my favorite tools.
Which tool reaches where two lobes meet?
A knife. Another way to undercut is a chip carving knife, which I use a lot, and the idea is exactly the same. Sometimes it's the only way to get an area where two lobes come together. Pretty much the only tool that gets in there is a carving knife.
What I do, I angle it at the right angle, go inside and lay it over, then take that piece away. Remove it. I did the same exact thing on the other side.
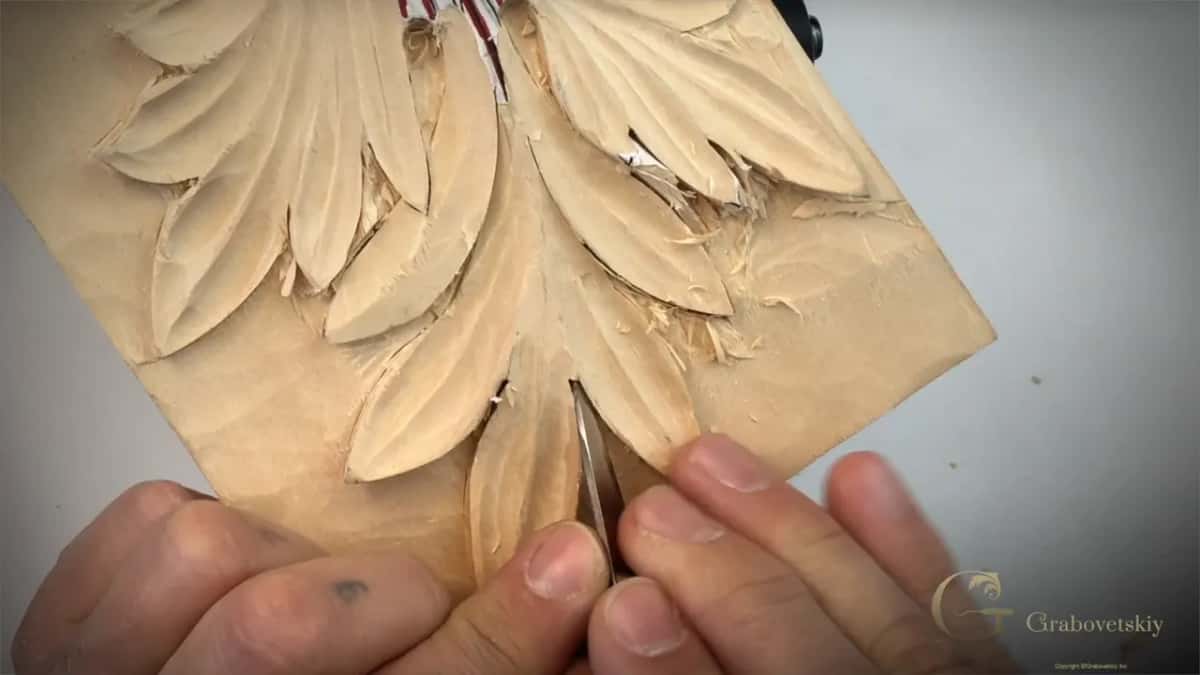
A back bent would also do it here, because its far side stays safe. Late in part 3 I used the knife for my first pass in one area, then took a really small V to remove that piece from the inside. Whether that knife belongs in relief carving at all is the question of lesson 2 of the Greek acanthus course.

What is a 1 mm V tool good for?
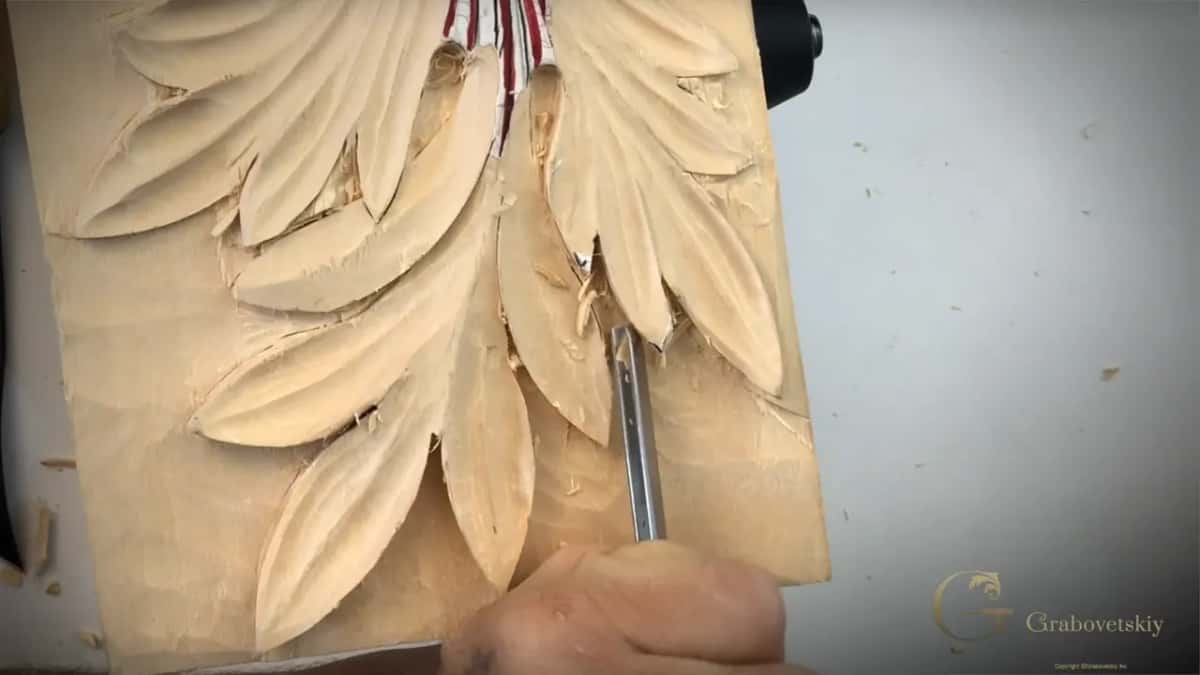
Cleaning underneath. For that I could use an even smaller V, and I have a number 16 that is only one millimeter (about 1/25 inch), by Pfeil. Really handy for this kind of job, it removes all the junk underneath.
Well, I shouldn't call it junk. Still wood, still live wood, and I love live wood.
In part 4 I took that small one again, only one millimeter, and carefully hooked it, and I said on camera to be careful when you hook it.
Where do you get skewed gouges for undercutting?
Buy them, or make your own. A really handy tool here is a skewed gouge. I have a right angle one and a left angle one, and I have multiple skewed gouges. The one in my hand, slightly bent, is by Henry Taylor, and those come in really handy.
Sometimes they're hard to find on the market, and I am pretty sure it is almost impossible sometimes to buy them, because they are just not widely available. So buy a normal number 3 or number 5 and reshape and resharpen it yourself.

One I used here is just a number 3 skewed gouge, if you could call it that, and it gets into really tiny spots. You'd be surprised how much more you use them than you thought at the beginning. I even have a number 7 skewed gouge that I resharpened with a really low angle, and with it I can get really deep and remove a lot of material.
Sharpening a skew is not complicated either, since you are still working the same sweep. In the sharpening course I reworked a Henry Taylor short bent skew, a number eight, 5/8 of an inch (about 16 mm), pretty much brand new and never sharpened. There I said I don't measure my degrees and go as low as possible, maybe less than 10 degrees, because it digs in the wood much better.

Why do tools break during undercutting?
Extreme undercutting. Really be careful with it. You think it is simple, but you can break your tools easily if you do an extreme undercut like I do. I've done it, and I broke some tools when I did the undercutting.
I know some of the most professional carvers who would never break a tool anywhere else, only when they are undercutting. So it is important not to rush. Again, I use just a V tool, lay it on its side and go carefully, in multiple steps.

For the corners I took a small number 9 and used its side to remove the extra material left there. My number 12 knife came next, because sometimes it is just much easier and quicker. See lesson 9 of the Roman acanthus course for why the final undercut comes late in the work.
Undercutting is not as easy as many people think. I would say it is one of the most difficult skills. Learn clean undercutting and it gives you the ability to work on deeper levels without hitting the parts in your way, so it is also one of the most important skills. Somebody may not agree with me, and I'm okay with that.
Could a CNC machine undercut a leaf like this?
Not like this. Some carving you can do on a CNC machine. But in one of our courses, the Grinling Gibbons wood carving style, there is absolutely no CNC on planet Earth that can do that work.
Some people are really excited about 3D printers, and maybe in the future they can print something close. First, it won't be the same. Second, it won't be a solid piece. And third, it will lack the most important part, the human touch. When a machine does the carving, it looks more like plastic.
Like I said before, this skill is among the oldest on the planet, and in thousands of years it did not develop too much. If a wood carver from the 19th, 17th or 15th century did a piece like ours, it would take him exactly the same tools, the same time and almost the same setup.
So don't rush anything. I know it's tempting to finish in half an hour. One of my works took me a few years to finish, and I don't think I have any photos of it, because it is in a customer's house.
What does the leaf look like after these tools?
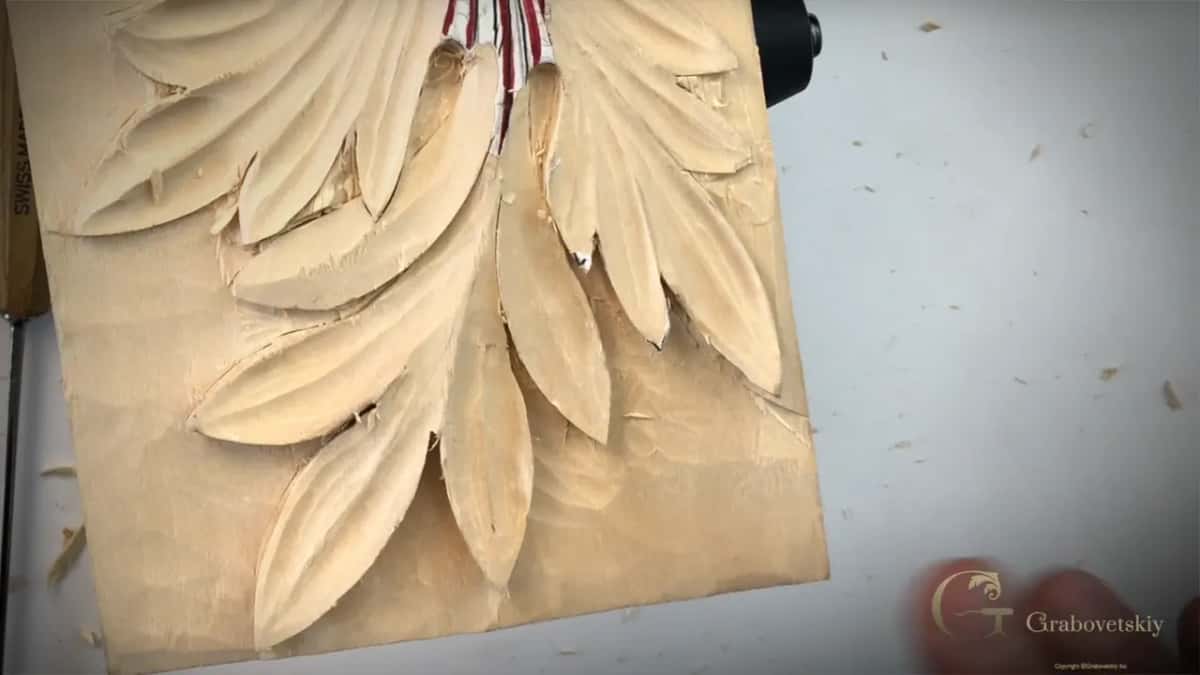
It already throws a shadow. One side is going to look really nice, because those leaves stand really high above the background, and that creates a beautiful move. All of this work is about removing material from under those leaves, which is undercutting.
We didn't even remove the background yet. The shadow is already visible, though, and next the background goes deeper, in lesson 6. The tools course and the rest of the school are there when you want them.
How it's done
- Open the wall. I lay a V tool on one of its sides, flat part on the background, and tap it in with a mallet, little by little, all the way around the leaf. A 45 degree one is my first choice.
- Tidy choppy spots with a number 9. Where an edge looks choppy, a number 9 cleans it, really carefully. A clean surface now helps me later.
- Slice with the gouge upside down. I slice, never push, and chunks come out, and then I turn the gouge back and clean the surface.
- Stop just short of the edge. I stop just short and leave approximately 1/32 inch for later.
- Reach the tight spots. In a tight corner between lobes I angle a knife in, lay it over and take the piece away. A back bent keeps the opposite lobe safe, and my tiny V hooks out what is left underneath.
- Clear the corners. My number 12 knife and the side of a small number 9 take out the extra material left in the corners.
Frequently asked questions
What angle V tool is best for undercutting?
My pick is a low angle, 45 degrees, when I have the choice, because it gets in even at the lowest points near the background. A normal 60 works too. On this Corinthian leaf I switched to the 60 for a while and got much the same result, only it stays closer to the edge.
Can a plain straight gouge undercut a leaf?
A straight number 5 does it if you hold it with the hollow facing down and slice instead of pushing. On my leaf it took chunks out easily. Back bents are a lot easier, though, since the side behind the blade stays clear of the opposite lobe.
How close to the edge should an undercut go?
Almost to the edge. With my straight gouge I left approximately 1/32 inch, about 0.8 mm. Underneath there is a little room too, because the background was left about 1/16 inch above its final line, so a V turned maybe 15 degrees stays safe.
What to carve next